> ## Documentation Index
> Fetch the complete documentation index at: https://checklyhq.com/docs/llms.txt
> Use this file to discover all available pages before exploring further.
# The Checkly Pulumi Provider
> Learn about the Checkly Pulumi Provider
The [Checkly Pulumi provider](https://www.pulumi.com/registry/packages/checkly/) enables declaring your monitoring setup as code using [Pulumi](https://www.pulumi.com/).
## Getting started
Learn how to create, configure and sync your checks by following this getting started guide.
### Pulumi CLI setup
Before getting started and writing your monitoring setup in code, you have to set up Pulumi and its CLI. [Create a new Pulumi account](https://app.pulumi.com/signup) and [install the Pulumi CLI](https://www.pulumi.com/docs/get-started/install/).
The `pulumi` command should then be available in your environment.
```
$ pulumi
pulumi
Pulumi - Modern Infrastructure as Code
To begin working with Pulumi, run the `pulumi new` command:
$ pulumi new
This will prompt you to create a new project for your cloud and language of choice.
...
...
```
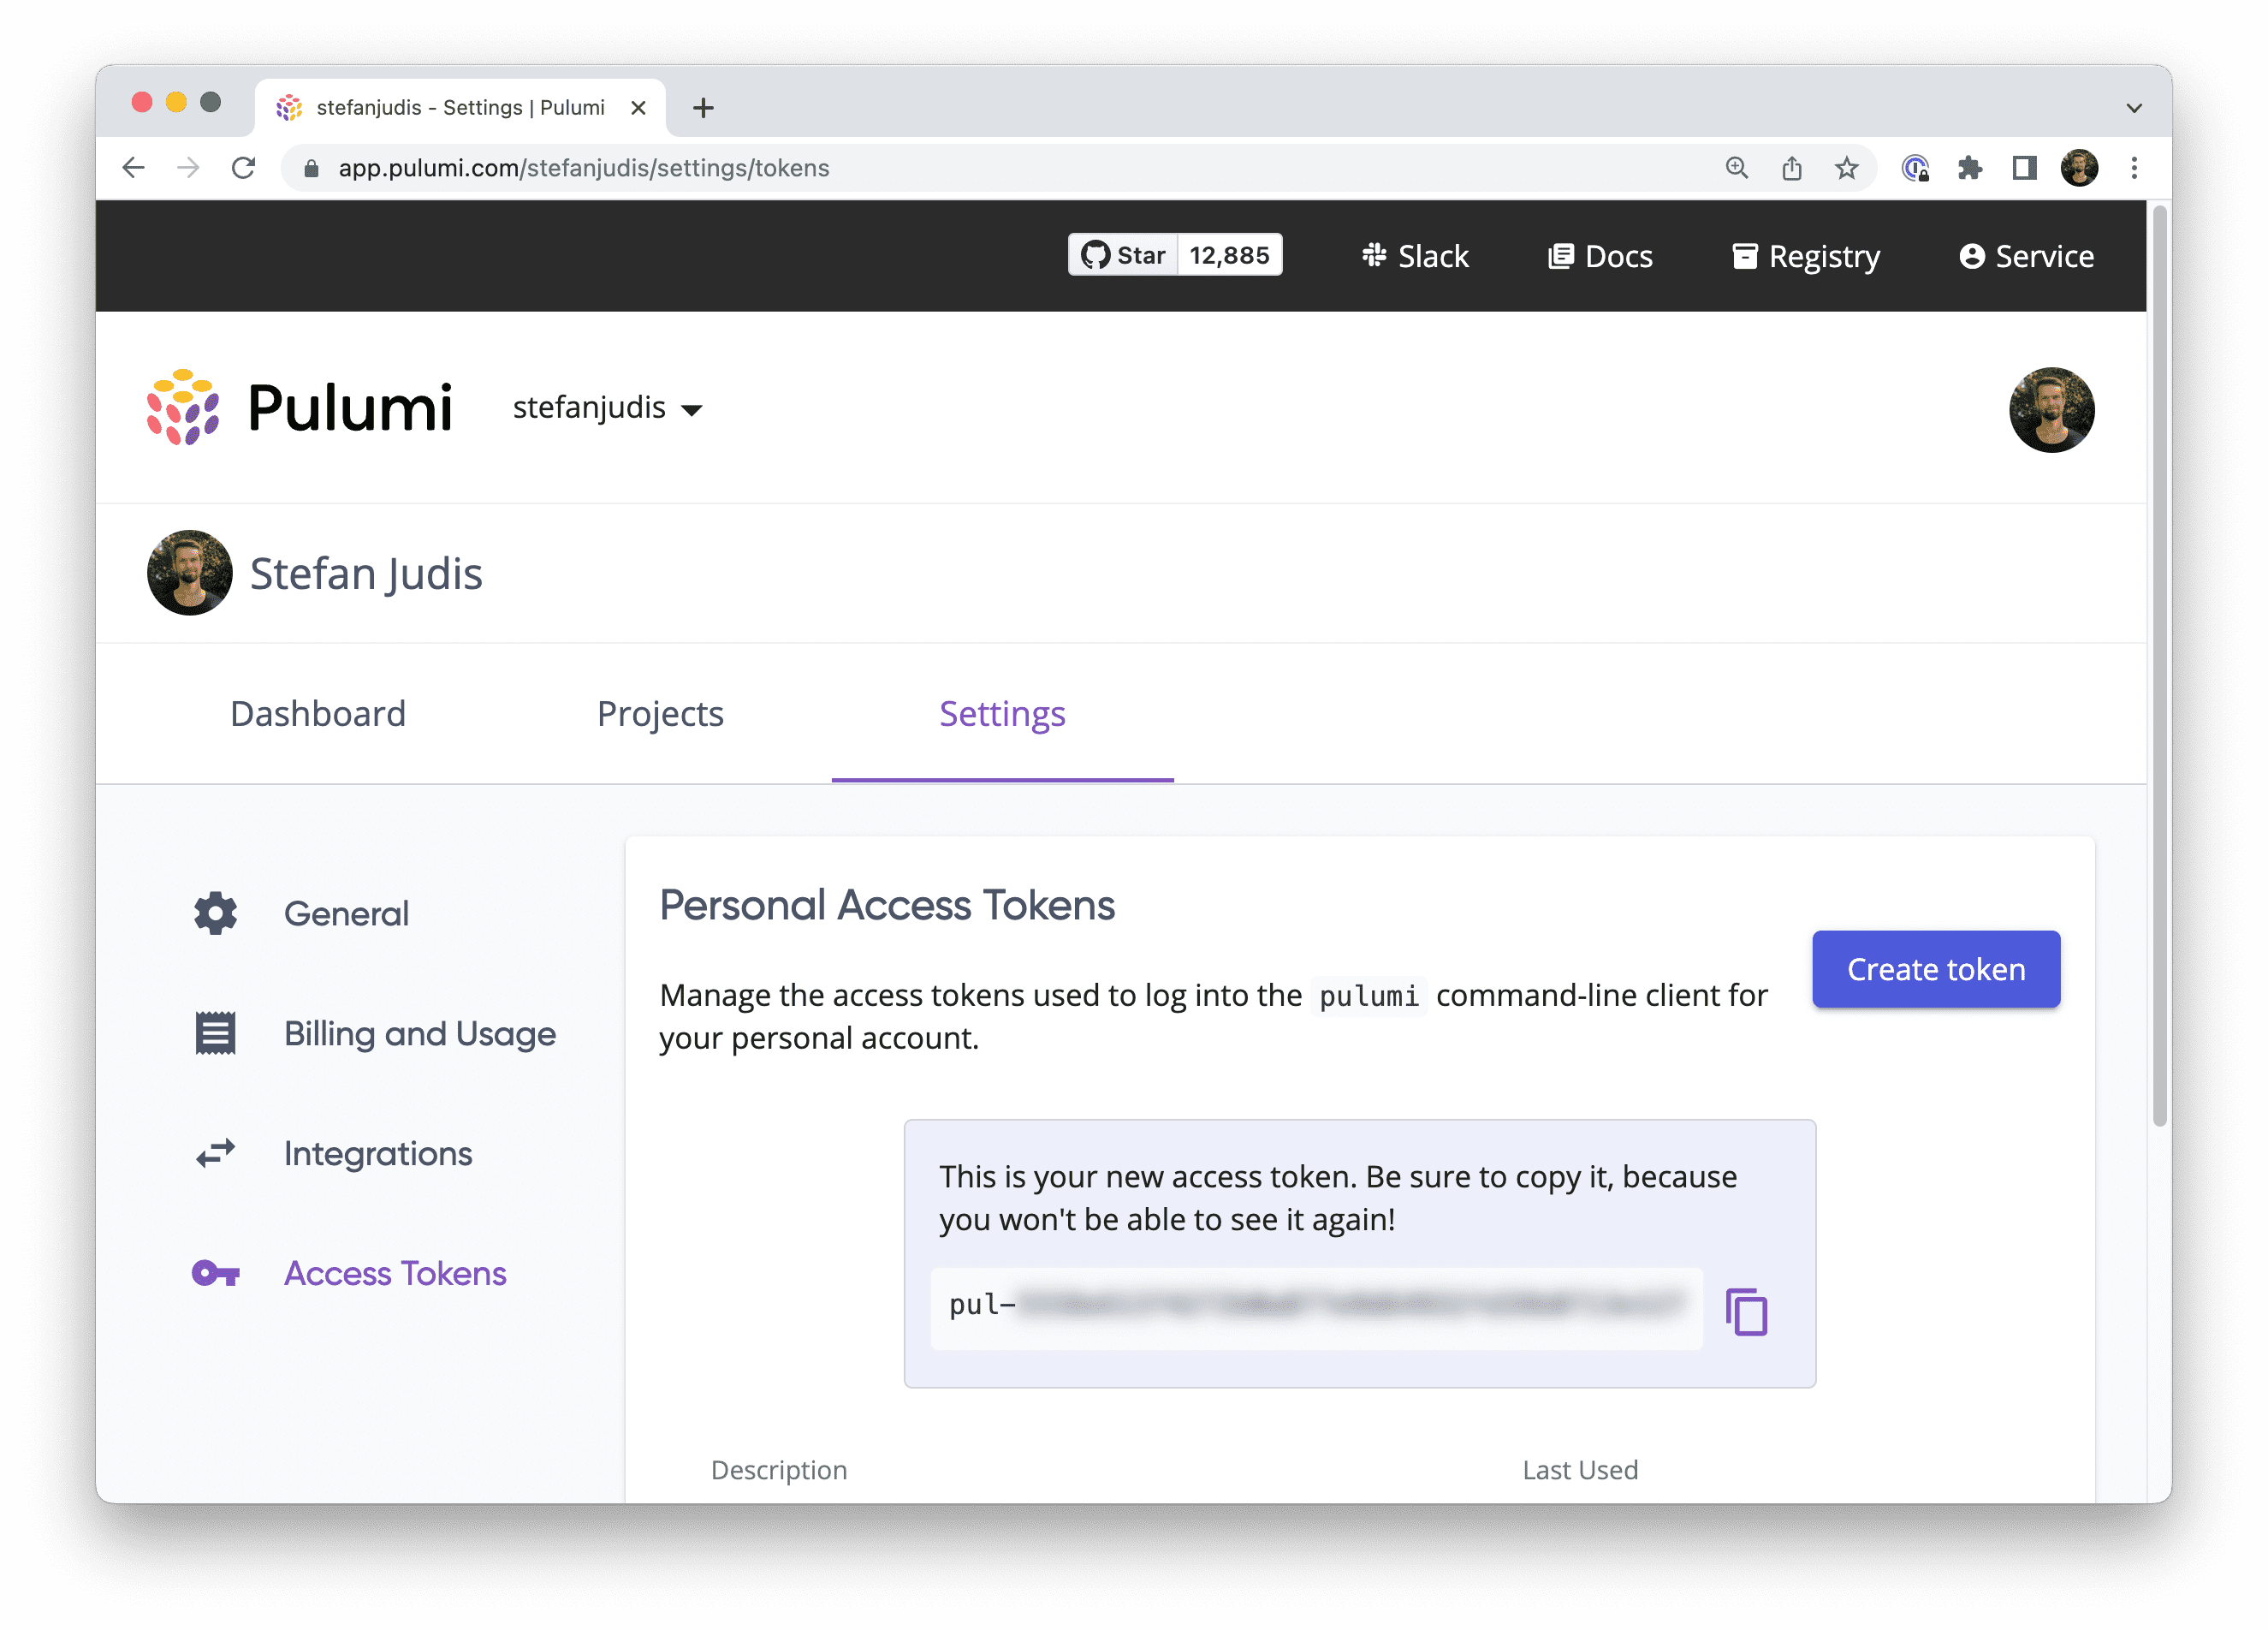
Create and copy a new personal access token in your Pulumi account at [app.pulumi.com/account/tokens](https://app.pulumi.com/account/tokens).
 Run `pulumi login` and provide the token.
```
$ pulumi login
Manage your Pulumi stacks by logging in.
Run `pulumi login --help` for alternative login options.
Enter your access token from https://app.pulumi.com/account/tokens
or hit to log in using your browser:
```
The CLI's `whoiam` command should return your username after a successful login.
```
$ pulumi whoami
YOUR_USER_NAME
```
Now you're ready to create a new Pulumi project and start setting up your Checkly infrastructure.
### Create a new Pulumi project
Create a new directory for your Pulumi project and navigate into it.
```
$ mkdir new-pulumi-checkly-project && cd $_
```
Initialize a new Pulumi project with `pulumi new` and choose the minimal JavaScript template (`javascript`).
```
$ pulumi new javascript
This command will walk you through creating a new Pulumi project.
Enter a value or leave blank to accept the (default), and press .
Press ^C at any time to quit.
project name: (new-pulumi-checkly-project)
project description: (A minimal JavaScript Pulumi program)
Created project 'new-pulumi-checkly-project'
Please enter your desired stack name.
To create a stack in an organization, use the format / (e.g. `acmecorp/dev`).
stack name: (dev)
Created stack 'dev'
Installing dependencies...
added 96 packages, and audited 97 packages in 4s
Finished installing dependencies
Your new project is ready to go! ✨
To perform an initial deployment, run 'pulumi up'
```
Inspect the created files by running `ls` and make sure that a `Pulumi.yaml`, `package.json` and `index.js` file are available.
```
$ ls
Pulumi.yaml node_modules package.json
index.js package-lock.json
```
### Define your Checkly account ID and API key
To interact with [the underlying Checkly API](/api-reference/overview), provide your Checkly account ID and API key by defining those in your environment.
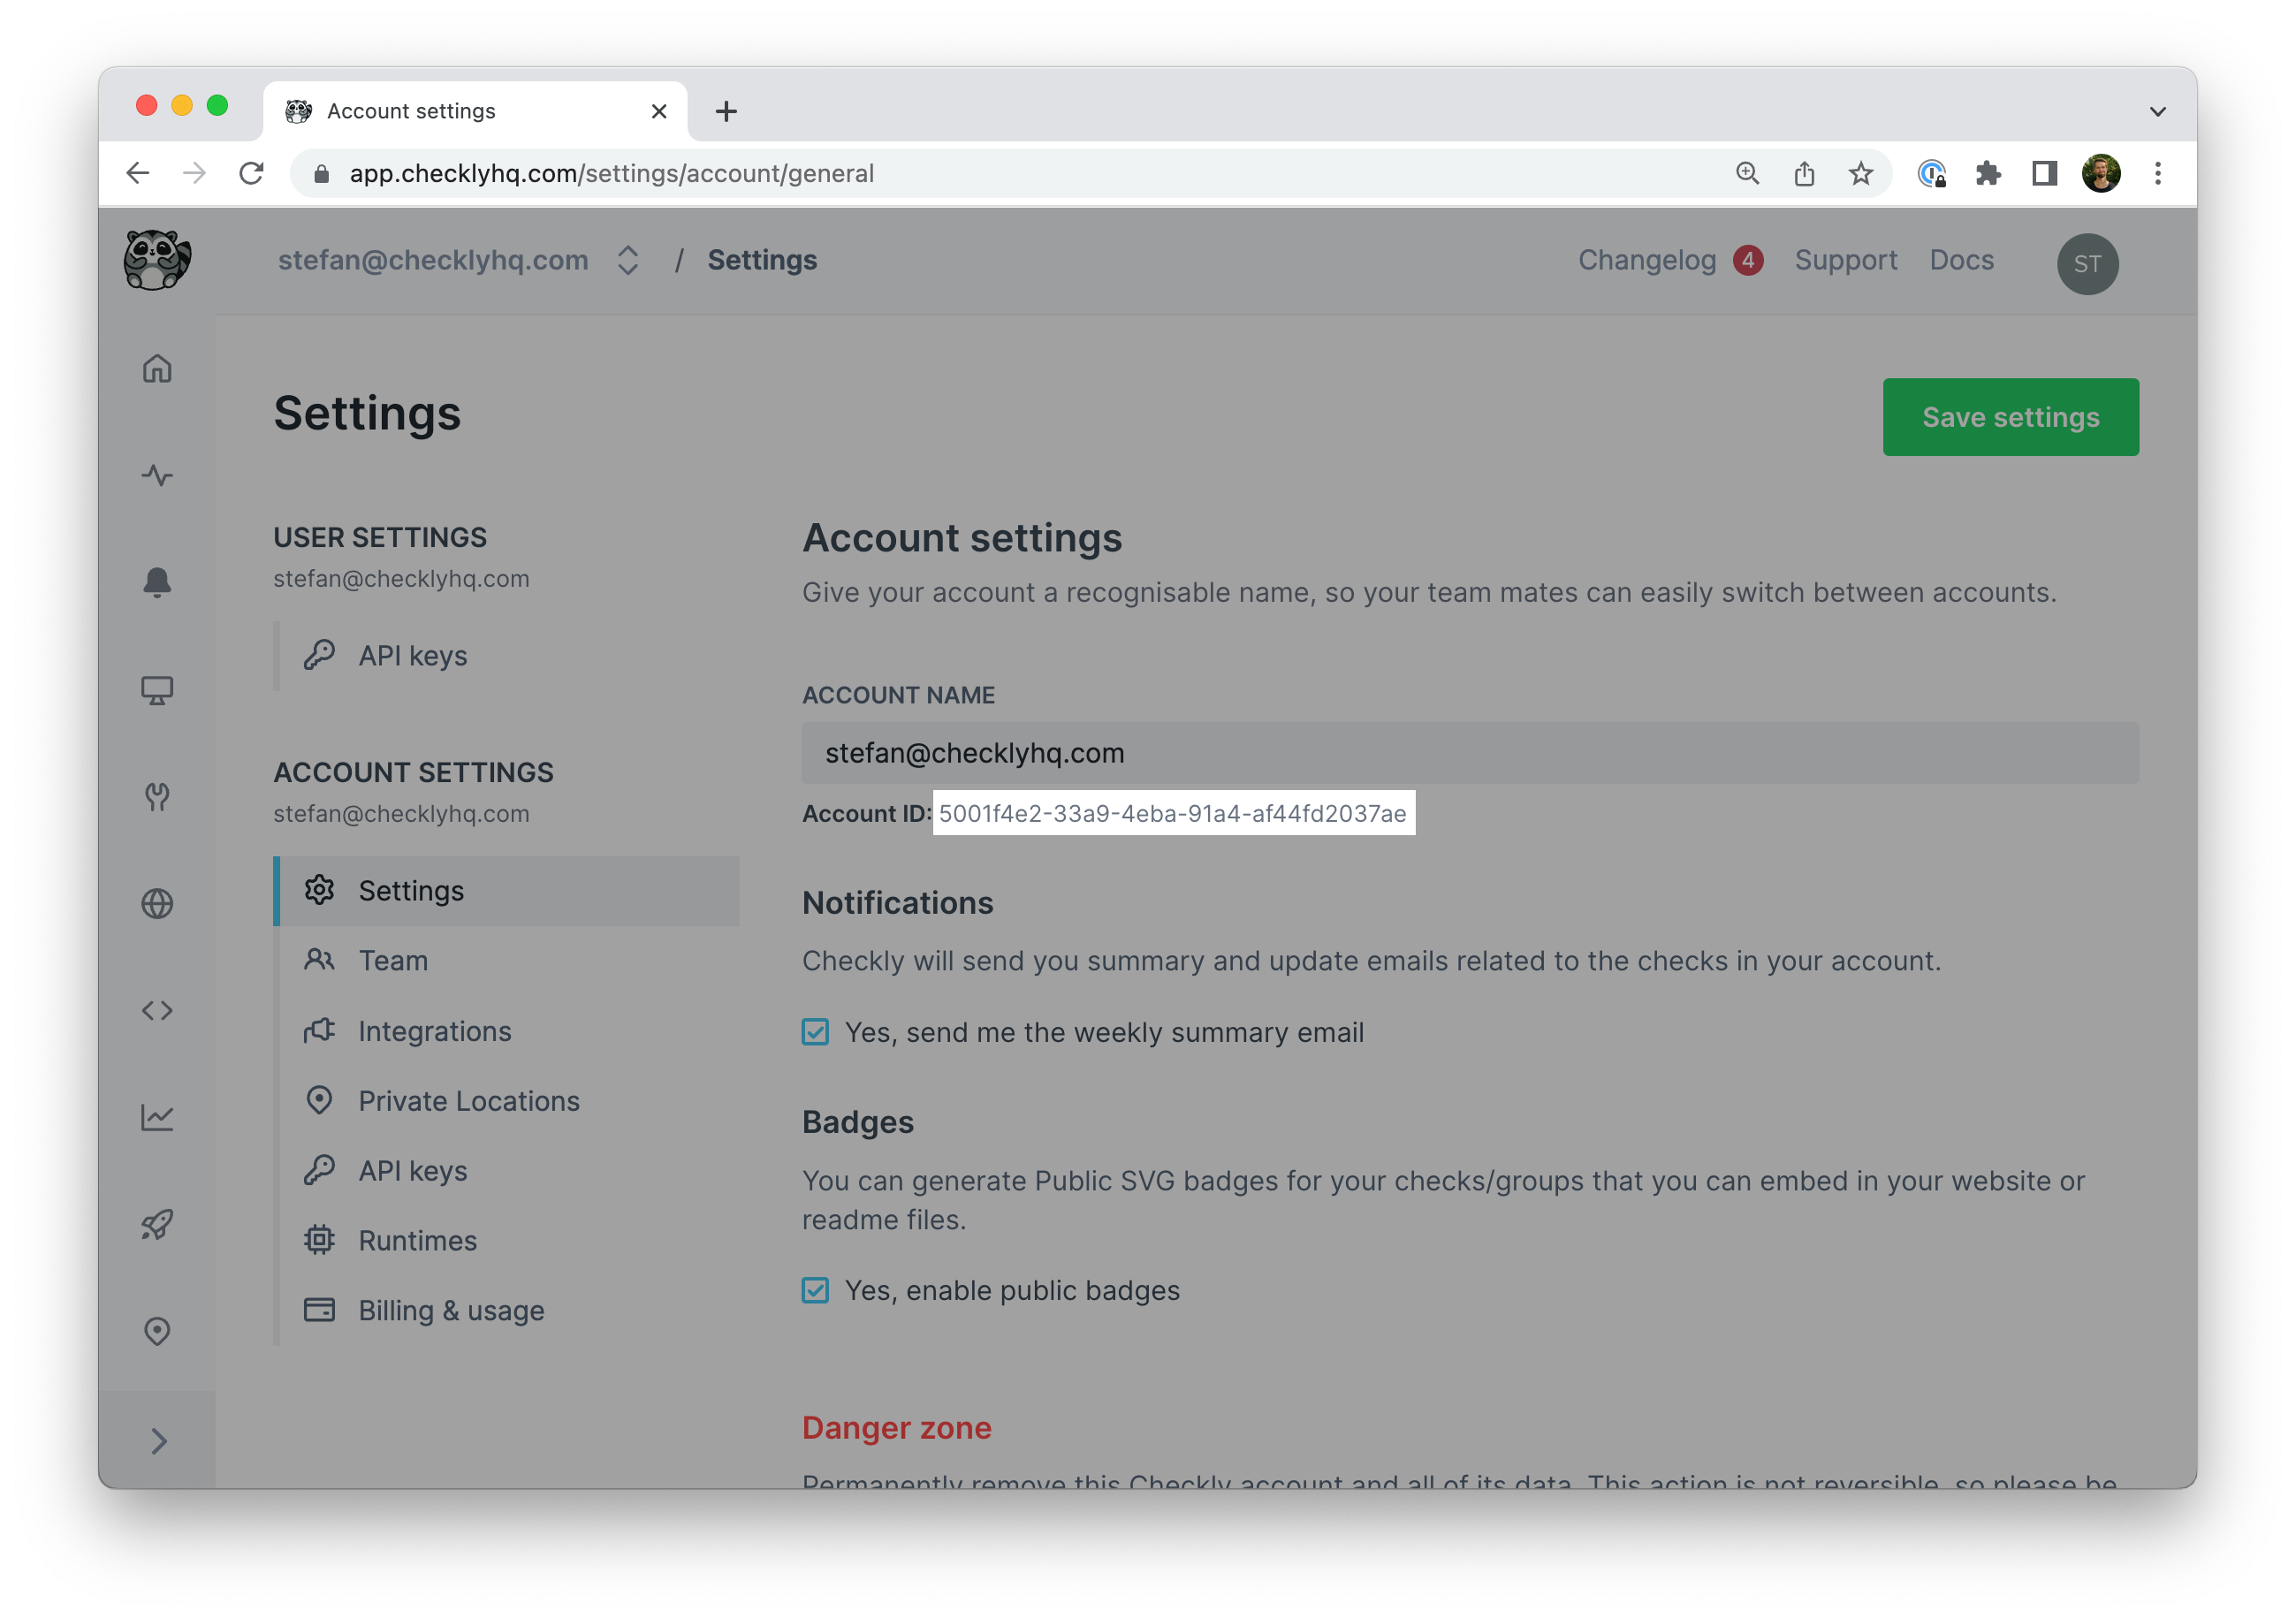
Your account ID is accessible at [app.checklyhq.com/settings/account/general](https://app.checklyhq.com/settings/account/general).
Run `pulumi login` and provide the token.
```
$ pulumi login
Manage your Pulumi stacks by logging in.
Run `pulumi login --help` for alternative login options.
Enter your access token from https://app.pulumi.com/account/tokens
or hit to log in using your browser:
```
The CLI's `whoiam` command should return your username after a successful login.
```
$ pulumi whoami
YOUR_USER_NAME
```
Now you're ready to create a new Pulumi project and start setting up your Checkly infrastructure.
### Create a new Pulumi project
Create a new directory for your Pulumi project and navigate into it.
```
$ mkdir new-pulumi-checkly-project && cd $_
```
Initialize a new Pulumi project with `pulumi new` and choose the minimal JavaScript template (`javascript`).
```
$ pulumi new javascript
This command will walk you through creating a new Pulumi project.
Enter a value or leave blank to accept the (default), and press .
Press ^C at any time to quit.
project name: (new-pulumi-checkly-project)
project description: (A minimal JavaScript Pulumi program)
Created project 'new-pulumi-checkly-project'
Please enter your desired stack name.
To create a stack in an organization, use the format / (e.g. `acmecorp/dev`).
stack name: (dev)
Created stack 'dev'
Installing dependencies...
added 96 packages, and audited 97 packages in 4s
Finished installing dependencies
Your new project is ready to go! ✨
To perform an initial deployment, run 'pulumi up'
```
Inspect the created files by running `ls` and make sure that a `Pulumi.yaml`, `package.json` and `index.js` file are available.
```
$ ls
Pulumi.yaml node_modules package.json
index.js package-lock.json
```
### Define your Checkly account ID and API key
To interact with [the underlying Checkly API](/api-reference/overview), provide your Checkly account ID and API key by defining those in your environment.
Your account ID is accessible at [app.checklyhq.com/settings/account/general](https://app.checklyhq.com/settings/account/general).
 ```
export CHECKLY_ACCOUNT_ID=xxx
```
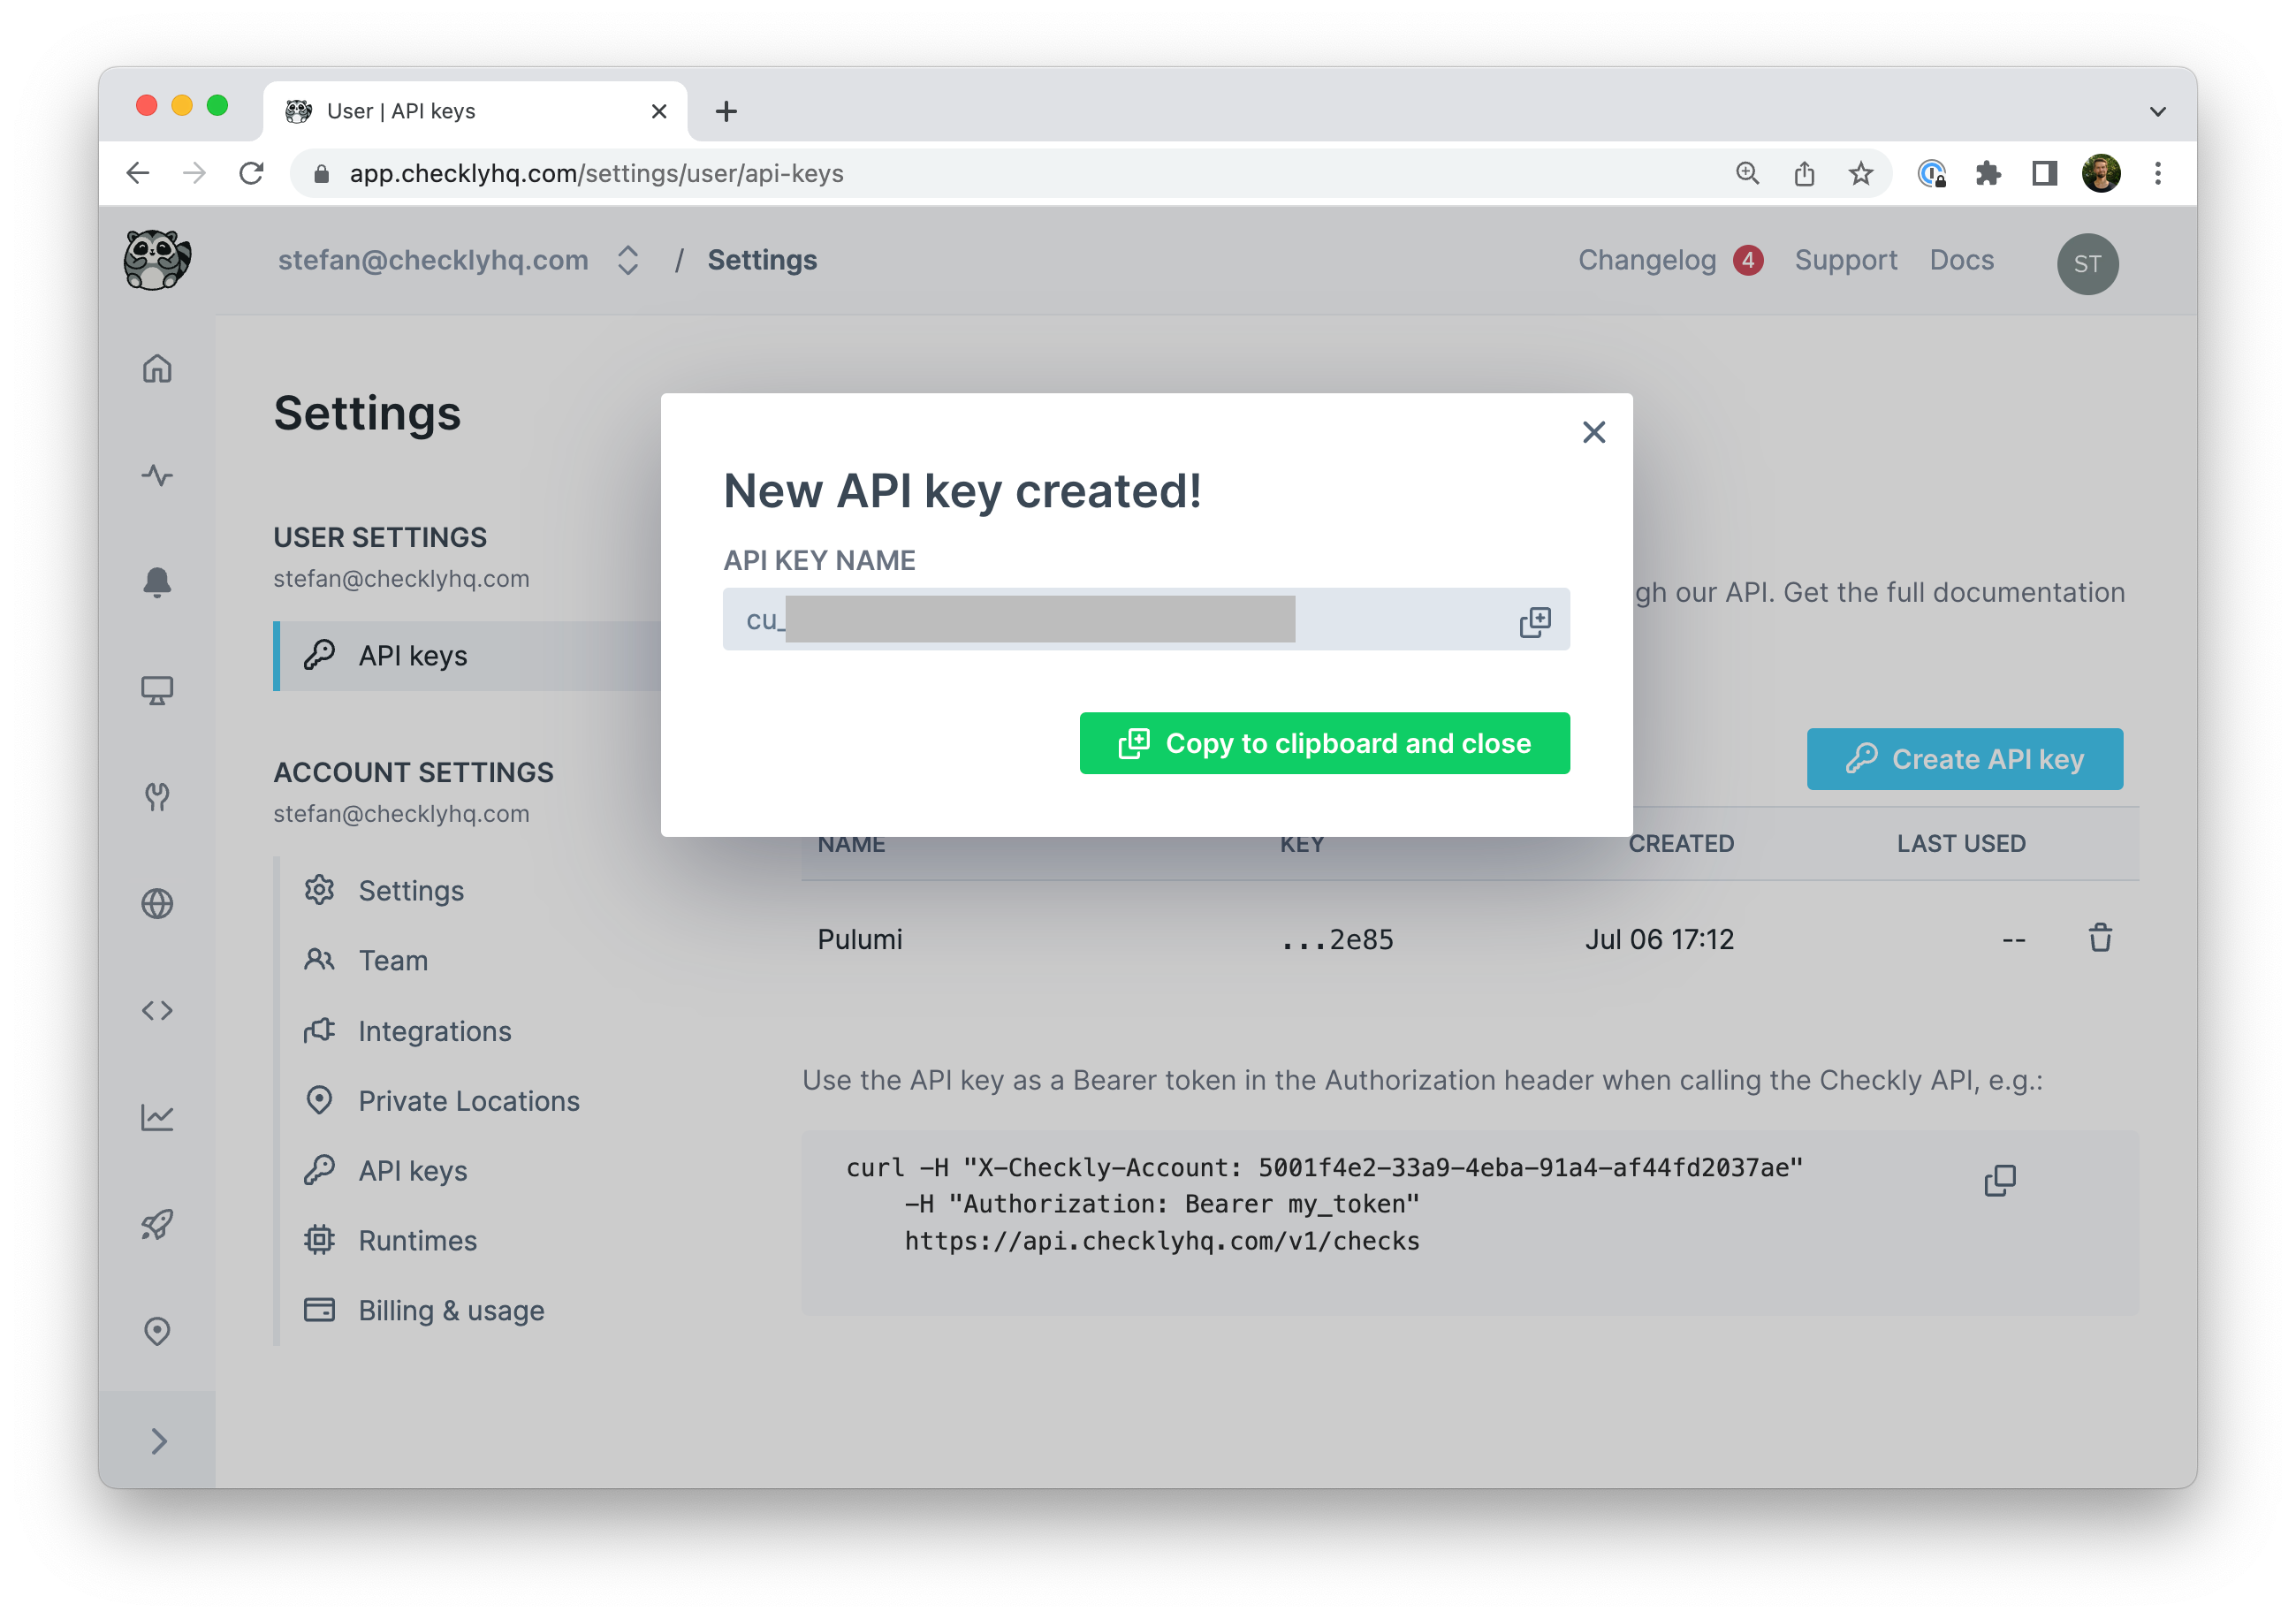
Create a new API key at [app.checklyhq.com/settings/user/api-keys](https://app.checklyhq.com/settings/user/api-keys).
```
export CHECKLY_ACCOUNT_ID=xxx
```
Create a new API key at [app.checklyhq.com/settings/user/api-keys](https://app.checklyhq.com/settings/user/api-keys).
 ```
export CHECKLY_API_KEY=cu_xxx
```
Test that both values are available in your environment.
```
$ echo $CHECKLY_ACCOUNT_ID
xxx
$ echo $CHECKLY_API_KEY
cu_xxx
```
> If you prefer storing your configuration alongside your Pulumi stack for easy multi-user access, use `pulumi config set`.
```
$ pulumi config set checkly:apiKey cu_xxx --secret
$ pulumi config set checkly:accountId xxx
```
### Install the Checkly Pulumi Provider
Install the Checkly Pulumi provider (`@checkly/pulumi`) with `yarn` or `npm` to integrate it in your new project.
```
$ npm install @checkly/pulumi
$ yarn add @checkly/pulumi
```
Open `index.js` and require it on top of the file.
```js theme={null}
const checkly = require('@checkly/pulumi')
```
The exported `checkly` object provides resources such as `AlertChannel`, `Check`, and `CheckGroup`, enabling you to define and configure your entire Checkly monitoring setup in code.
Add the following Check definition examples to the `index.js`.
### Examples
#### How to create your first API check
```js theme={null}
new checkly.Check('my-api-check', {
name: 'Public SpaceX API',
activated: true,
frequency: 10,
type: 'API',
locations: ['eu-west-1', 'us-west-2'],
tags: ['pulumi'],
degradedResponseTime: 5000,
maxResponseTime: 15000,
request: {
method: 'GET',
url: 'https://api.spacexdata.com/v3',
assertions: [
{
source: 'STATUS_CODE',
comparison: 'EQUALS',
target: '200',
},
{
source: 'JSON_BODY',
property: '$.project_name',
comparison: 'EQUALS',
target: 'SpaceX-API',
},
],
},
useGlobalAlertSettings: true,
})
```
#### How to create your first Browser check
```javascript browser-check.js theme={null}
new checkly.Check('my-browser-check-pulumi', {
name: 'Google.com Playwright check',
activated: true,
frequency: 10,
type: 'BROWSER',
script: `
const { expect, test } = require('@playwright/test')
test('visit page and take screenshot', async ({ page }) => {
const response = await page.goto('https://checklyhq.com')
expect(response.status()).toBeLessThan(400)
await page.screenshot({ path: 'screenshot.jpg' })
})`,
locations: ['eu-west-1', 'us-west-2'],
tags: ['pulumi'],
})
```
### Creating checks and applying changes
Your `index.js` file should now include instructions to create one API and one Browser check.
Initialize a deployment and apply your changes by running `pulumi up`.
```
$ pulumi up
Previewing update (dev)
View Live: https://app.pulumi.com/stefanjudis/new-pulumi-checkly-project/dev/previews/b30010eb-53a6-438a-864b-af29c2f1321f
Type Name Plan
pulumi:pulumi:Stack new-pulumi-checkly-project-dev
+ ├─ checkly:index:Check my-browser-check-pulumi create
+ └─ checkly:index:Check my-api-check-pulumi create
Resources:
+ 2 to create
1 unchanged
Do you want to perform this update? yes
Updating (dev)
View Live: https://app.pulumi.com/stefanjudis/new-pulumi-checkly-project/dev/updates/2
Type Name Status
pulumi:pulumi:Stack new-pulumi-checkly-project-dev
+ ├─ checkly:index:Check my-api-check-pulumi created
+ └─ checkly:index:Check my-browser-check-pulumi created
Resources:
+ 2 created
Duration: 2s
```
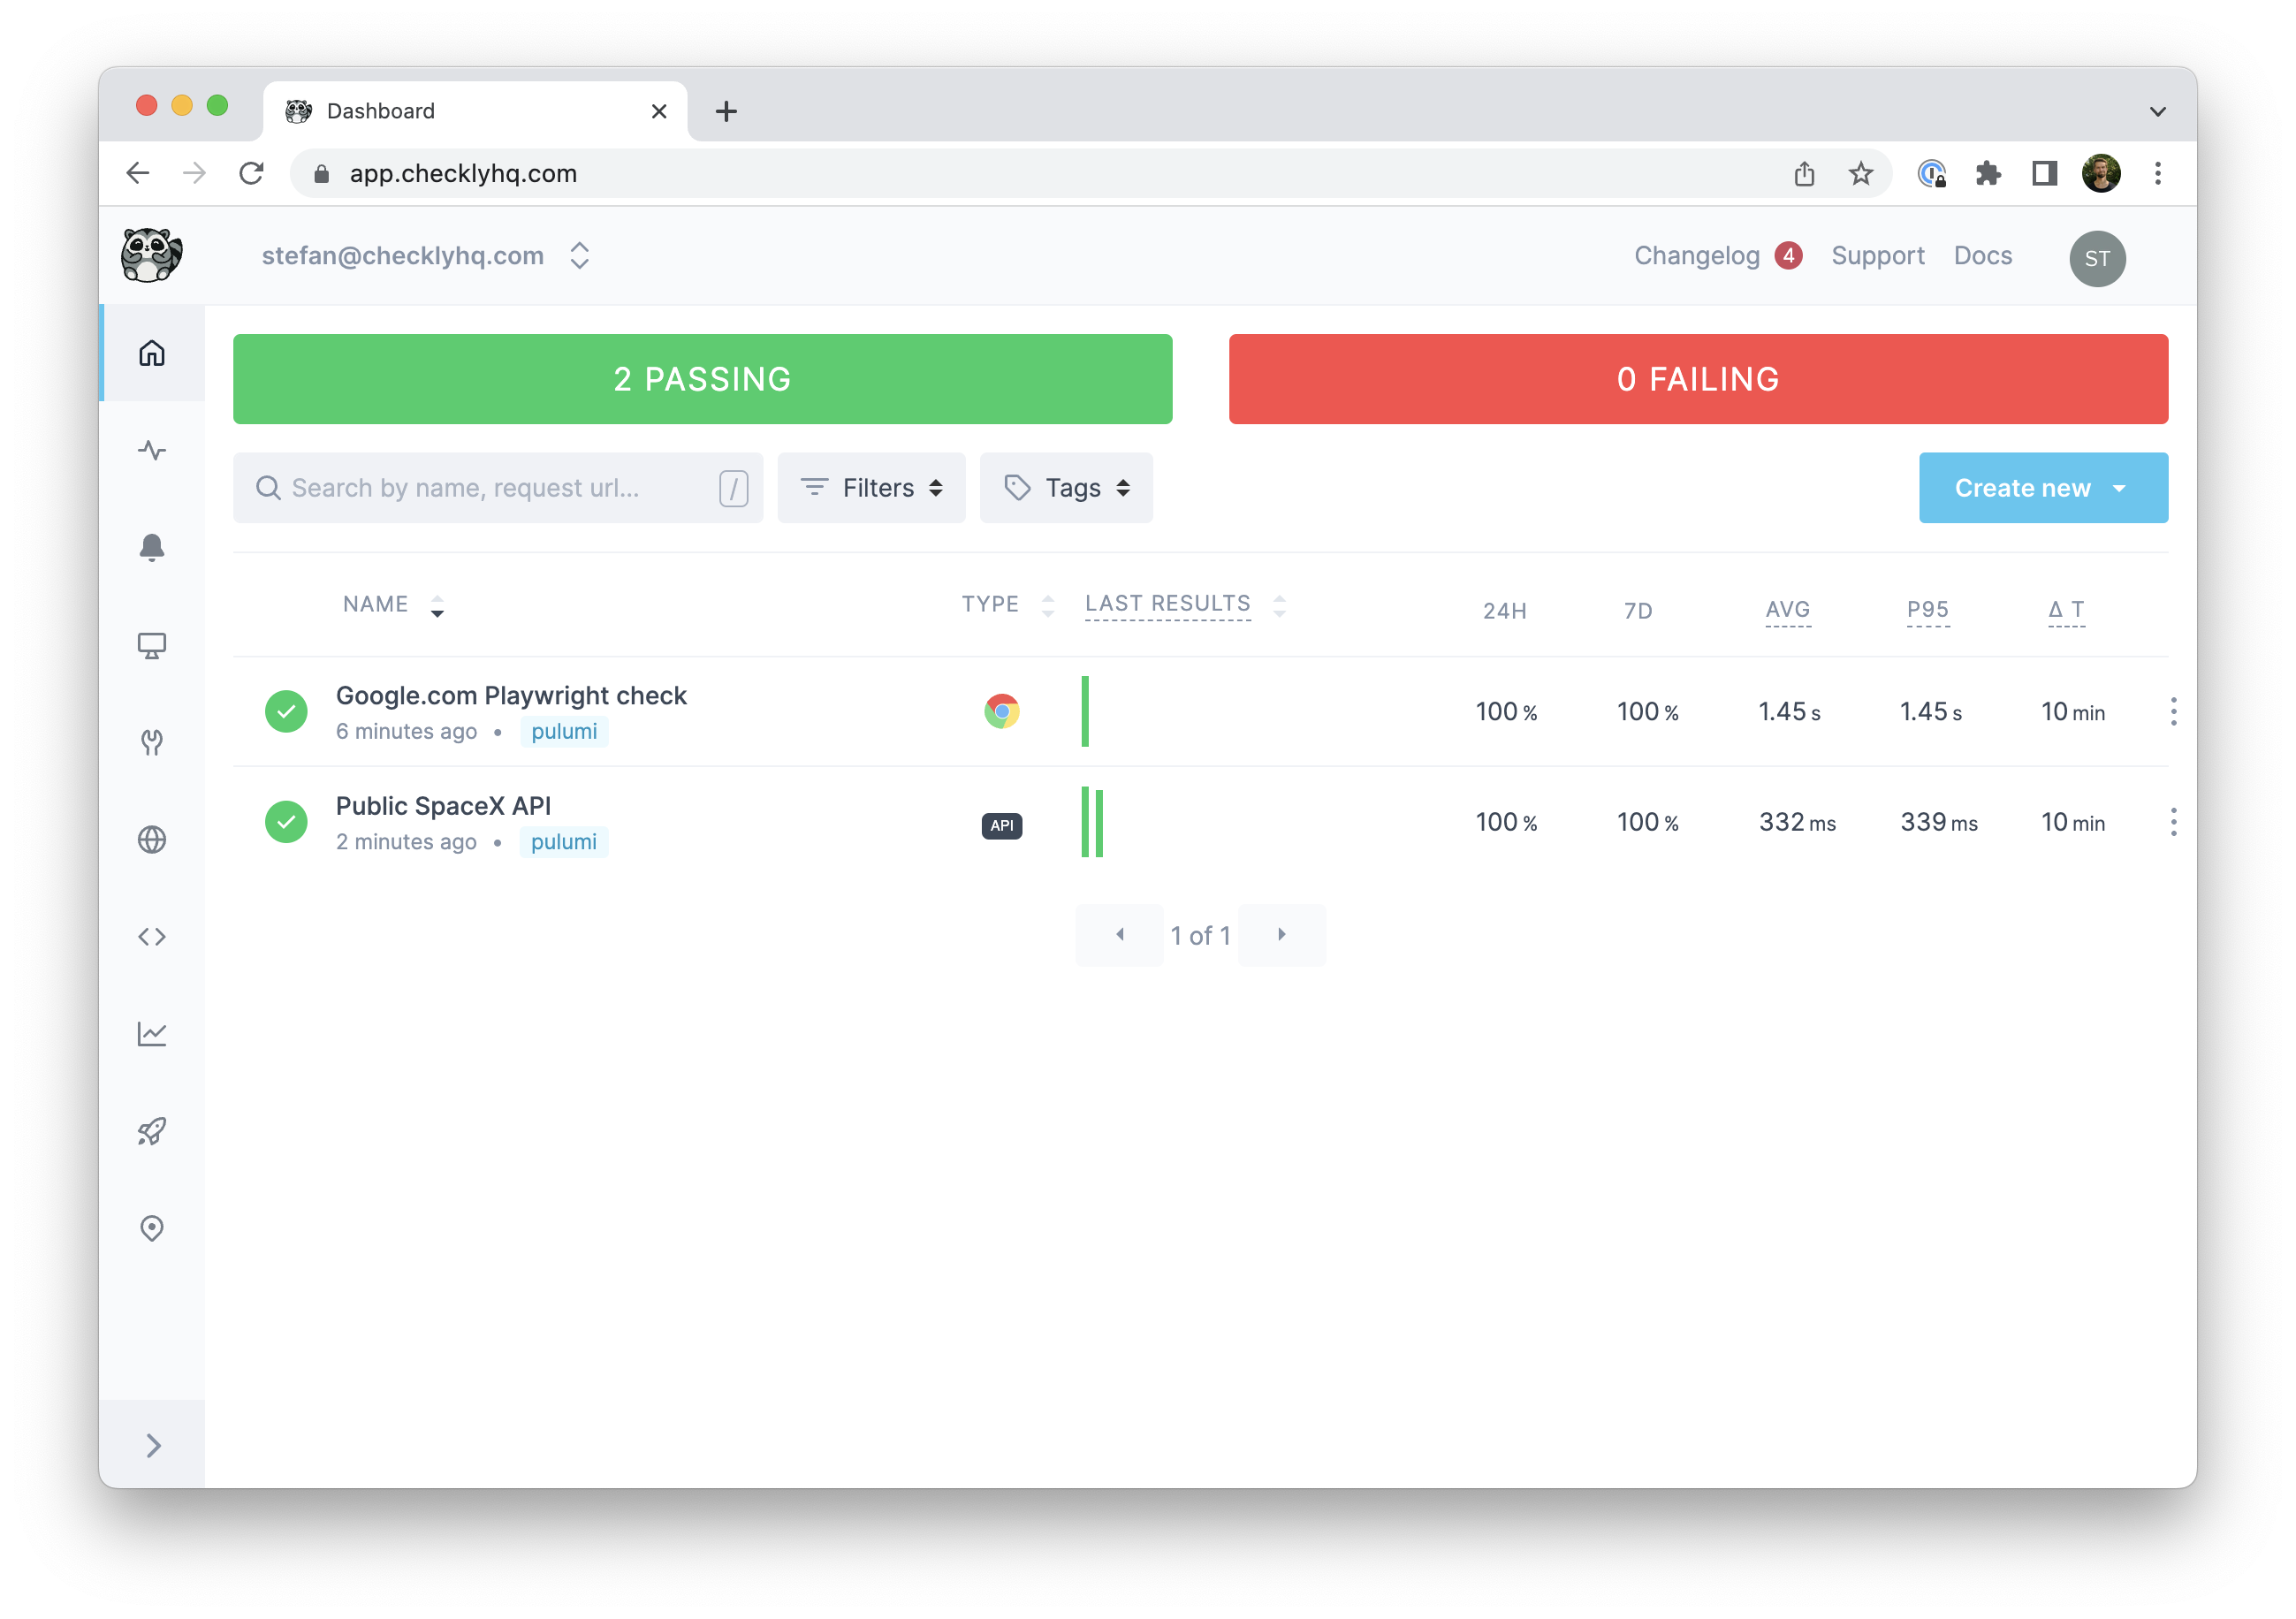
Congratulations! Head to the Checkly dashboard to see the newly created checks.
```
export CHECKLY_API_KEY=cu_xxx
```
Test that both values are available in your environment.
```
$ echo $CHECKLY_ACCOUNT_ID
xxx
$ echo $CHECKLY_API_KEY
cu_xxx
```
> If you prefer storing your configuration alongside your Pulumi stack for easy multi-user access, use `pulumi config set`.
```
$ pulumi config set checkly:apiKey cu_xxx --secret
$ pulumi config set checkly:accountId xxx
```
### Install the Checkly Pulumi Provider
Install the Checkly Pulumi provider (`@checkly/pulumi`) with `yarn` or `npm` to integrate it in your new project.
```
$ npm install @checkly/pulumi
$ yarn add @checkly/pulumi
```
Open `index.js` and require it on top of the file.
```js theme={null}
const checkly = require('@checkly/pulumi')
```
The exported `checkly` object provides resources such as `AlertChannel`, `Check`, and `CheckGroup`, enabling you to define and configure your entire Checkly monitoring setup in code.
Add the following Check definition examples to the `index.js`.
### Examples
#### How to create your first API check
```js theme={null}
new checkly.Check('my-api-check', {
name: 'Public SpaceX API',
activated: true,
frequency: 10,
type: 'API',
locations: ['eu-west-1', 'us-west-2'],
tags: ['pulumi'],
degradedResponseTime: 5000,
maxResponseTime: 15000,
request: {
method: 'GET',
url: 'https://api.spacexdata.com/v3',
assertions: [
{
source: 'STATUS_CODE',
comparison: 'EQUALS',
target: '200',
},
{
source: 'JSON_BODY',
property: '$.project_name',
comparison: 'EQUALS',
target: 'SpaceX-API',
},
],
},
useGlobalAlertSettings: true,
})
```
#### How to create your first Browser check
```javascript browser-check.js theme={null}
new checkly.Check('my-browser-check-pulumi', {
name: 'Google.com Playwright check',
activated: true,
frequency: 10,
type: 'BROWSER',
script: `
const { expect, test } = require('@playwright/test')
test('visit page and take screenshot', async ({ page }) => {
const response = await page.goto('https://checklyhq.com')
expect(response.status()).toBeLessThan(400)
await page.screenshot({ path: 'screenshot.jpg' })
})`,
locations: ['eu-west-1', 'us-west-2'],
tags: ['pulumi'],
})
```
### Creating checks and applying changes
Your `index.js` file should now include instructions to create one API and one Browser check.
Initialize a deployment and apply your changes by running `pulumi up`.
```
$ pulumi up
Previewing update (dev)
View Live: https://app.pulumi.com/stefanjudis/new-pulumi-checkly-project/dev/previews/b30010eb-53a6-438a-864b-af29c2f1321f
Type Name Plan
pulumi:pulumi:Stack new-pulumi-checkly-project-dev
+ ├─ checkly:index:Check my-browser-check-pulumi create
+ └─ checkly:index:Check my-api-check-pulumi create
Resources:
+ 2 to create
1 unchanged
Do you want to perform this update? yes
Updating (dev)
View Live: https://app.pulumi.com/stefanjudis/new-pulumi-checkly-project/dev/updates/2
Type Name Status
pulumi:pulumi:Stack new-pulumi-checkly-project-dev
+ ├─ checkly:index:Check my-api-check-pulumi created
+ └─ checkly:index:Check my-browser-check-pulumi created
Resources:
+ 2 created
Duration: 2s
```
Congratulations! Head to the Checkly dashboard to see the newly created checks.
 Checkly resources should be managed *either* through Pulumi *or* the Checkly UI, not both. Modifying Pulumi-managed resources via the UI, and vice-versa, is likely to cause issues.
## Additional resources
Find more documentation on how to create groups, alerts and snippets online.
* [The official Pulumi Provider documentation](https://www.pulumi.com/registry/packages/checkly/)
* [The Pulumi Provider on GitHub](https://github.com/checkly/pulumi-checkly)
* [Detailed examples in JavaScript and TypeScript](https://github.com/checkly/pulumi-checkly#examples)
Checkly resources should be managed *either* through Pulumi *or* the Checkly UI, not both. Modifying Pulumi-managed resources via the UI, and vice-versa, is likely to cause issues.
## Additional resources
Find more documentation on how to create groups, alerts and snippets online.
* [The official Pulumi Provider documentation](https://www.pulumi.com/registry/packages/checkly/)
* [The Pulumi Provider on GitHub](https://github.com/checkly/pulumi-checkly)
* [Detailed examples in JavaScript and TypeScript](https://github.com/checkly/pulumi-checkly#examples)