Manual and triggered check runs (e.g. via the API or the Checkly UI) always execute, even when check execution is paused. However, if alert silencing is enabled, alerts from these runs will still be suppressed.
Creating a maintenance window
Navigate to the Maintenance Windows page indicated by the wrench icon on the menu. Then click “create new” in the top right corner. After giving your window an appropriate name, the core options you have are:Setting a schedule
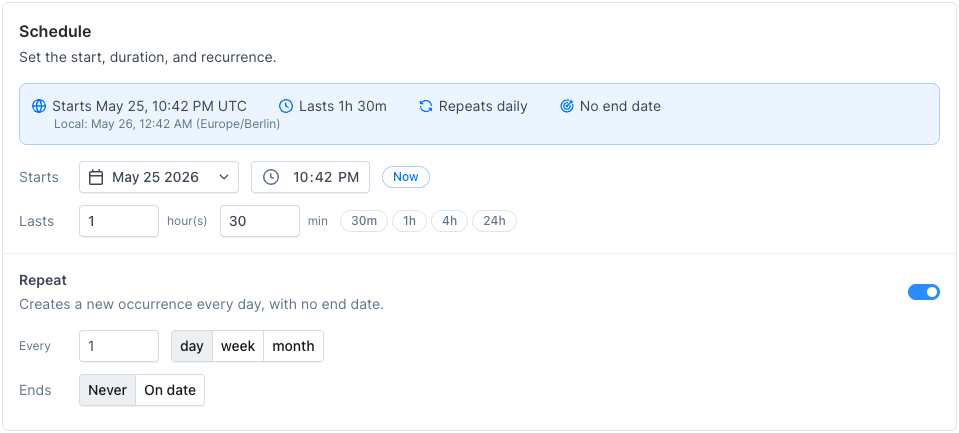
Setting repeats
If your maintenance window repeats at a certain cadence, toggle the repeat option. Here you can set- The amount of repetitions.
- The unit of repetition, i.e. Day, Week or Month.
- The date on which the repetition cycle should end.
If you schedule a window on the 31st and add a monthly repeat cycle, your schedule will also activate on the 30th of the relevant months and the 28th or 29th of February depending on the leap year.
Check behavior
Each maintenance window lets you configure how checks behave during the maintenance period. Toggle the behaviors you need:Pause check execution
When enabled, scheduled check runs are skipped for the duration of the window. You can scope which checks are paused:- All checks — every check in the account is paused.
- Checks matching tags — only checks (and check groups) with matching tags are paused.
Silence alerts
When enabled, alert channel notifications are suppressed while checks continue to run and collect data. This is useful when you want to keep monitoring but avoid noisy alerts during expected degradation. You can scope which checks are silenced:- All checks — alerts are silenced for every check in the account.
- Checks matching tags — only checks (and check groups) with matching tags have their alerts silenced.
Adding checks via tags
You scope which checks are affected by adding tags to the pause or silence configuration. Any checks or check groups with matching tags will be included. This way, any checks or check groups created after creating your maintenance window can still be made part of the window; no need to update the maintenance window configuration. Just set the correct tags.Maintenance lifecycle and updates
A maintenance window is a template. Each time it runs it creates a maintenance: a single occurrence with its own status and its own timeline of updates. A one-off window has one maintenance, while a recurring window creates one maintenance per cycle, each tracked separately. A maintenance moves through these statuses:- Scheduled: planned but not started. Checks are not paused or silenced yet.
- In progress: active. The check behavior you configured (pause, silence, or both) is now in effect.
- Verifying: an optional active state for when the work is done but you are still confirming. Check behavior stays in effect.
- Completed: finished. Checks resume and alerts are sent again.
- Cancelled: called off. Like completing, this ends any pausing or silencing.
Updates
Each maintenance has a timeline of updates. Posting an update records a message and can move the maintenance to a new status, similar to updating an incident. If the window is shown on a status page, these updates are what your visitors see or get notified about.Showing maintenance on your status page
If you publish a status page, you can show a maintenance window on it so visitors and subscribers know what to expect. Enable Status page visibility on the window to choose which pages and services it appears on, set a severity, automatically post start and end updates, and notify subscribers ahead of time. See Status page maintenance for the full guide.Showing maintenance on a status page is part of the Communicate add-on. View pricing.
Monitoring maintenance status
While a maintenance window is active:- The Maintenance Windows page shows a banner at the top summarizing the active maintenance, with a quick link to post an update.
- The home dashboard shows a Maintenance badge on each affected check row, with a tooltip showing the maintenance window name and whether the check is paused, silenced, or both.
- The home dashboard status filter includes an Under maintenance option, letting you quickly find all checks currently affected by a maintenance window.
- The check overview page shows a tag if the check is currently affected by a maintenance window.