Debugging scripts
Understanding why a script does not work as expected and finding the failure root cause are automation key skills. Given its importance and its sometimes deceptive complexity, debugging is a topic that should receive quite some attention.
This article will explore basic concepts and tools to point beginners in the right direction.
Awareness comes first
Script debugging is firstly about observing and understanding. Finding out what is causing the failure (or misbehaviour) in your execution heavily depends on your knowledge of:
- What the script you are looking at is supposed to do
- How the application the script is running against is supposed to behave at each step of the script
When approaching a debugging session, make sure the above points are taken care of. Skipping this step is way more likely to cost you additional time than it is to save you any.
The error message
Error messages are not present in every scenario: we might be trying to understand why a script passes, or why it takes longer than expected. But when we have access to an error message, we can use it to guide us.
The error, in and of its own, is not always enough to understand what is going wrong with your script. Oftentimes, there can be multiple degrees of separation between the error and its root cause. For example: an “Element not found” error might be alerting you to the fact that an element is not being found on the page, but that itself might be because the browser was made to load the wrong URL in the first place.
Do not fall into the easy trap of reading the error message and immediately jumping to conclusions. Rather, take the error message, research it if needed, combine it with your knowledge of script and app under test and treat it as the first piece to the puzzle, rather than the point of arrival of your investigation.
Good knowledge of the automation tool you are using will also help add more context to the error message itself.
Gaining visibility
Given that Headless browser scripts will run without a GUI, a visual assessment of the state of the application needs additional steps.
One possibility is to adding screenshots in specific parts of the script, to validate our assumptions on what might be happening at a given moment of the execution. For example, before and after a problematic click or page transition:
...
await page.screenshot({ path: 'before_click.png' })
await page.click('#button')
await page.screenshot({ path: 'after_click.png' })
...
...
await page.screenshot({ path: 'before_click.png' })
await page.waitForSelector('#button')
await page.click('#button')
await page.screenshot({ path: 'after_click.png' })
...
Another way to better observe our script’s execution is to run in headful mode:
...
const browser = await chromium.launch({ headless: false, slowMo: 20 })
...
...
const browser = await puppeteer.launch({ headless: false, slowMo: 20 })
...
We can then tweak the slowMo option, which adds a delay in milliseconds between interactions, to make sure the execution is not too fast for us to follow.
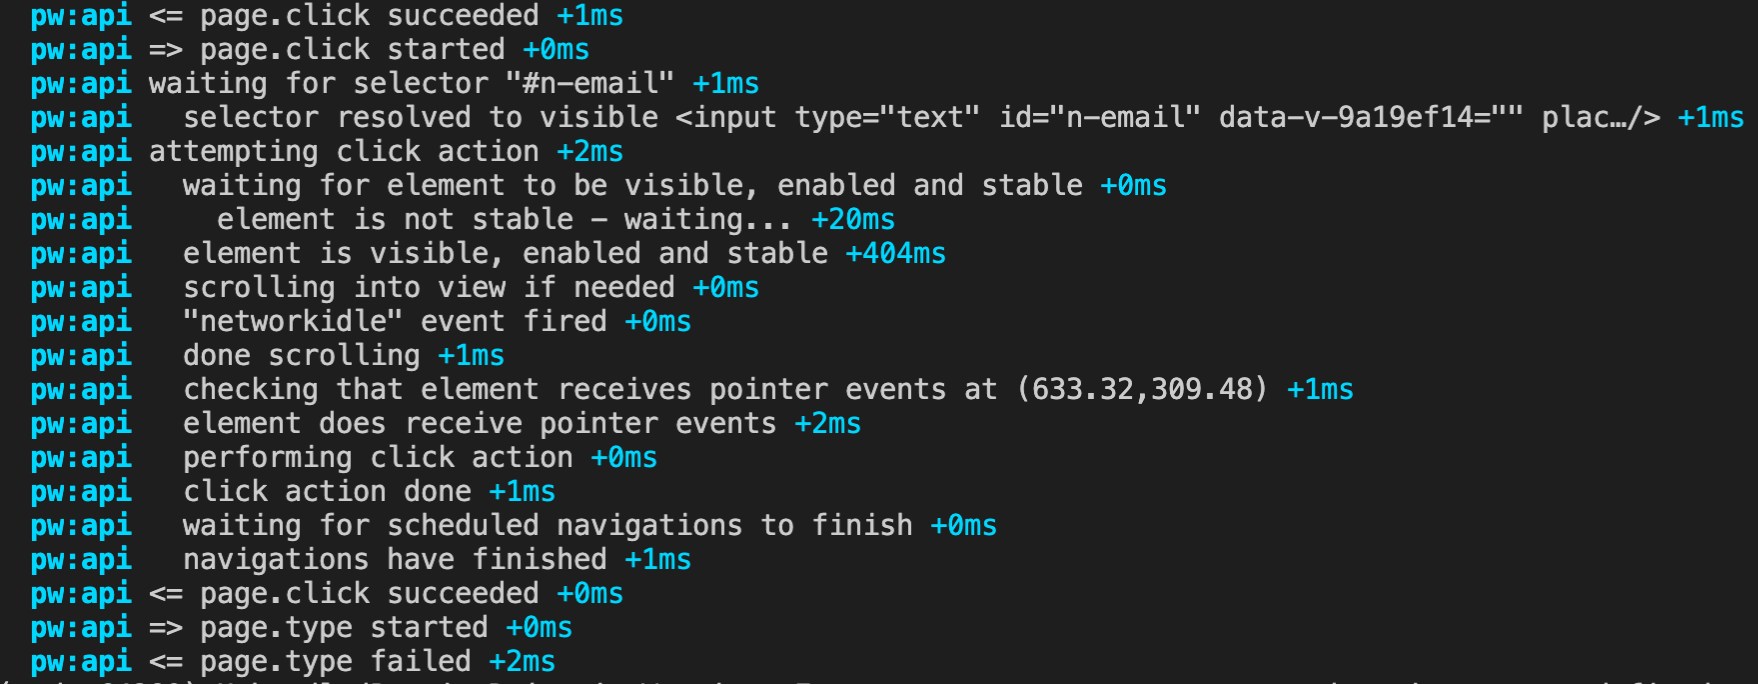
Increasing logging
Sometimes we need to try and see the execution through our automation tool’s eyes. Added logging can help by taking us step-by-step through every command as it is executed.
DEBUG=pw:api node script.js
DEBUG="puppeteer:*" node script.js
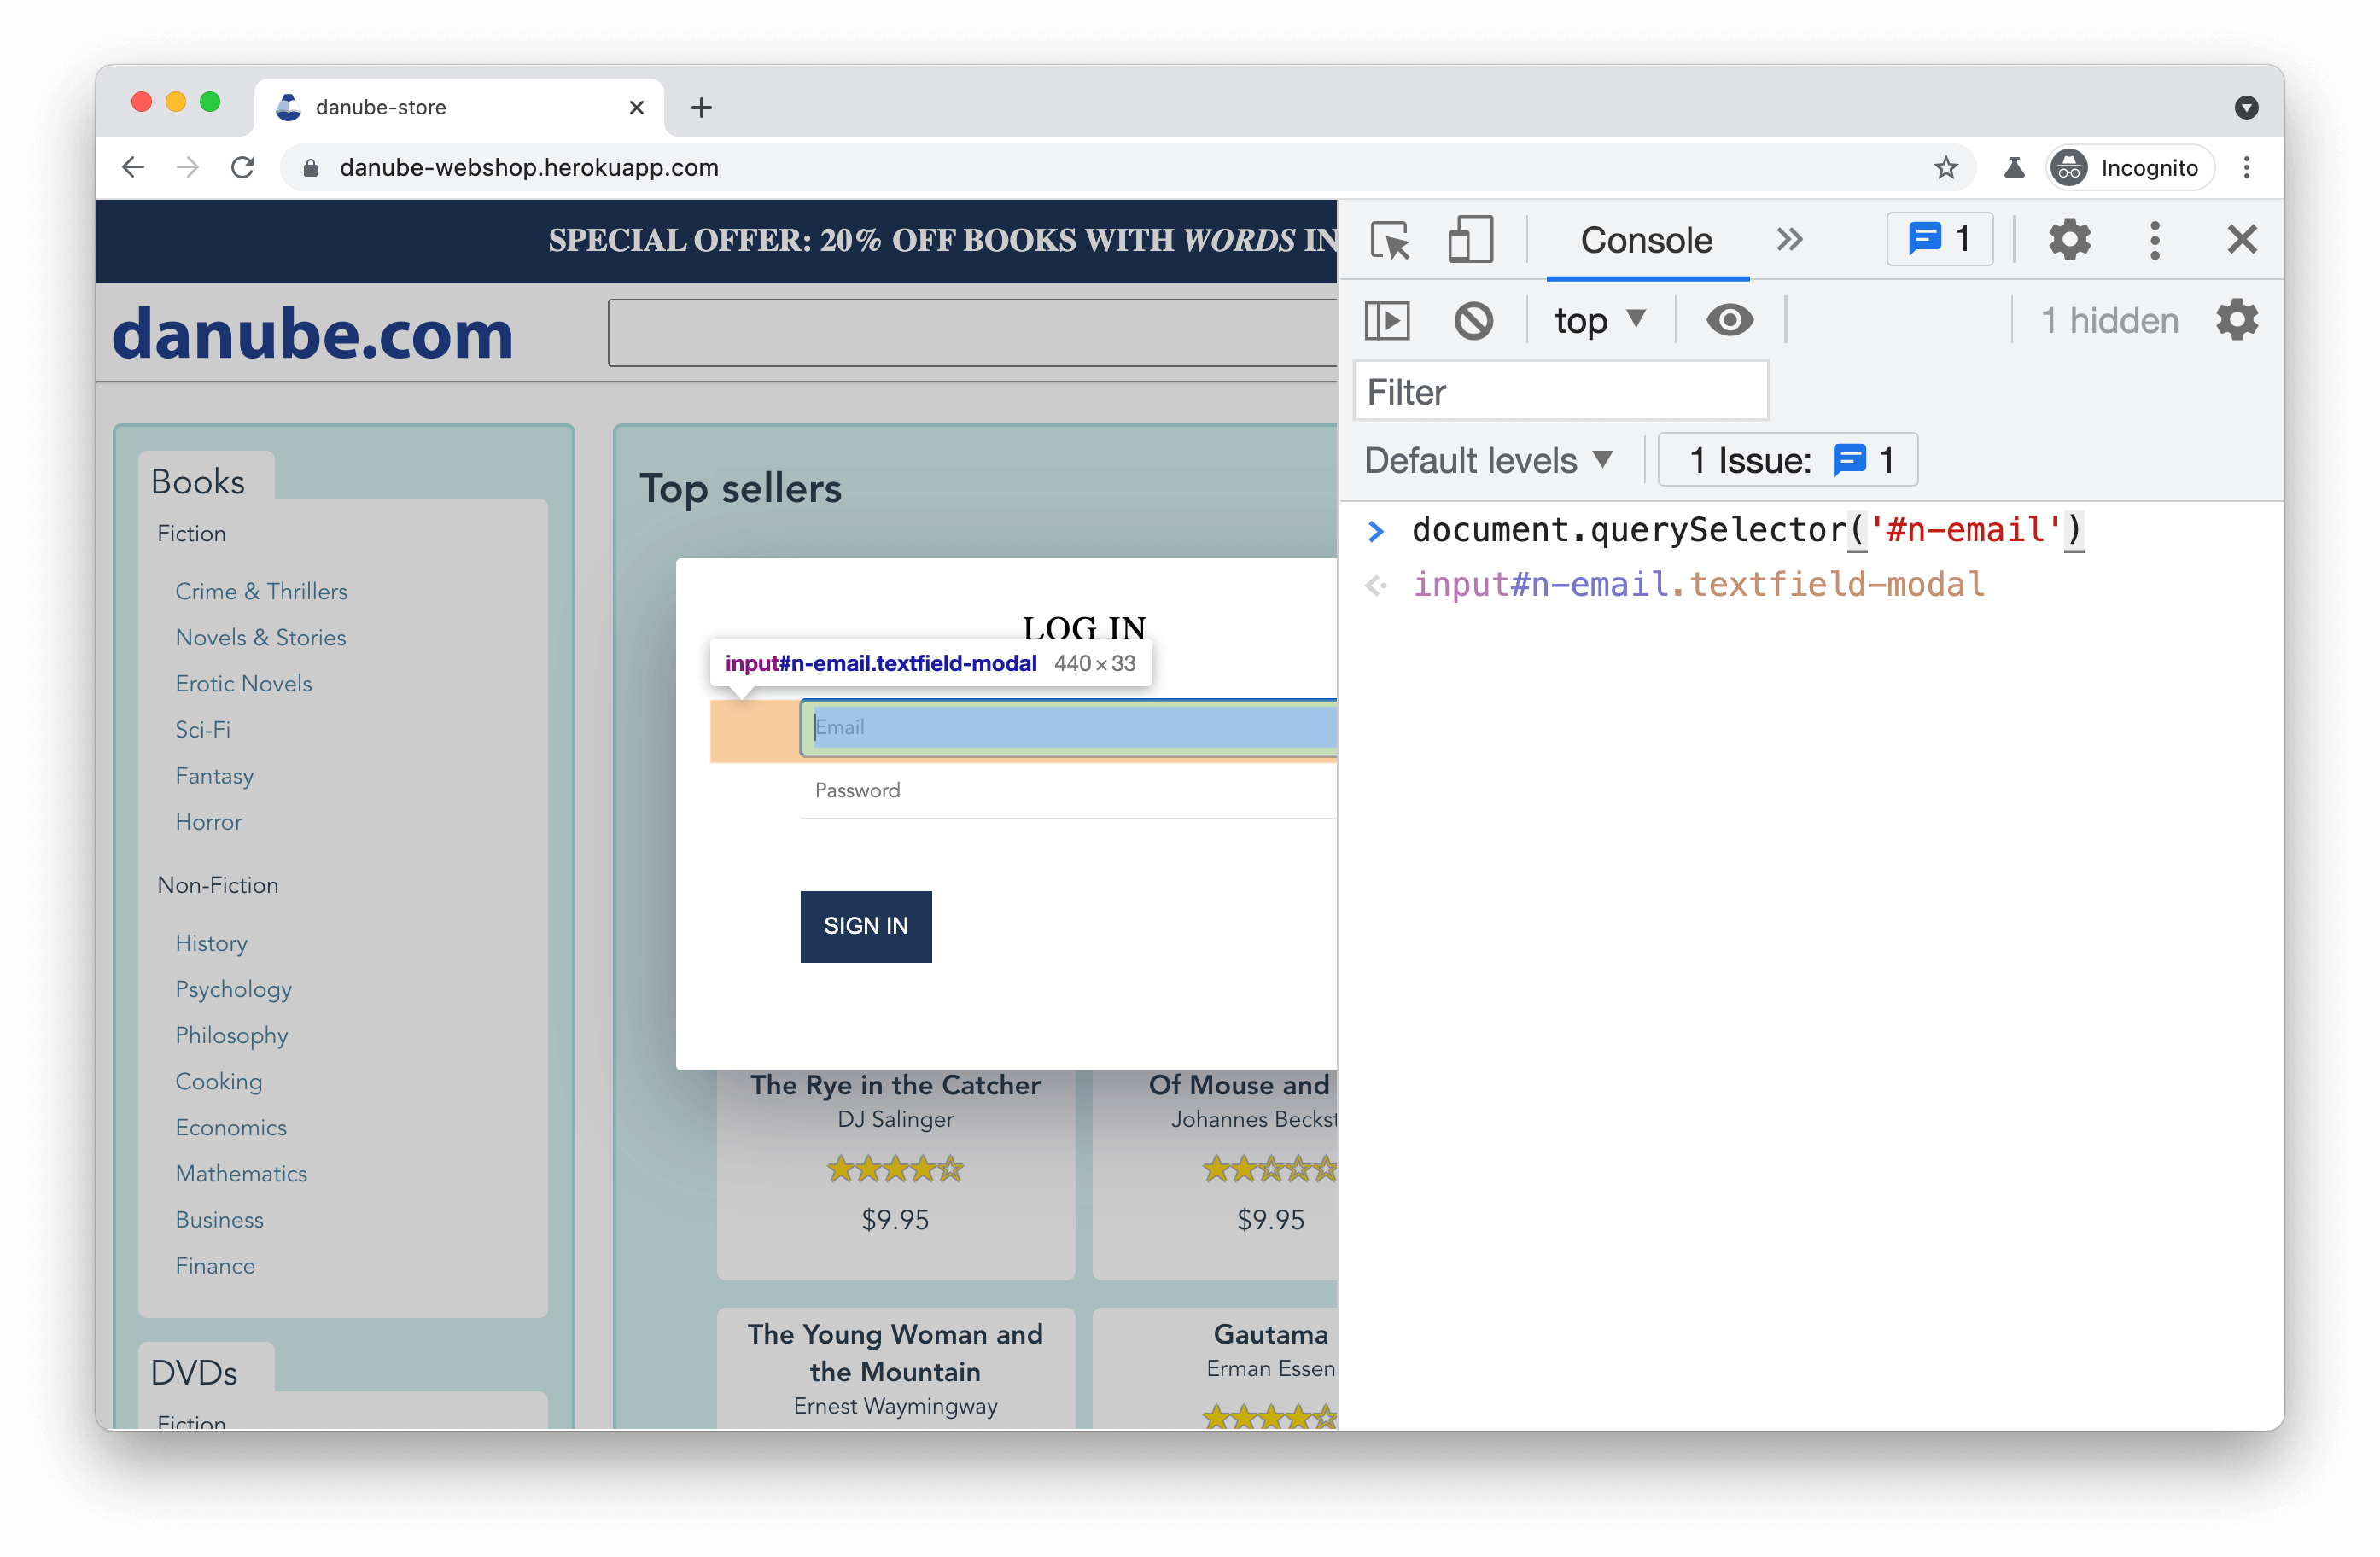
Accessing DevTools
A wealth of information is available through the Chrome Developer Tools. We can configure our browser to start with the DevTools tab already open (this will automatically disable headless mode), which can be helpful when something is not working as expected. Careful inspection of the Console, Network and other tabs can reveal hidden errors and other important findings.

...
await chromium.launch({ devtools: true })
...
...
await browser.launch({ devtools: true })
...
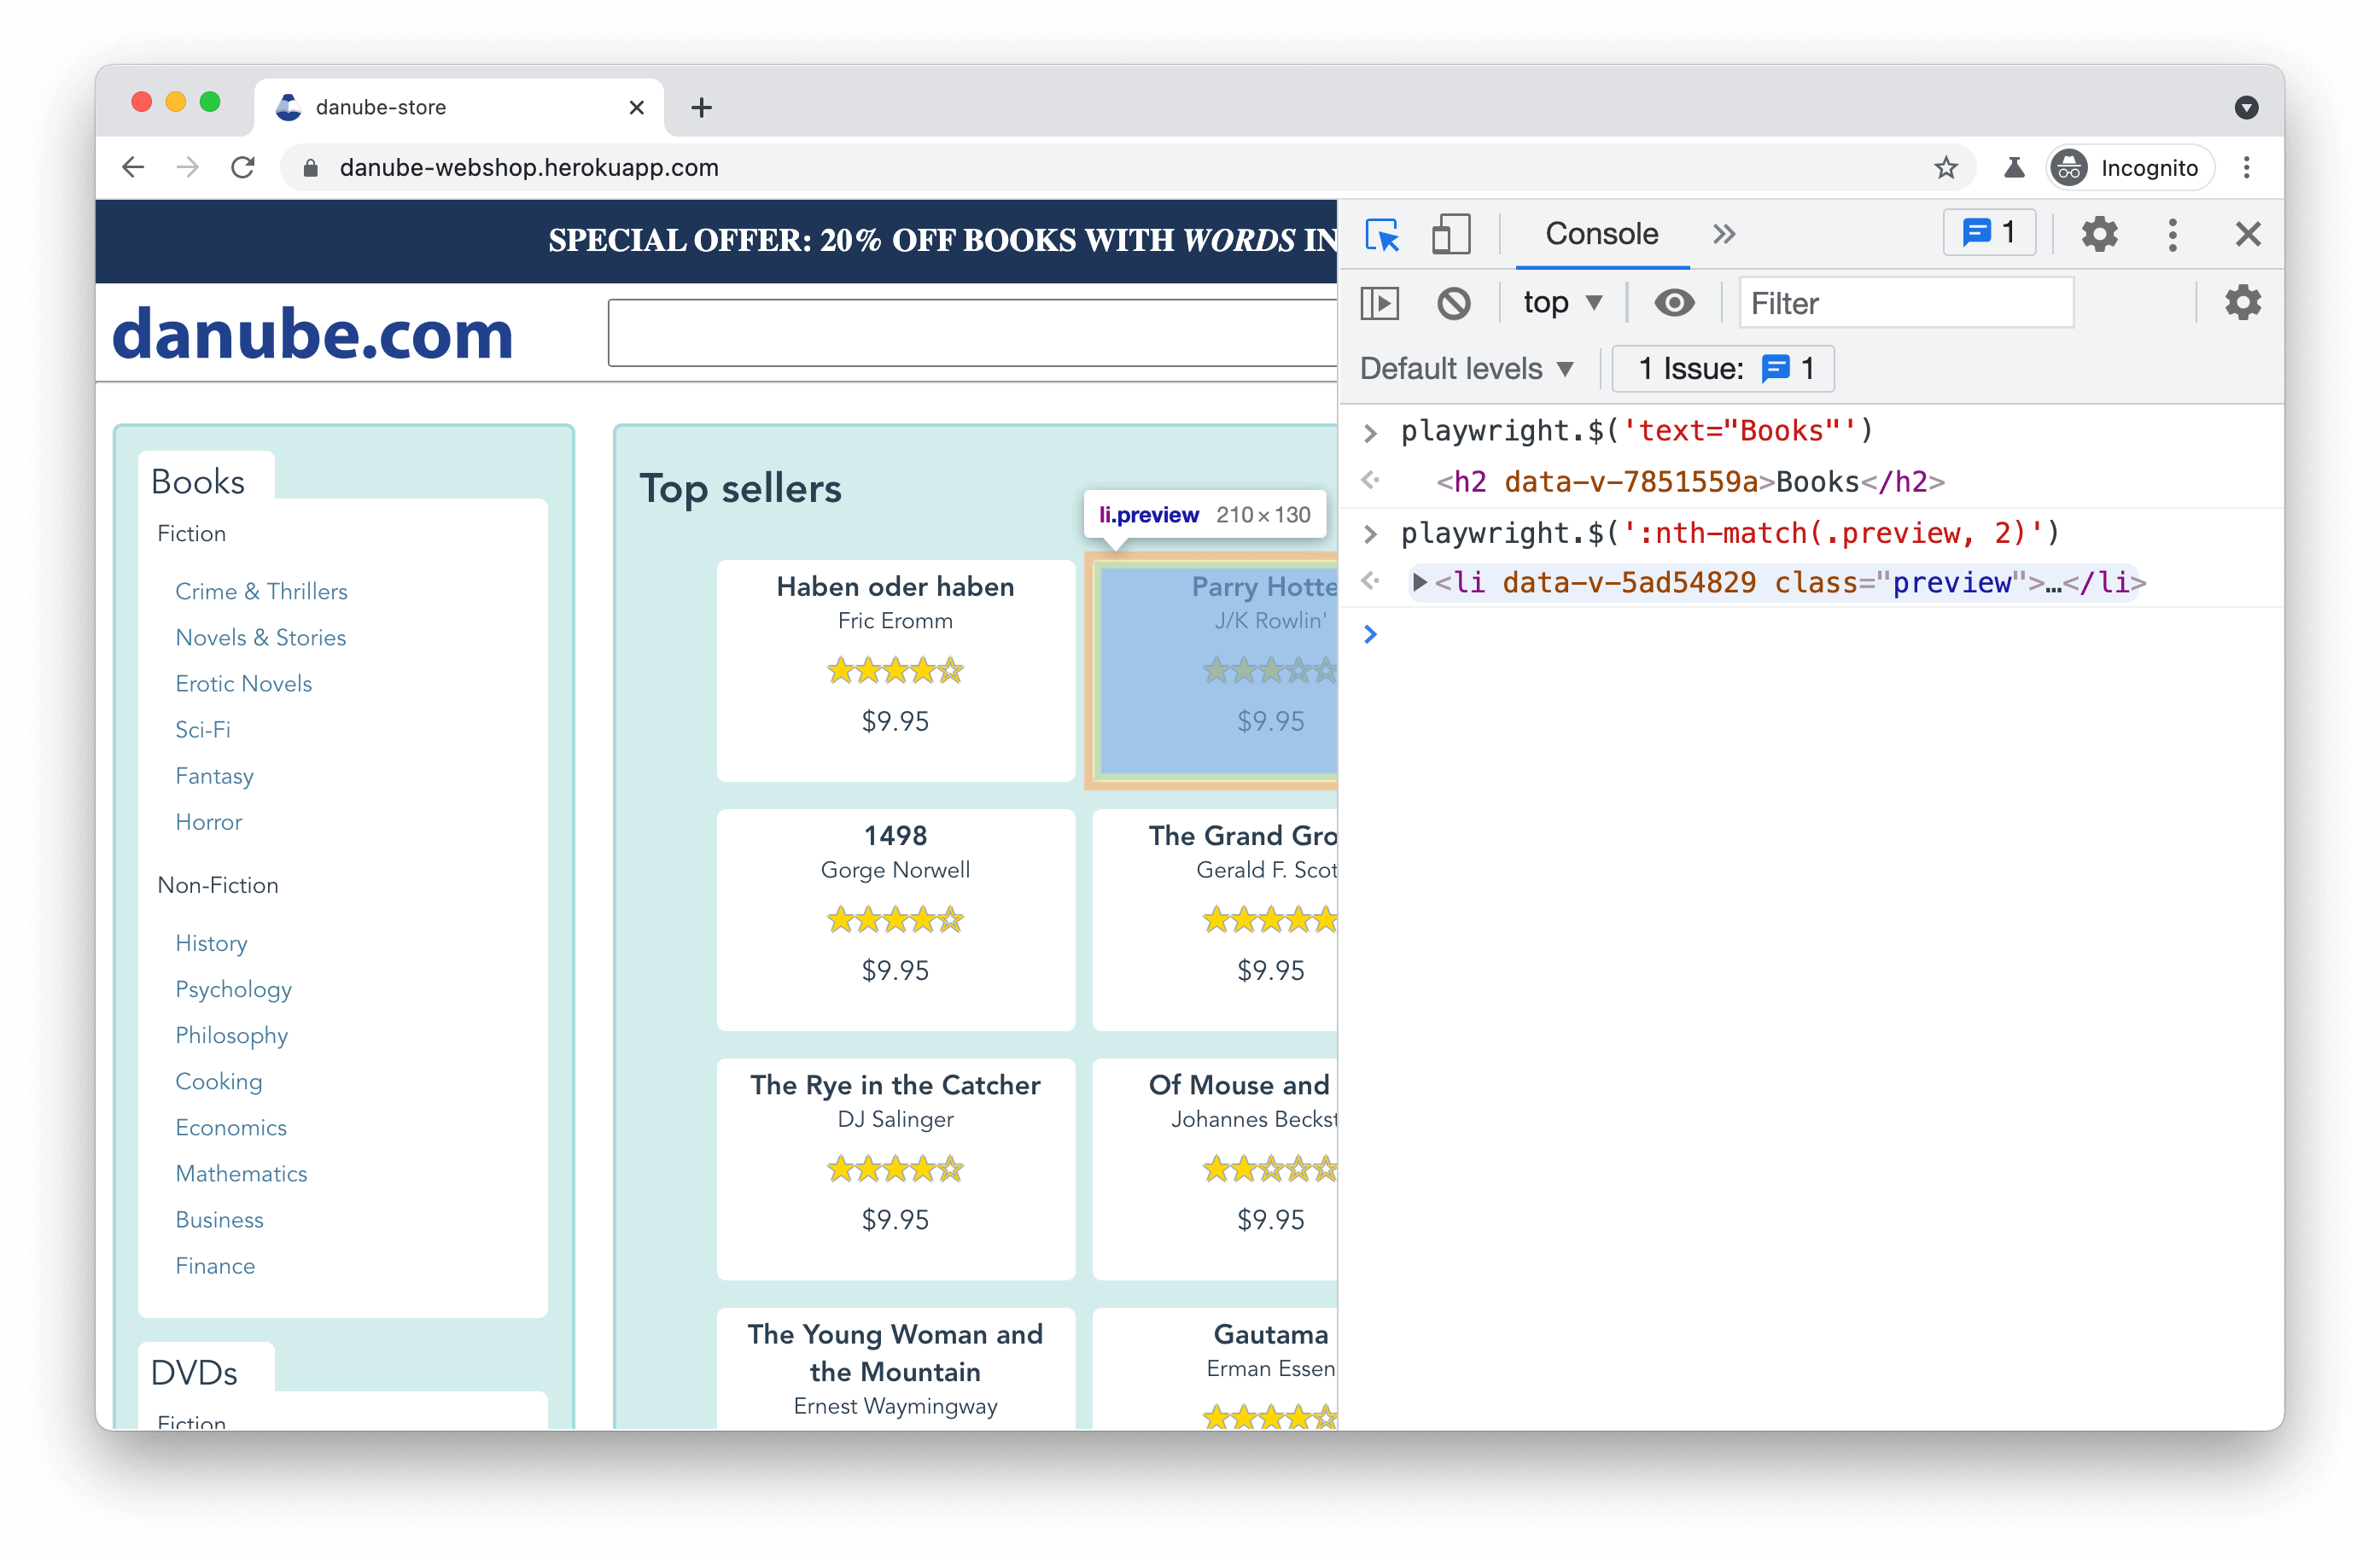
We can also use the console to directly try out a selector on the page in its current state, e.g. with document.querySelector or document.querySelectorAll.
If we are using Playwright, we can also run in debug mode with PWDEBUG=console node script.js. This provisions a playwright object in the browser which allows us to also try out Playwright-specific selectors.
The Playwright Inspector
The Playwright Inspector is a GUI tool which exposes additional debugging functionality, and can be launched using PWDEBUG=1 npm run test.
The Inspector allows us to easily step through each instruction of our script, while giving us clear information on the duration, outcome, and functioning of each. This can be helpful in getting to the root cause of some of the more generic errors.
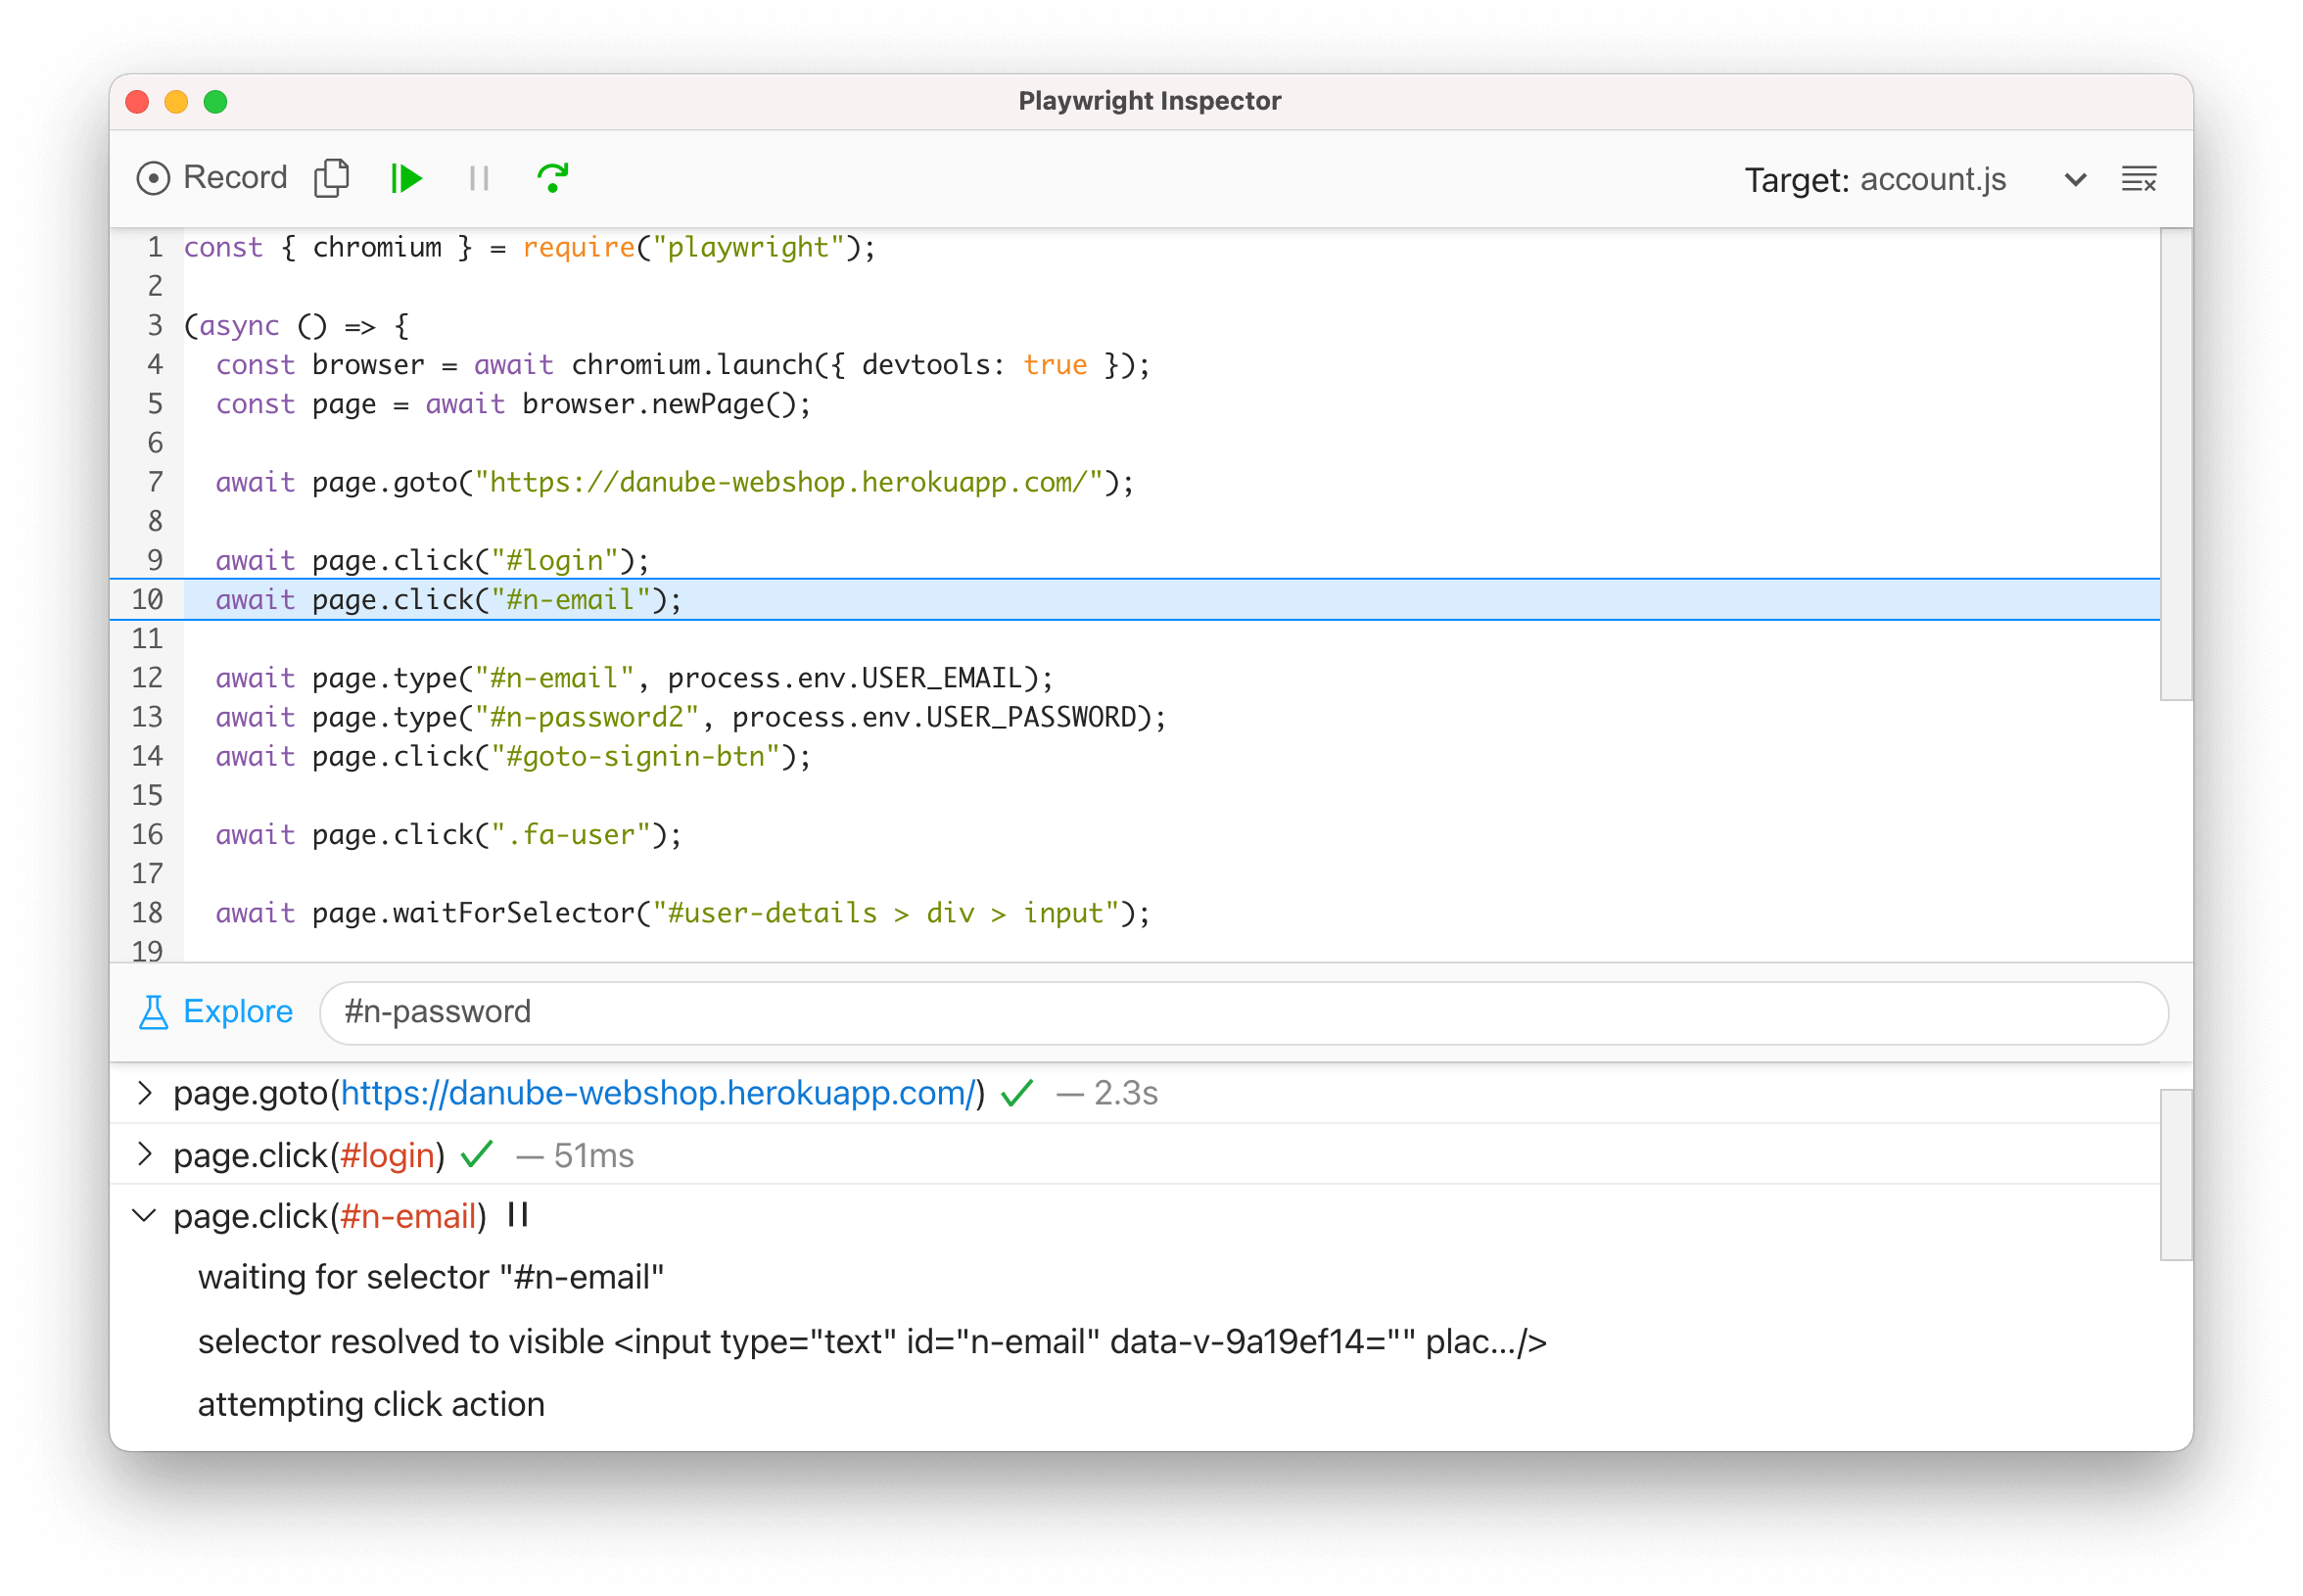
The Inspector includes additional handy features such as selector generation and debugging, as well as script recording.