- First, install the Checkly Slack App into your Slack Workspace by going to your integrations page and click “Connect Slack Workspace”.
- Then, head to your alert settings, click “Add more channels” and select a new Slack channel.
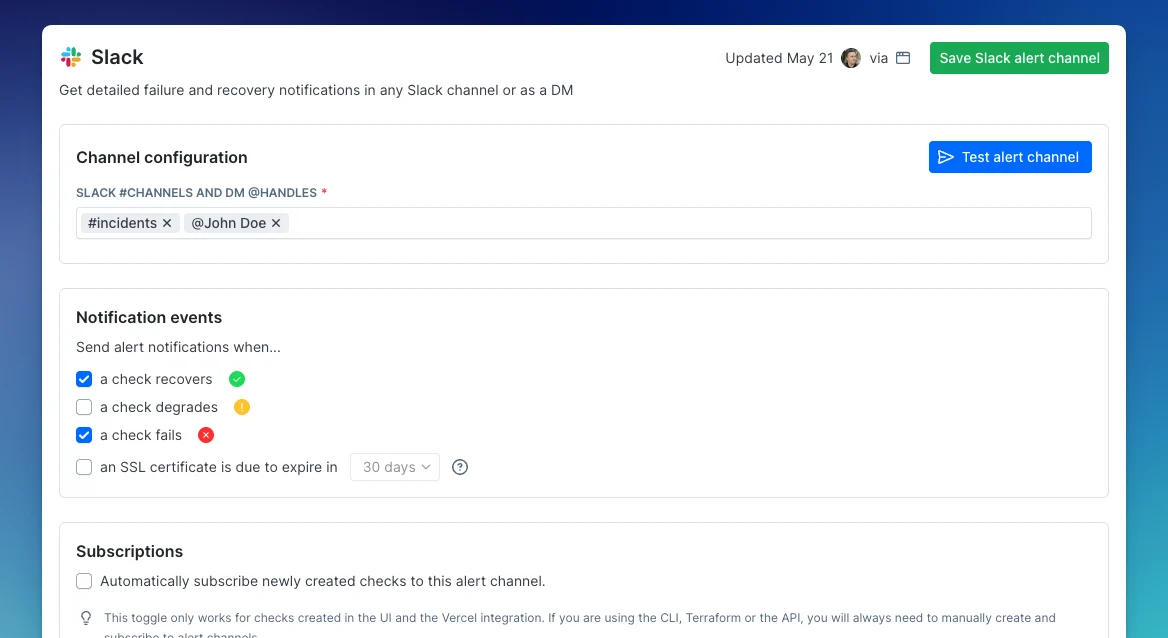
@Checkly.
Example Failed Slack Alert
For each check and / or monitor, the Slack alert message contains key information, a possible root cause analysis and key actions like rerunning the check.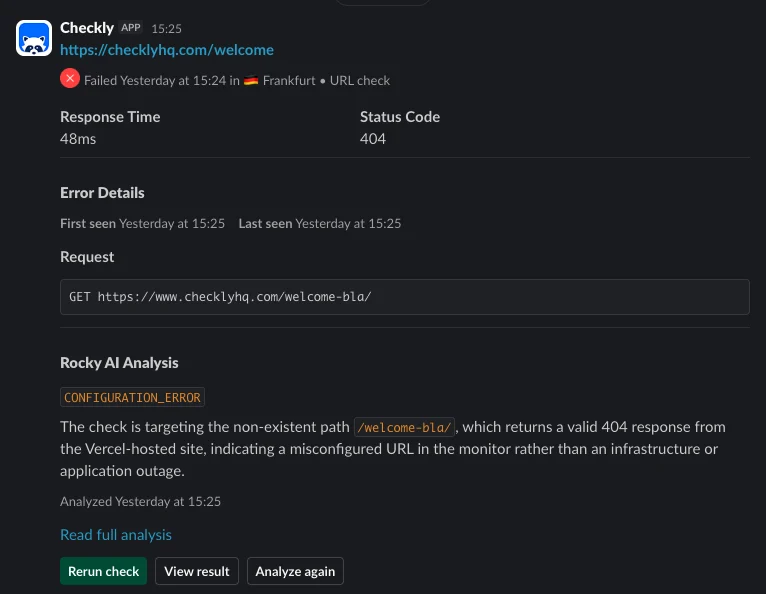
Example Recovered Slack Alert
From the recovered Slack message, you can see the timestamp as well as a link to the check itself.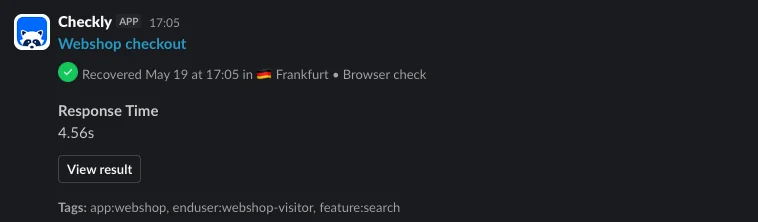
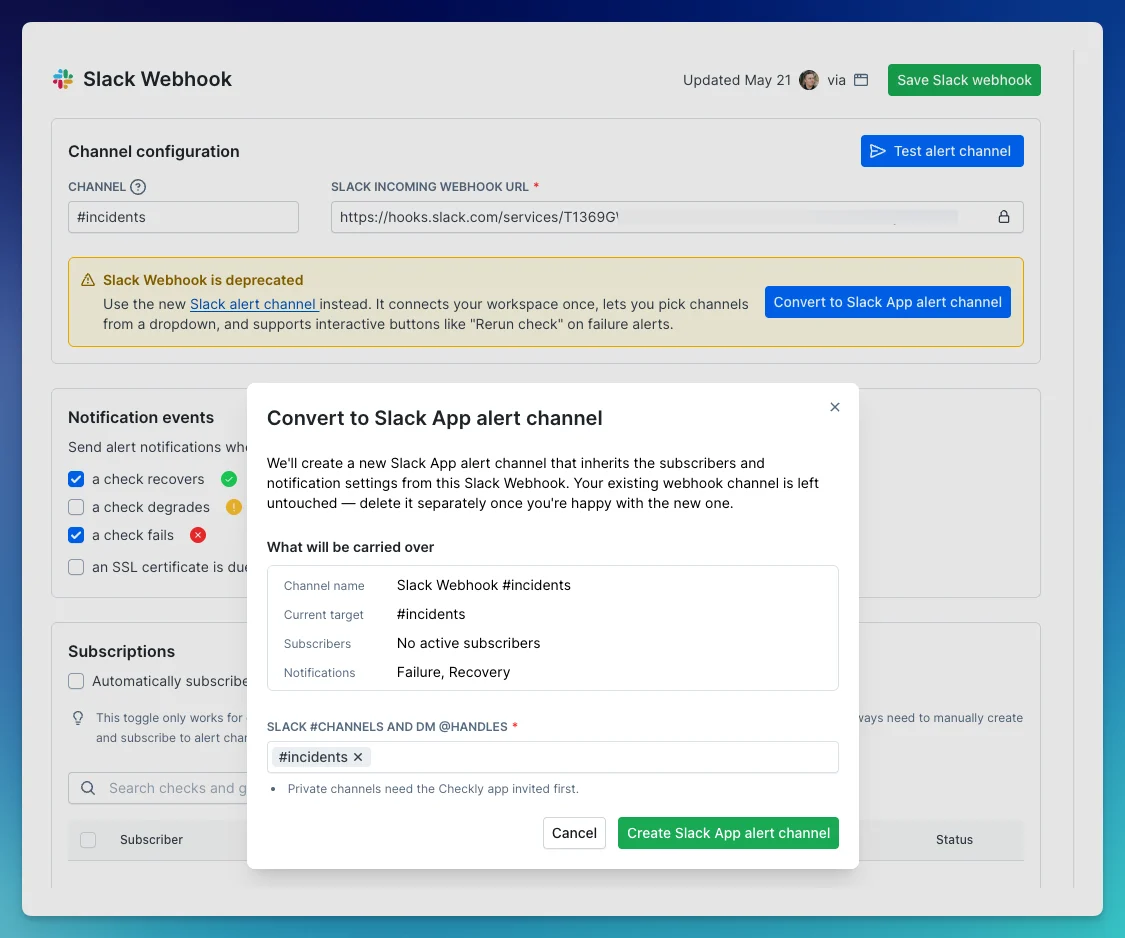
Migrating from the deprecated Slack webhook alert channels
Checkly previously only had Slack webhook based alert channels. These types of webhooks have been deprecated by Slack and are now also deprecated by Checkly. These webhook channels will keep working; we have not set a hard end-of-life date. You can recognize the deprecated channel in your alert channels list. It is named “Slack webhook” and has an alert icon.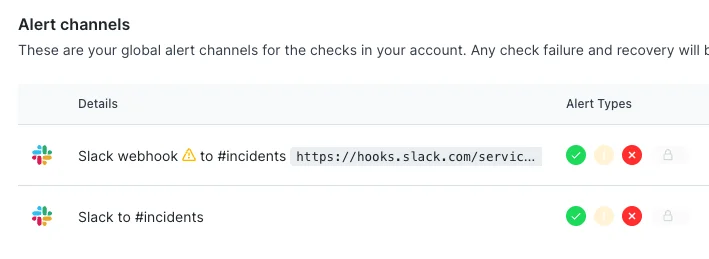
Permissions
Checkly requests these Slack permissions for the Checkly Slack app to work within your workspace:| Permission | Description |
|---|---|
app_mentions:read | Detects @mentions to start Cloud Agents and respond to requests |
channels:history | Reads previous messages in threads for extra context |
channels:join | Automatically joins public channels when invited or requested. |
channels:read | Accesses channel metadata (IDs and names) to post replies and updates |
chat:write | Sends status updates and notifications on triggered actions like rerunning checks |
groups:history | Reads previous messages in private channels for extra context |
groups:read | Accesses private channel metadata to post responses |
im:history | Accesses direct message history for extra context |
mpim:history | Accesses group DM history for multi-participant conversations |
users:read | Matches Slack users with Checkly accounts for permissions and secure access |
links:read | Read links for allow-listed domains like app.checklyhq.com to provide rich context |
links:write | Writes rich context for allow-listed domains like app.checklyhq.com |