

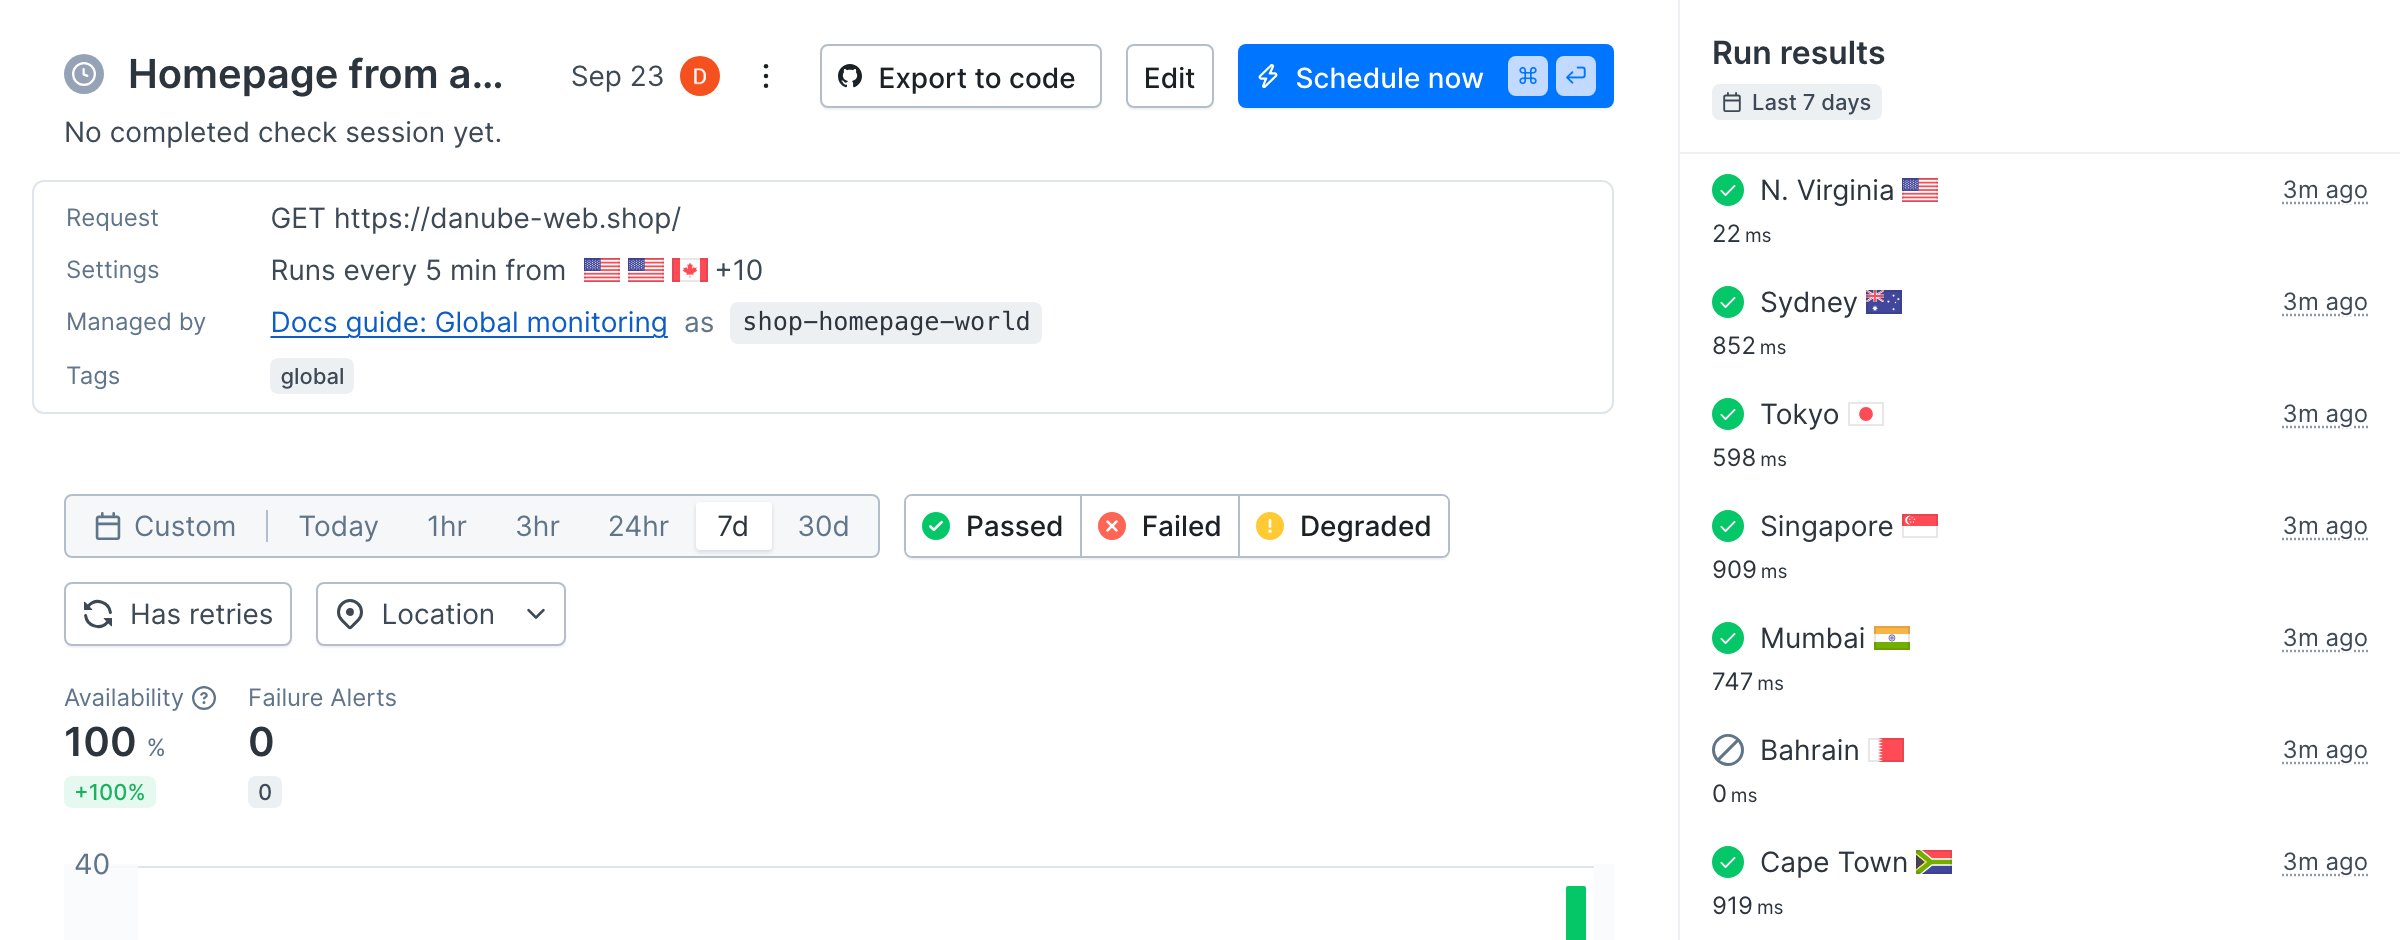
us-east-1. Every number in this guide was measured against it.
Let your agent do it
Let your agent do it
To run this guide from your terminal or your coding agent, run What follows is the reasoning behind that prompt and the same setup built step by step.
npx checkly init in your project first. It installs the Checkly CLI and Checkly Skills for your agent. Then paste the prompt below into Claude Code, Cursor, Codex, or any agent that supports skills. It builds the same setup as this guide, proves it with npx checkly test --record, and stops for your confirmation before npx checkly deploy.Prompt
Why one location is not enough
One vantage point tells you about one path
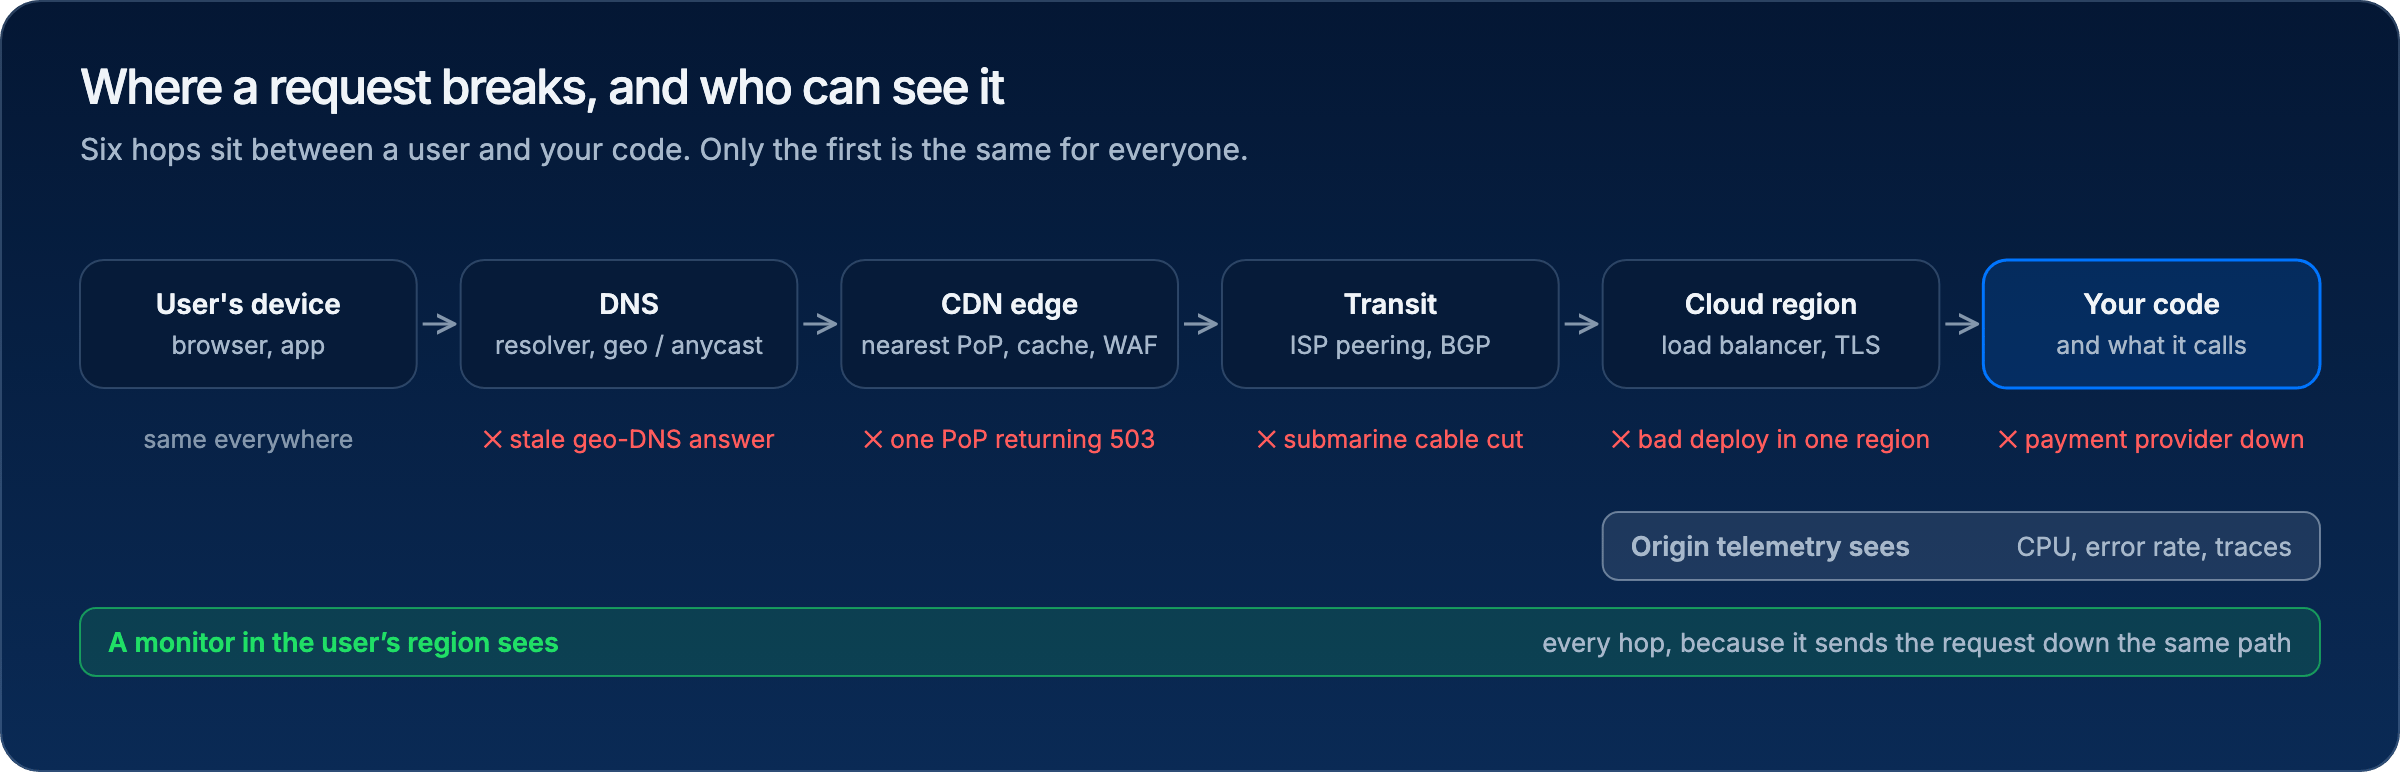
Most monitoring starts as a single check from a single place, usually the cloud region the app runs in. That check answers one question: can this region reach the origin? It says nothing about the path a user in Sydney takes to get there.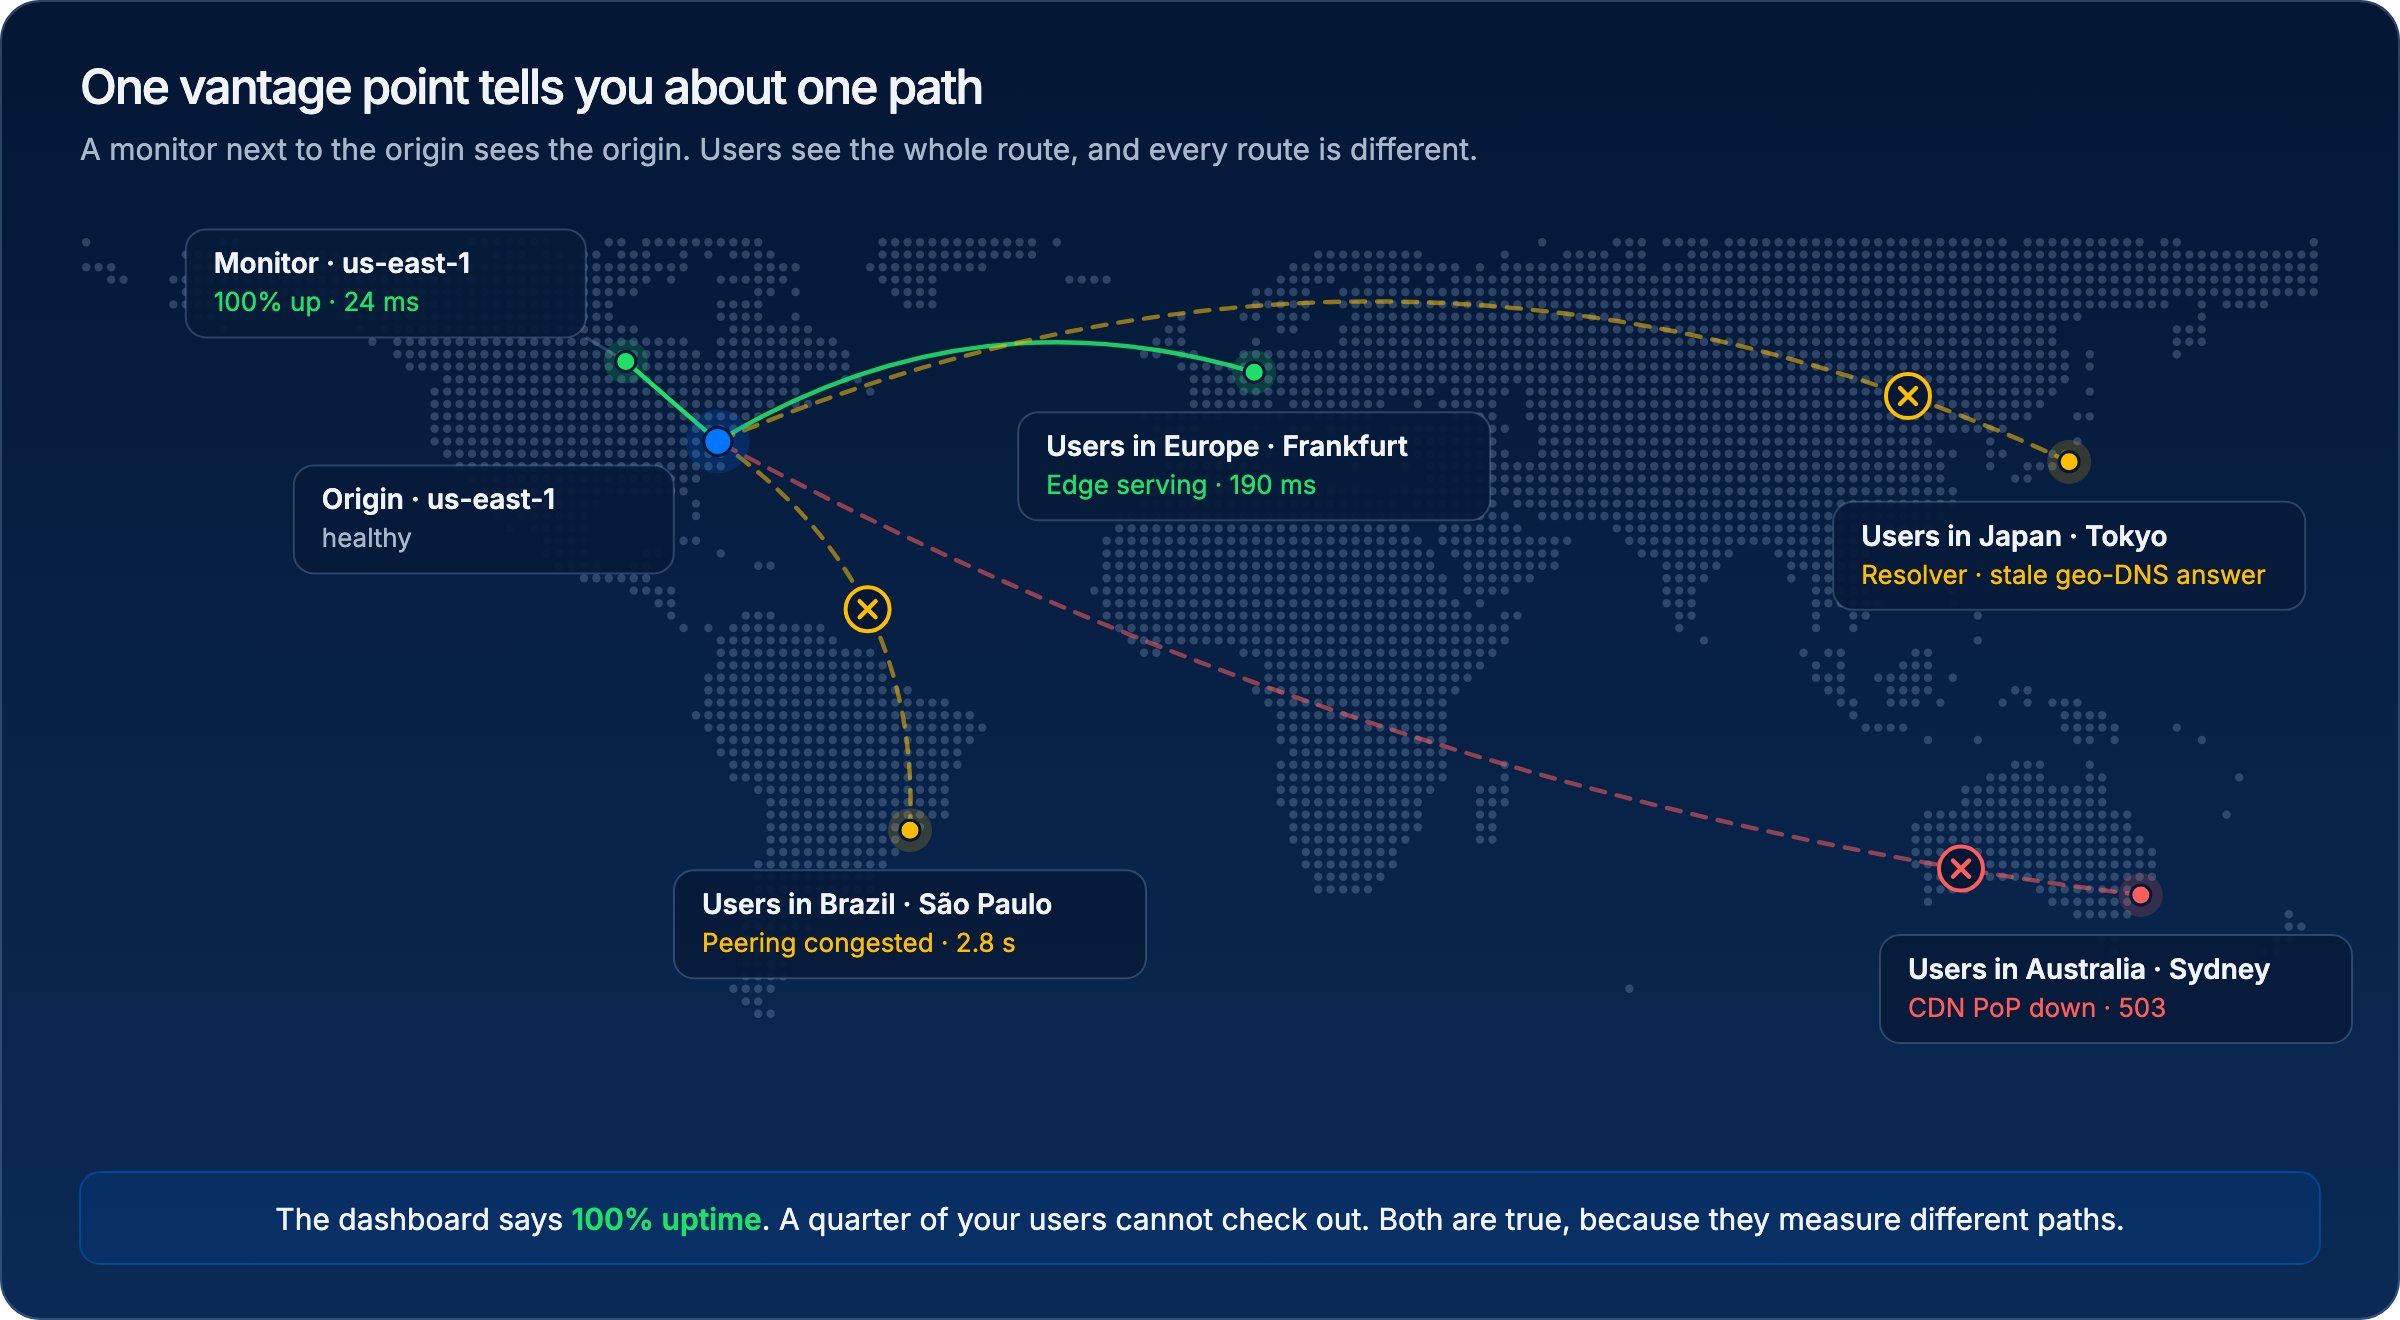
Latency is distance, and you pay it four times
Light in fibre covers roughly 200 kilometres per millisecond. Before the first byte of HTML arrives, a browser has already made about four round trips: DNS, TCP, TLS, and the HTTP request itself. Every one of them is priced by distance.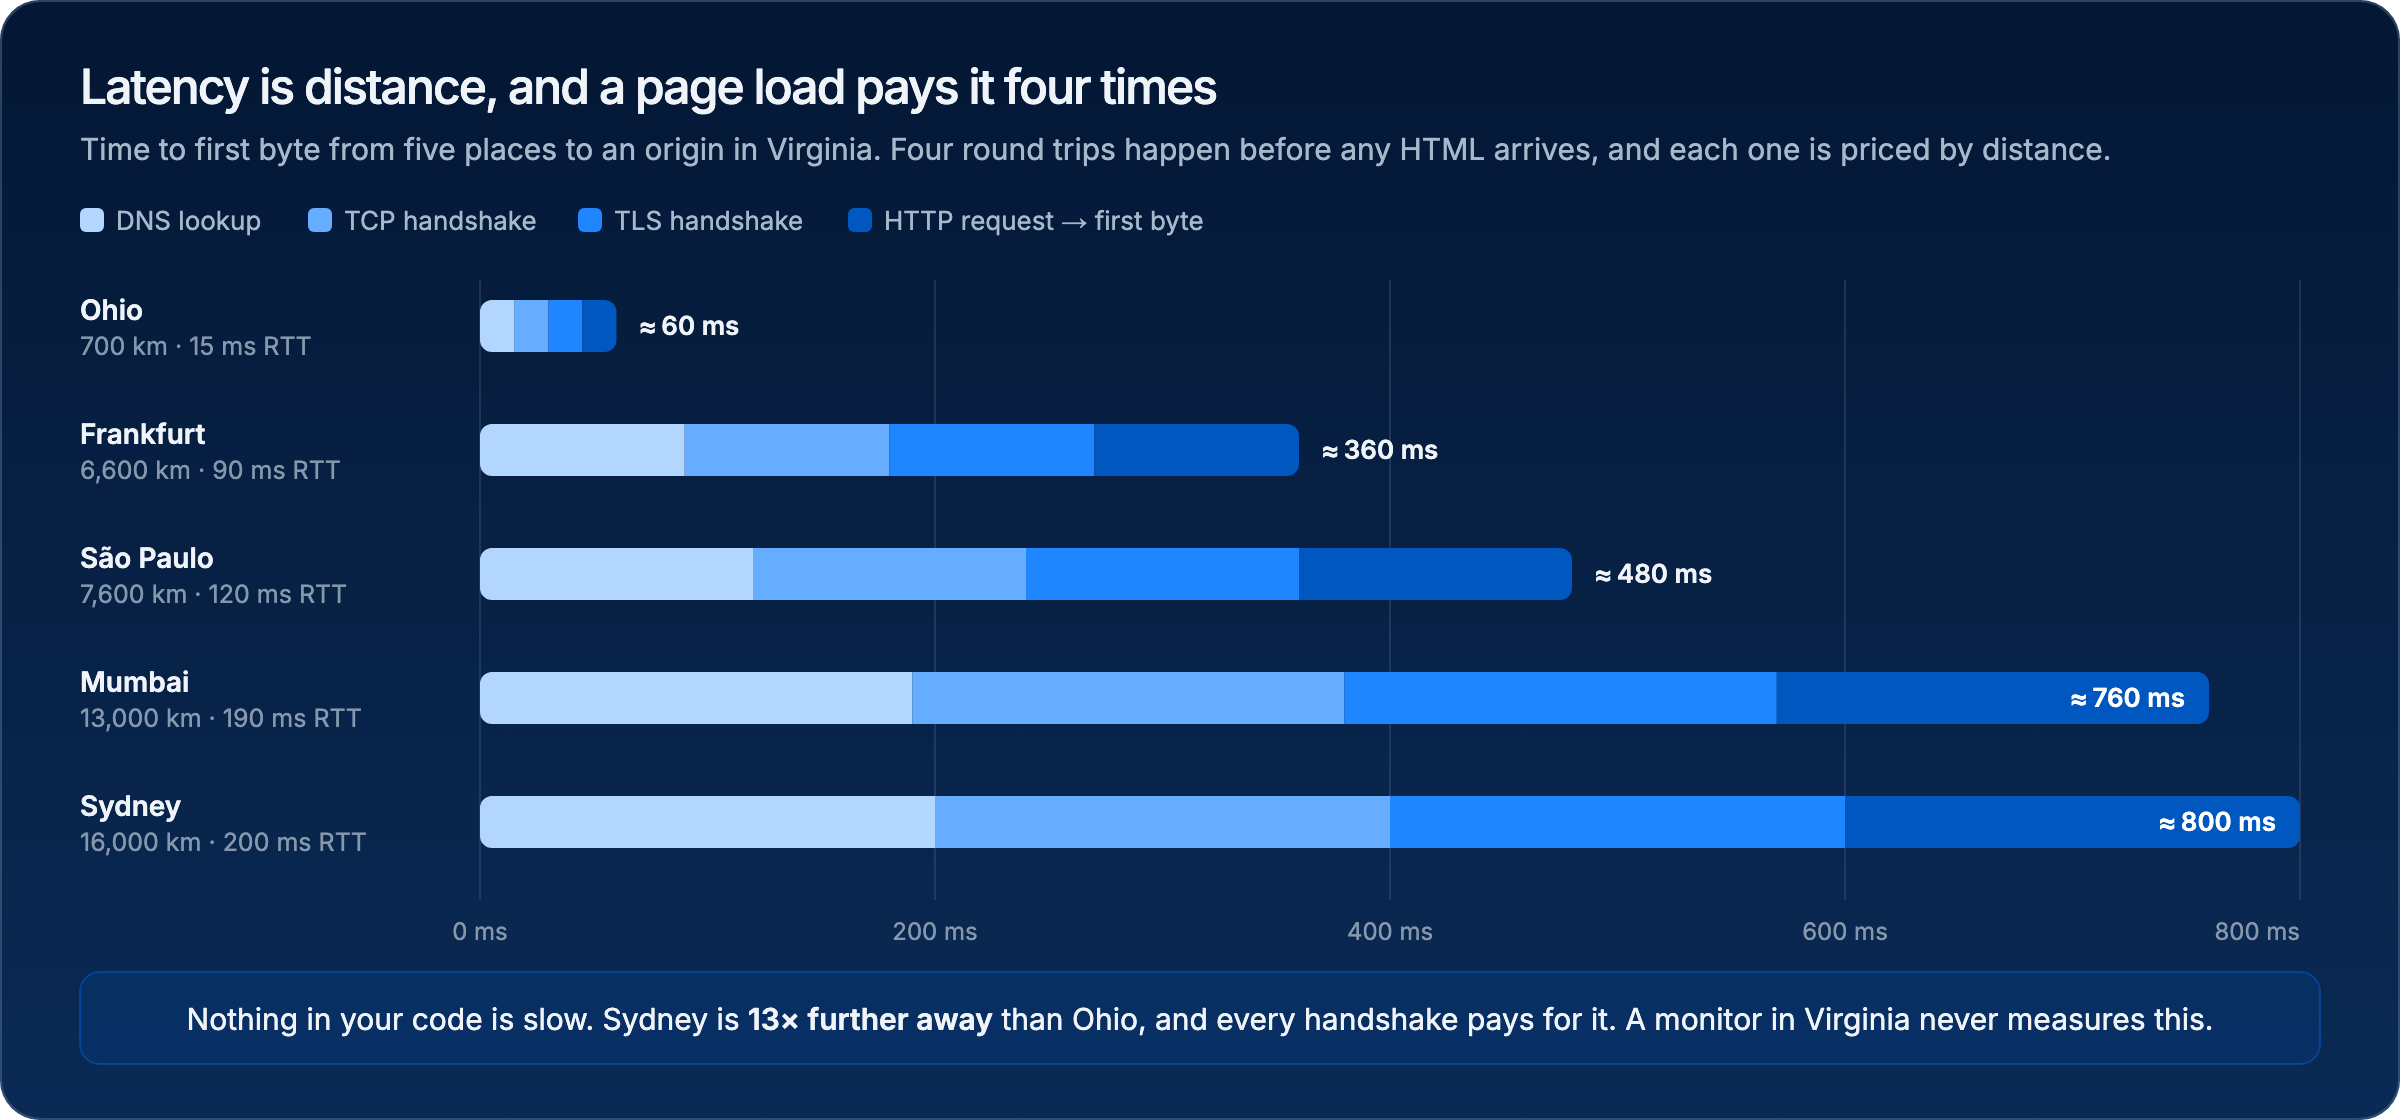
Build it in three steps
Step 1: Measure from everywhere
Before you can choose locations, you need to know how your site behaves from each one. Put the locations in one file and treat it as configuration, not as a per-check afterthought.__checks__/locations.ts
__checks__/homepage-world.check.ts
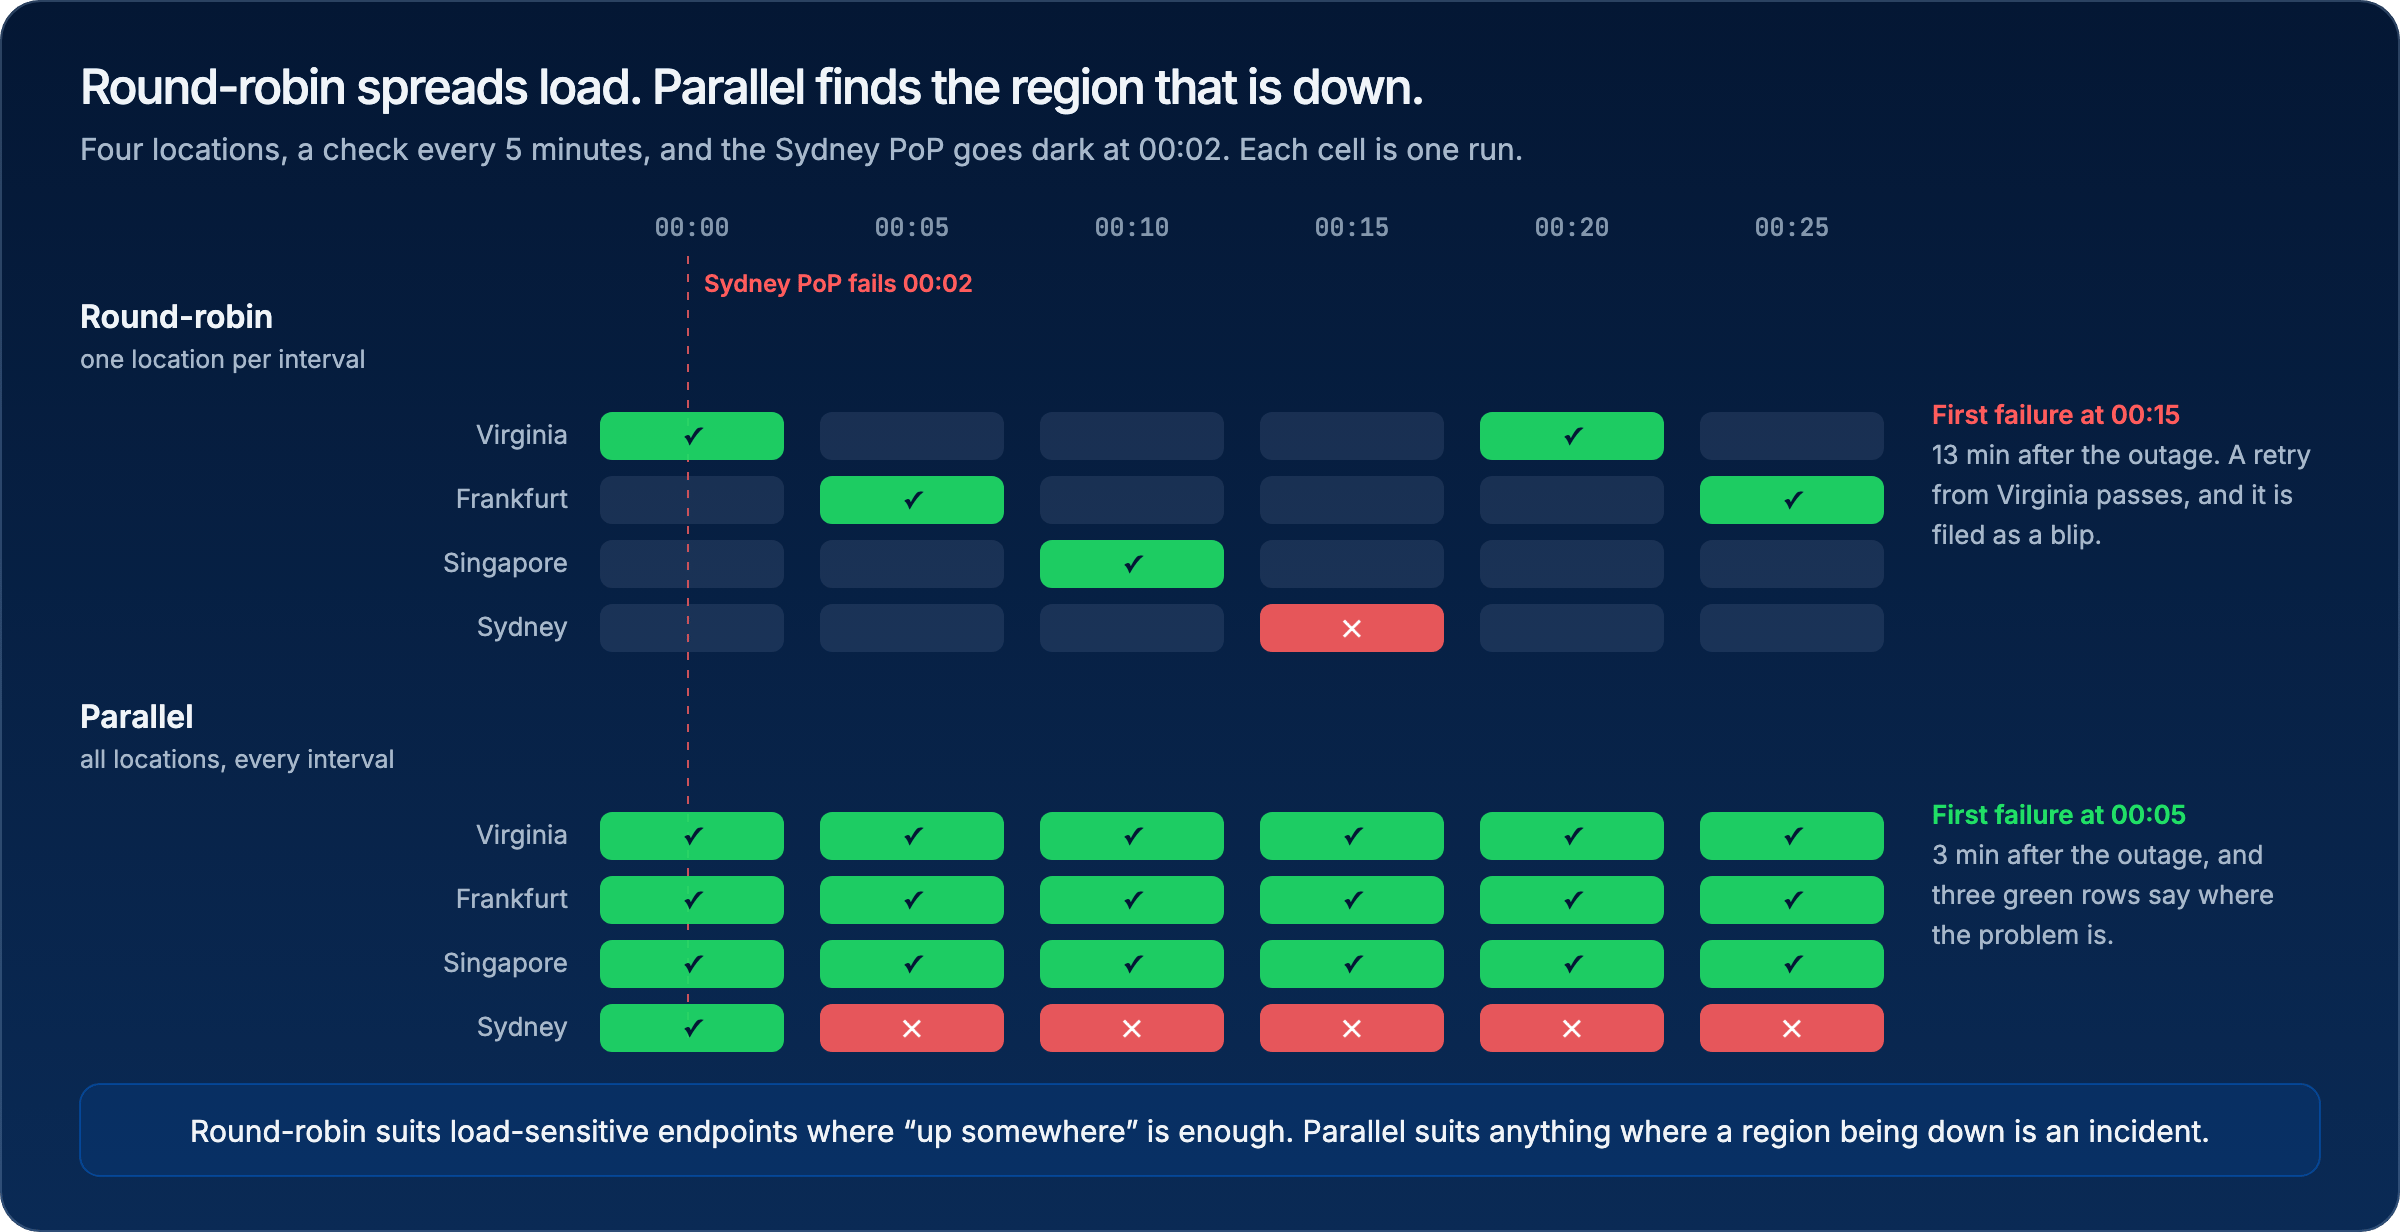
runParallel is the important line. Checkly schedules multi-location checks two ways. Round-robin runs one location per interval and rotates. Parallel runs every location every interval.
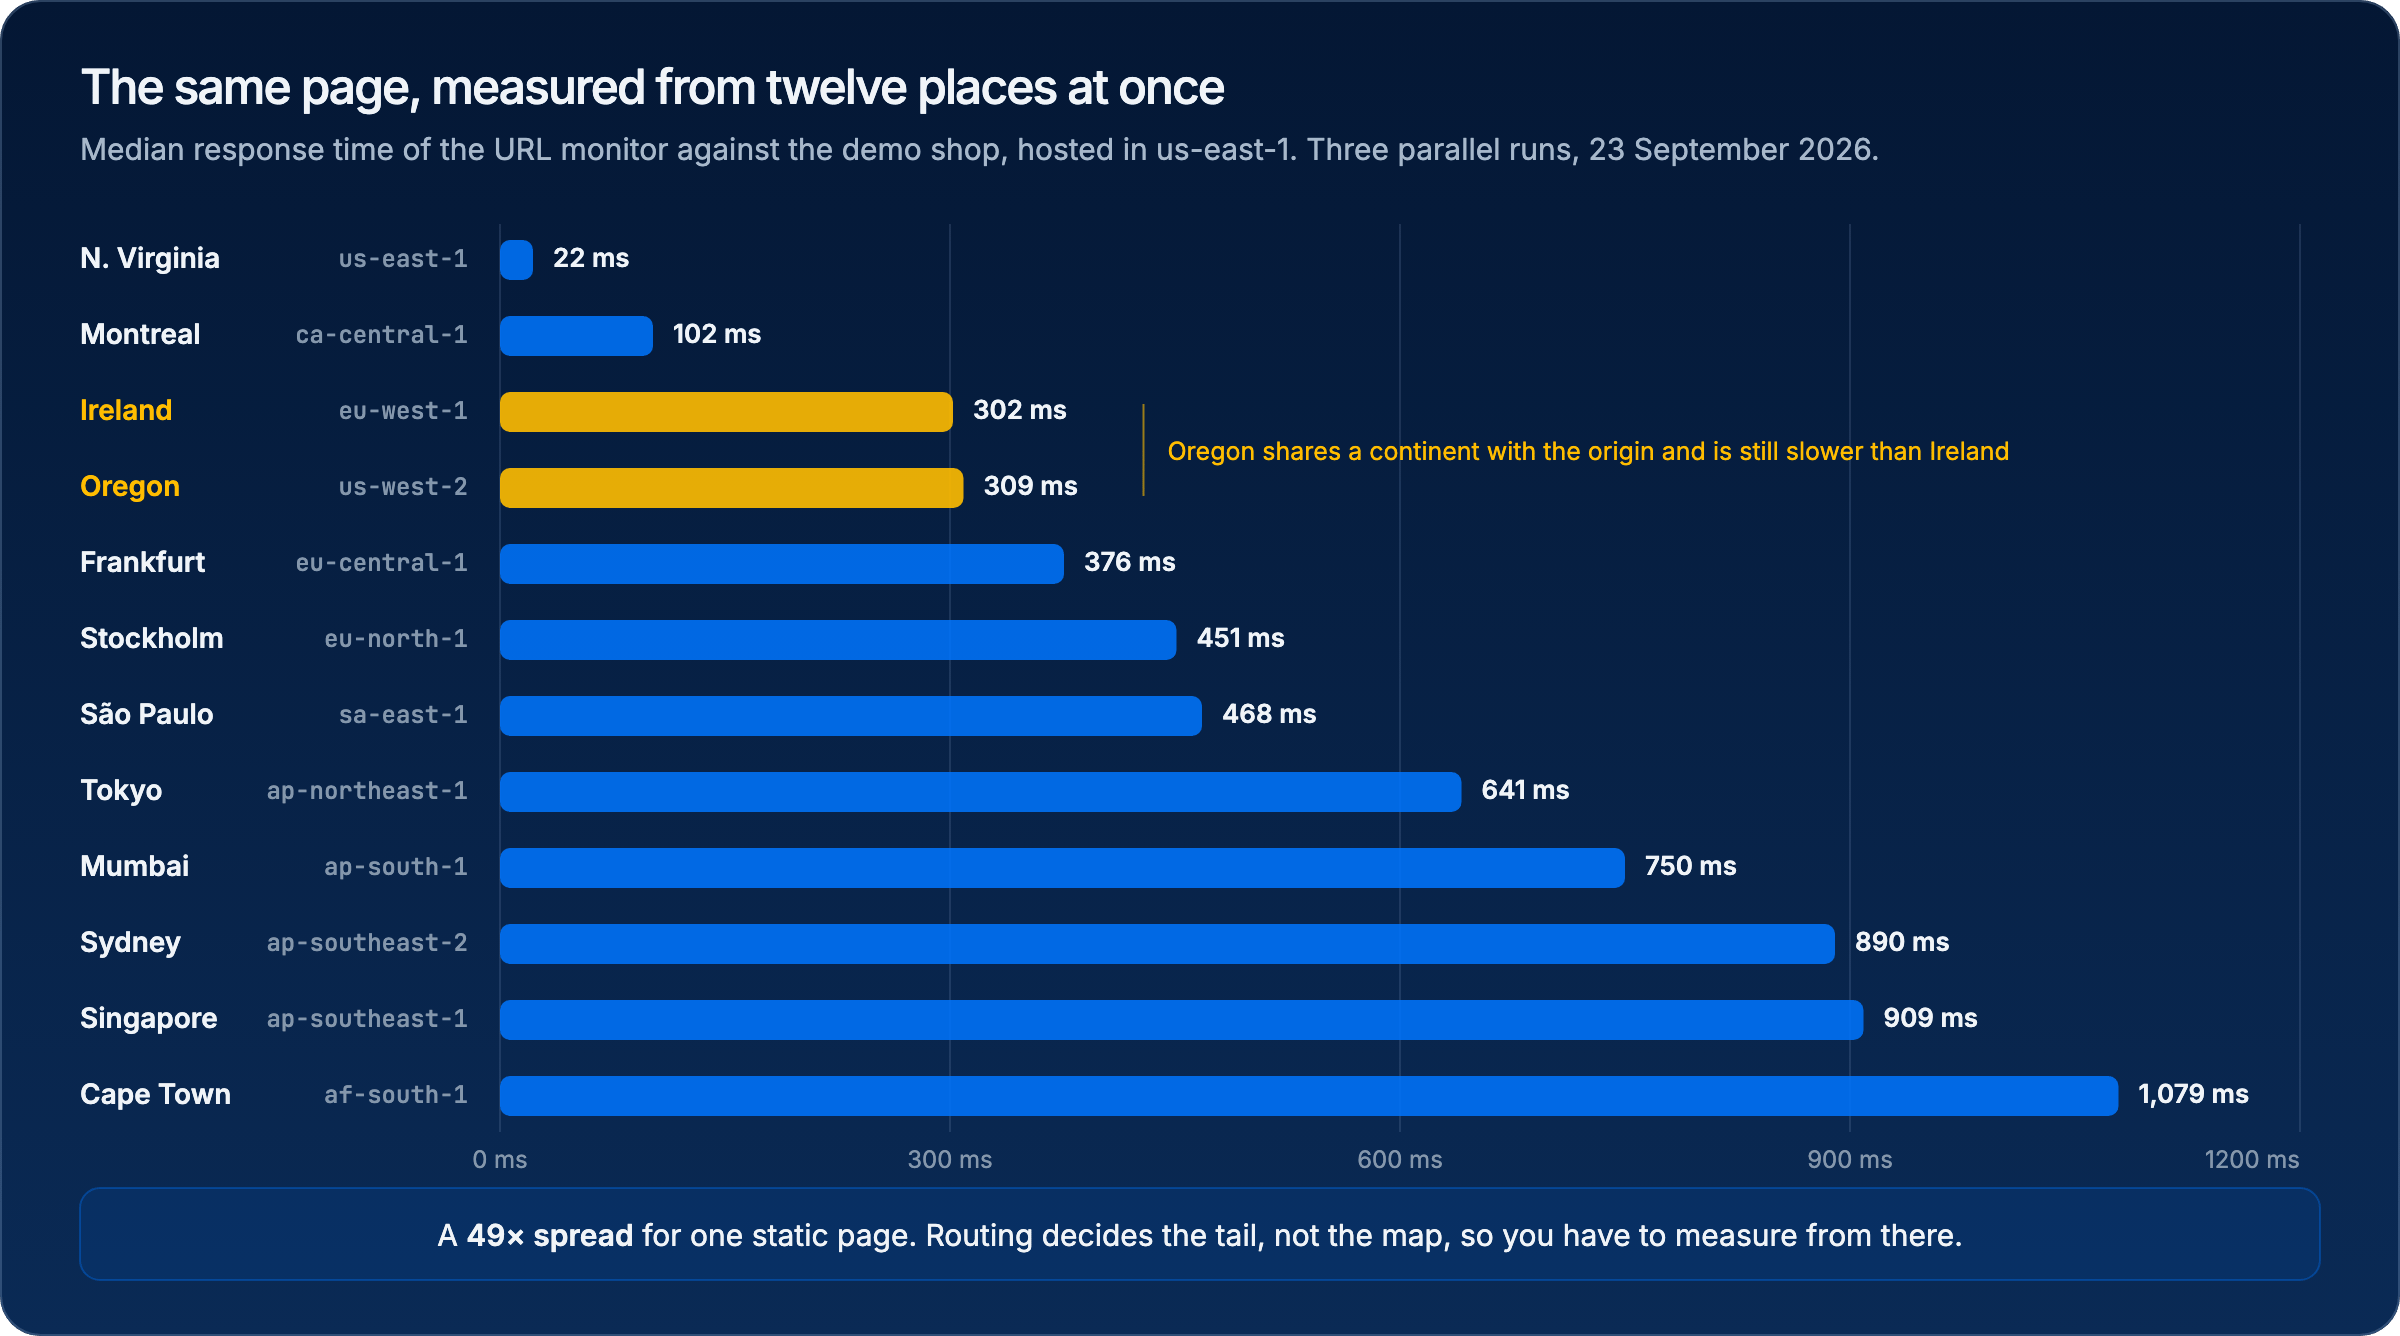
Bahrain shows 0 ms with a skipped marker in the same runs: the check did not execute there, so the chart leaves it out. Treat a location that is implausibly fast the same way you treat one that fails, and look at the raw result before you trust it.
Step 2: Choose the locations that matter
Thirteen locations is right for a cheap measuring monitor, not for every check. Twenty-two public locations is a menu, not a target. Build a default set from three sources, and use the chart from Step 1 to check your picks. Where your users are. Export sessions or revenue by country from your analytics, group the countries into markets, and keep the markets that matter to revenue. Monitor from one location per market, not one per country. Users in the same market mostly share DNS resolvers, CDN edges, and transit, so one location sees the path they take.
For a shop that is 60% US, 25% EU, and 10% India, that is
us-east-1, eu-central-1, and ap-south-1.
Where you run. Add one location in or next to every cloud region you deploy to, so a bad regional deploy shows up on its own row. Include standby regions: a failover region that serves no traffic until the day you need it is the one most likely to be broken on that day. The same shop runs in Virginia with failover in Ireland, which adds eu-west-1 (us-east-1 is already on the list). This only isolates a region if latency- or geo-based routing sends the monitor to its nearest region. If yours does not, point a separate check at the region’s own hostname.
One control, far from both. Pick a location with no users and no infrastructure. If only the control fails, the problem is the path, not the service. The slow end of the Step 1 chart is a good place to look: ap-southeast-2 works for this shop and gives you the worst-case latency to design for.
Name each source in locations.ts and make the combined set the project default, so a new check picks it up without anyone choosing locations again.
__checks__/locations.ts
checkly.config.ts
locations, like the world monitor, keep them. Everything else runs from the five core locations.
Start with five or six. Add a location when a real incident would have been caught sooner by it, not before. Review the set when your analytics show a new market, when you add or retire a region, and when you change CDN or DNS provider. For anything the public internet cannot reach, such as an office, a VPC, or a customer’s network, a private location runs the same checks from inside.
Step 3: Make the regions vote
The world monitor tells you where the site is slow. Checkout is the flow that should wake someone up, and it is also the most expensive check you run. That shapes how many locations it gets. In a parallel check, every location runs at every interval, and each one is a check run. Width multiplies:
Spend the width where it is cheap. URL, TCP, DNS, and ICMP monitors run in milliseconds, so run them from the core set or wider: they are what finds a regional path problem. API checks follow the core set. Browser checks and Playwright check suites take seconds to minutes per run, so one location per continent with meaningful revenue is enough to prove the flow works there.
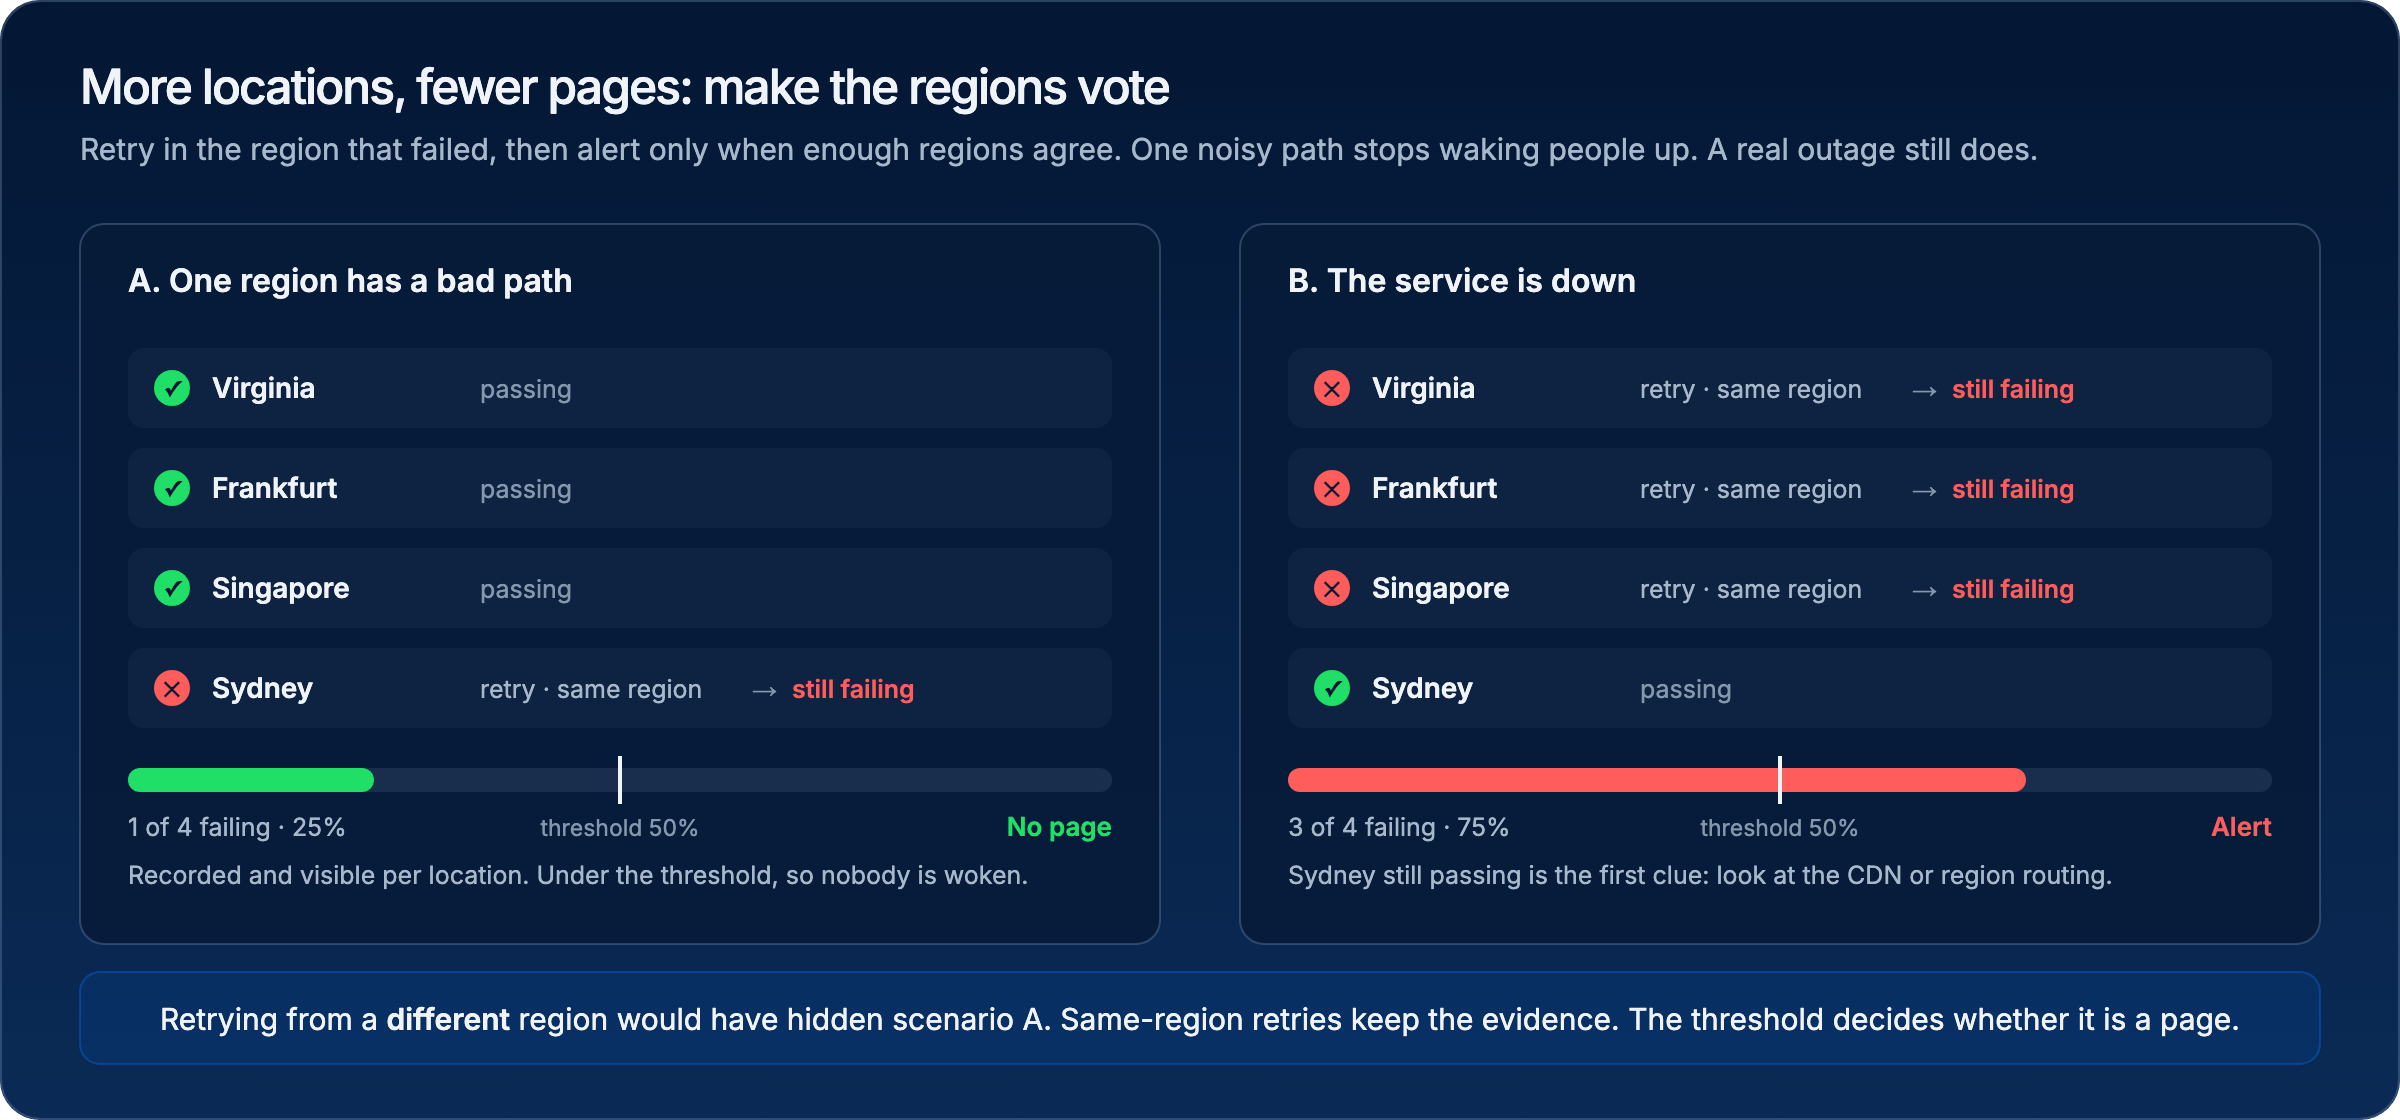
Even three locations create more chances for one noisy path to page someone. Two settings turn that around. Retry in the same region, so a flaky path is confirmed rather than papered over. Then alert only when a percentage of locations agree.
__checks__/checkout-regions.check.ts
Terminal
Terminal
Terminal
Verify it works
With the Checkly MCP server connected, the same read is one prompt away, and it is the kind of question you will ask again after every deploy:Prompt
degradedResponseTime you set. If one is not, that is the number to design around, because it is what a real user there is waiting. Then open the checkout check: three rows, one per continent, each with its own screenshots and trace, so a failure in one is already localised before anyone looks at a log.