Follow this comprehensive guide to create your first heartbeat monitor in Checkly. We’ll walk through each configuration step and explain the best practices to ensure your monitoring is effective.Documentation Index
Fetch the complete documentation index at: https://checklyhq.com/docs/llms.txt
Use this file to discover all available pages before exploring further.
Prerequisites
Prerequisites
Before creating your heartbeat monitor, make sure you have:
- A Checkly account with Team or Enterprise plan
- A scheduled job, script, or automated process you want to monitor
- Access to modify the code/script that runs your task
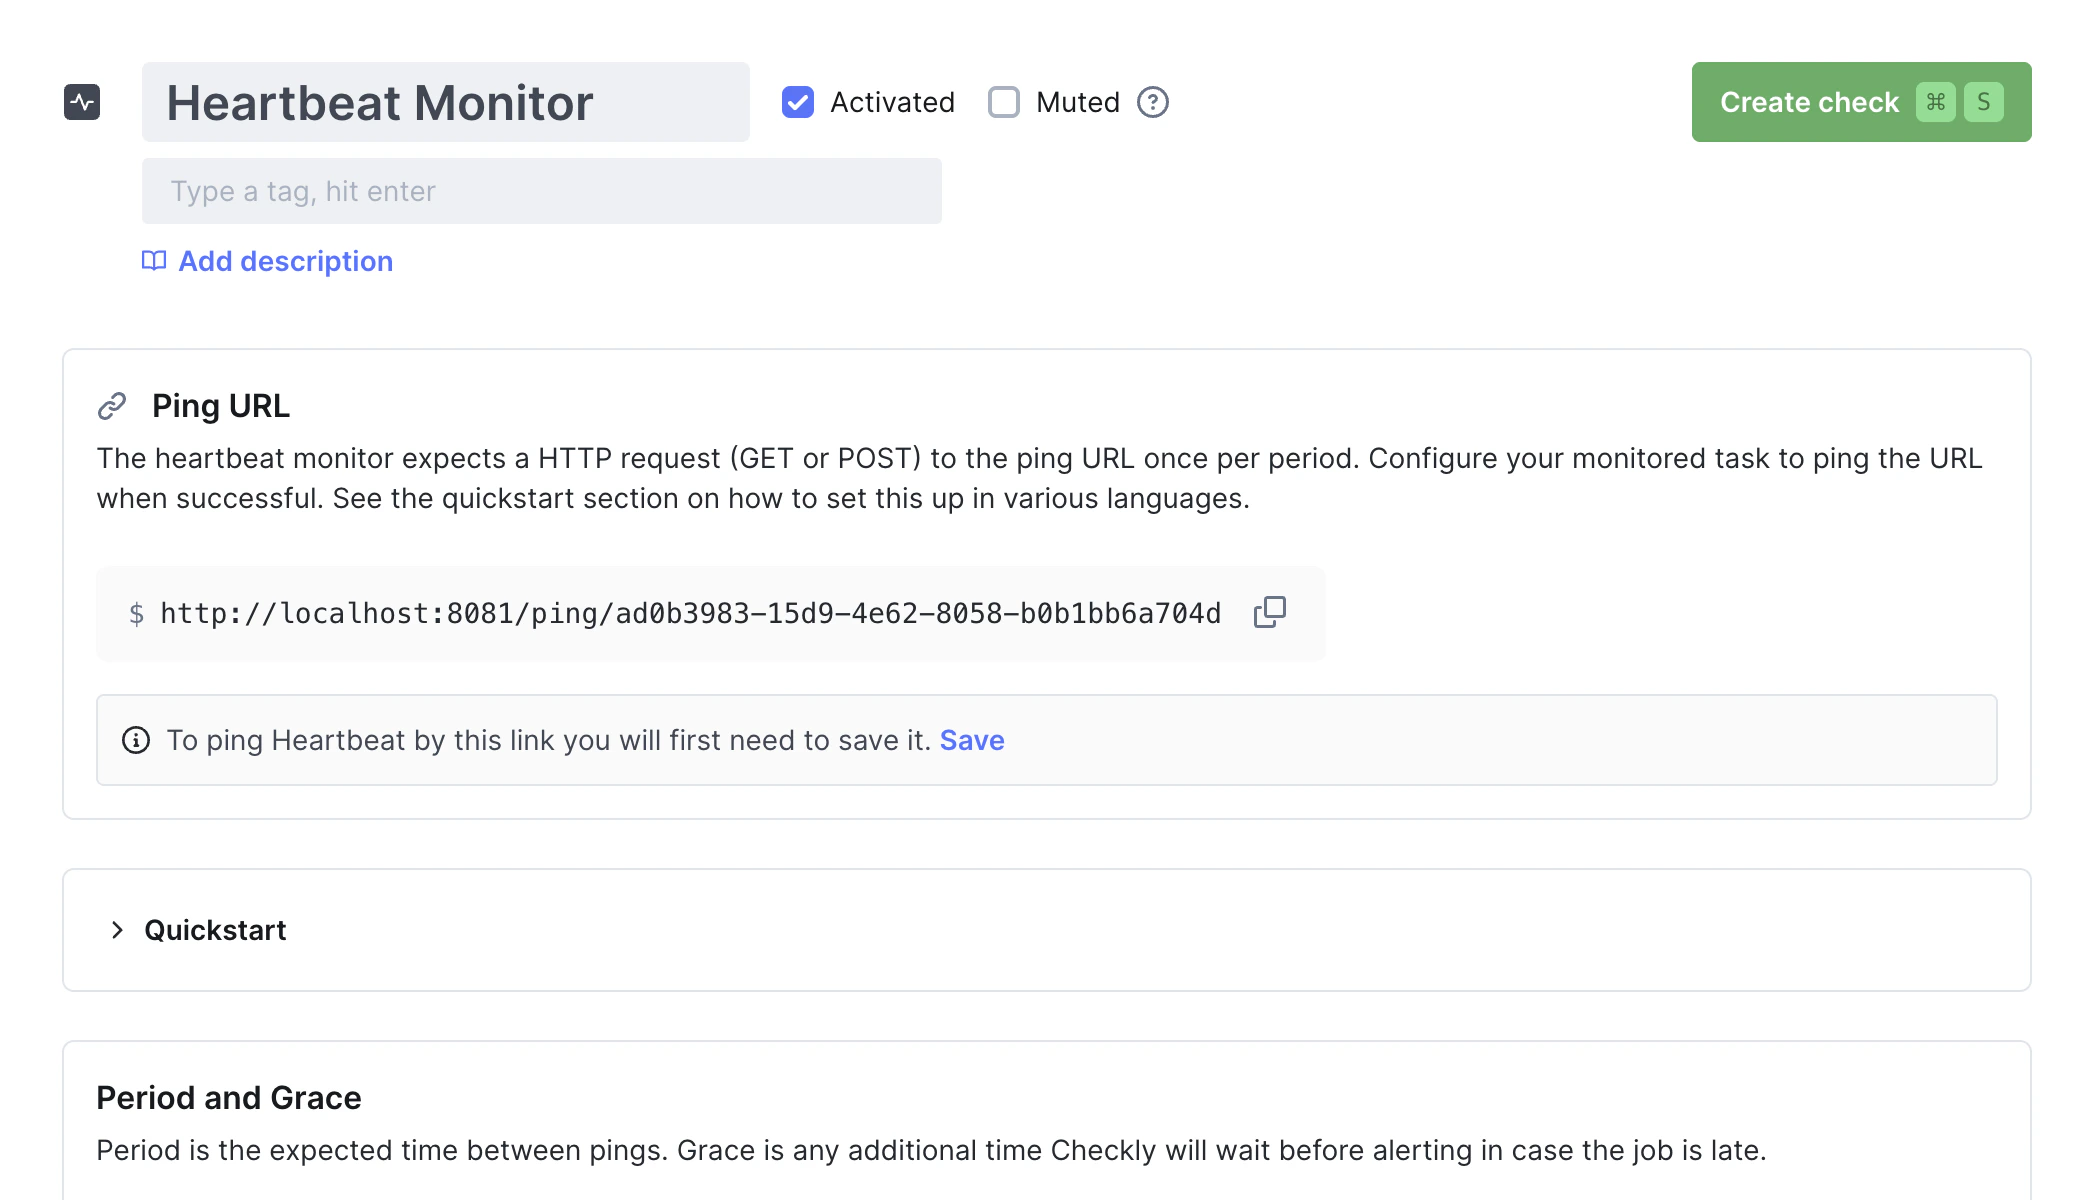
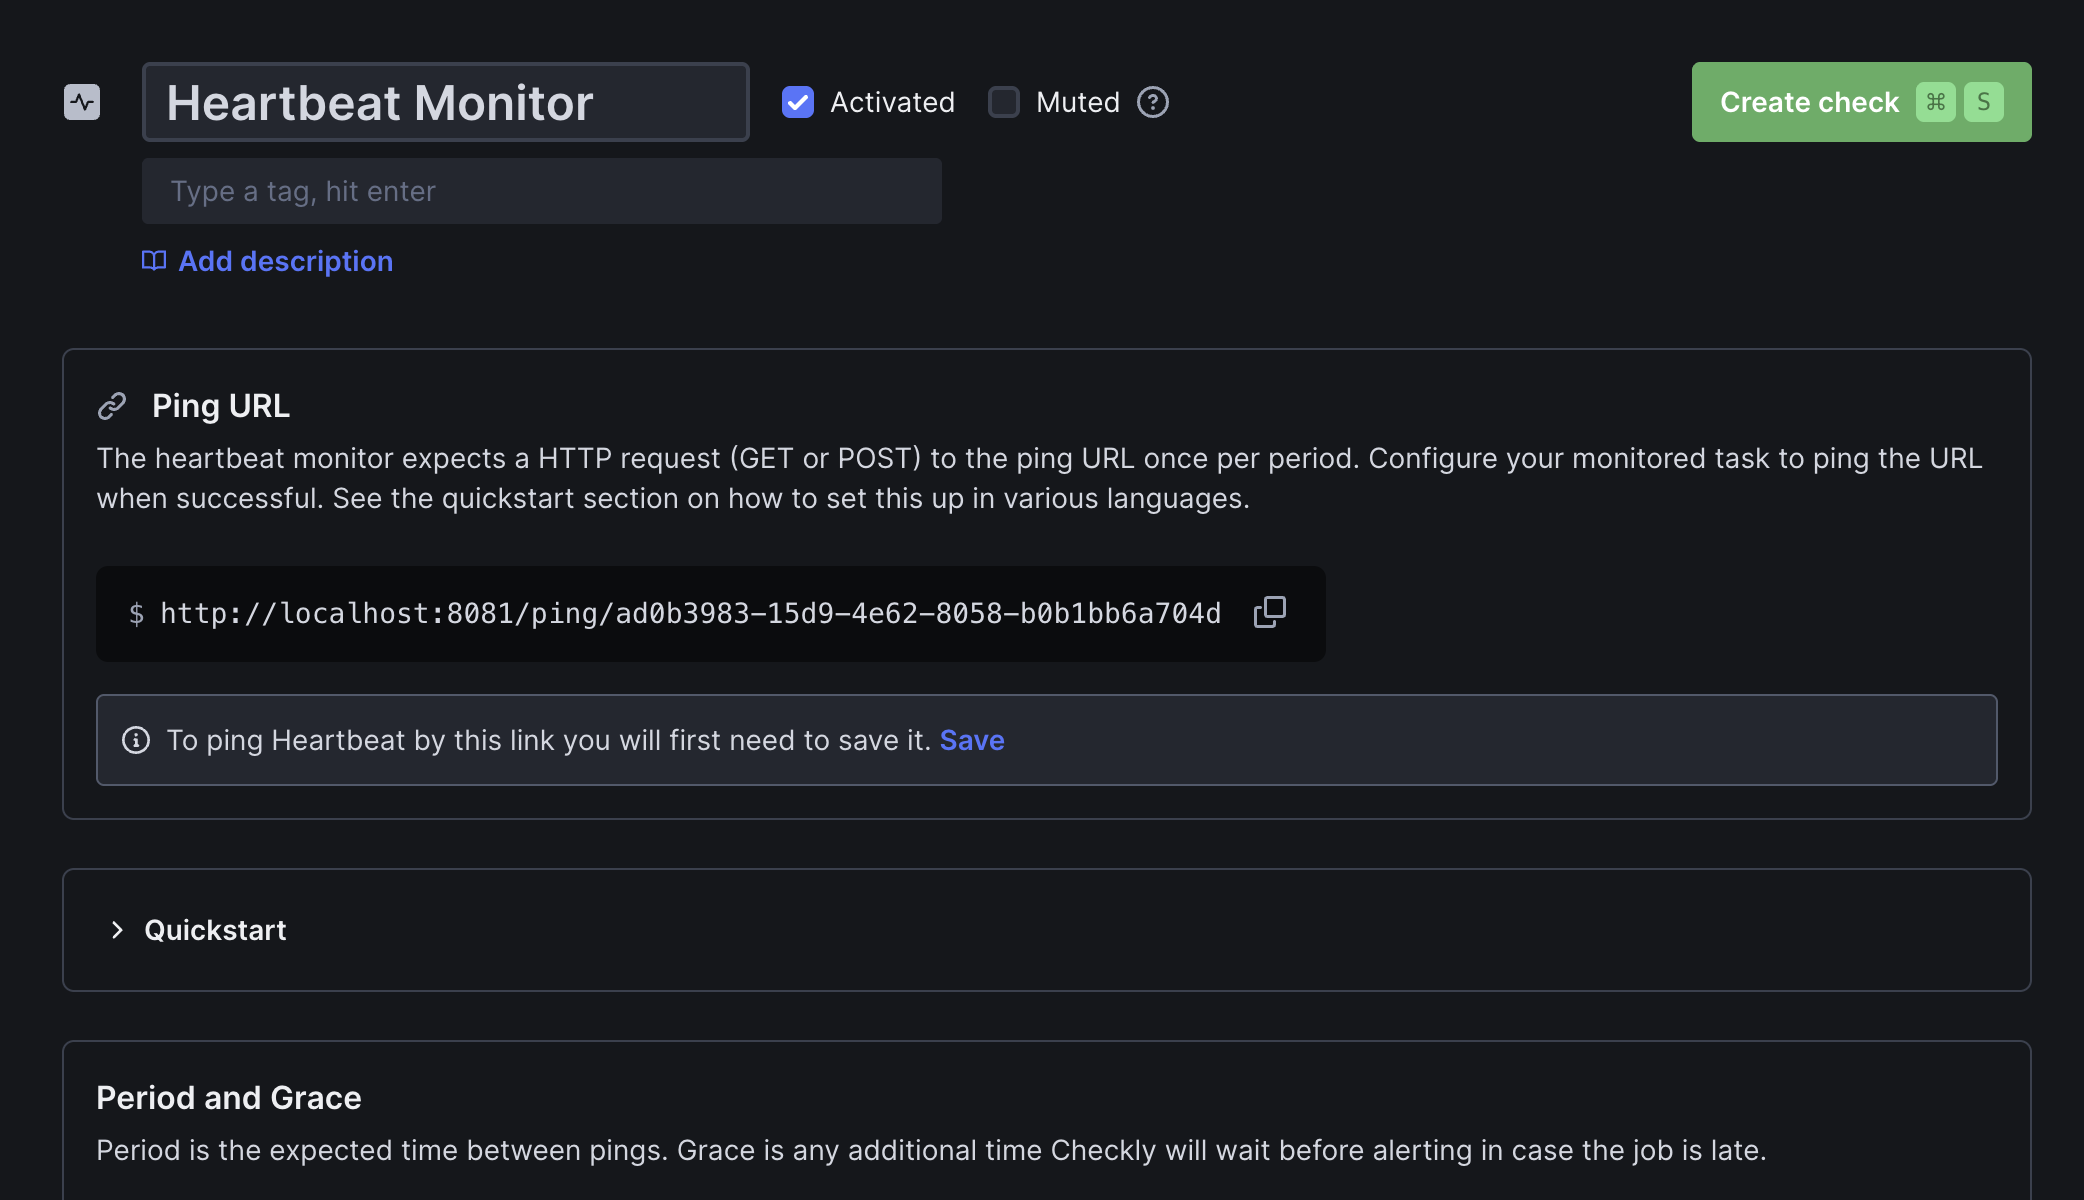
Step 1: Basic Configuration
Start by giving your monitor a descriptive name and relevant tags and description. Choose something descriptive that clearly identifies what the monitor is tracking, like “Nightly Database Backup” or “Weekly Reports Job”. Use tags to group related monitors and make them easier to find and manage.Step 2: Timing Configuration
The timing configuration is the heart of your heartbeat monitor. You need to specify when you expect pings and how much flexibility to allow.Period Setting
The period defines how often your task should ping Checkly:- Daily jobs: Set to 1 day
- Weekly jobs: Set to 7 days
- Hourly jobs: Set to 1 hour
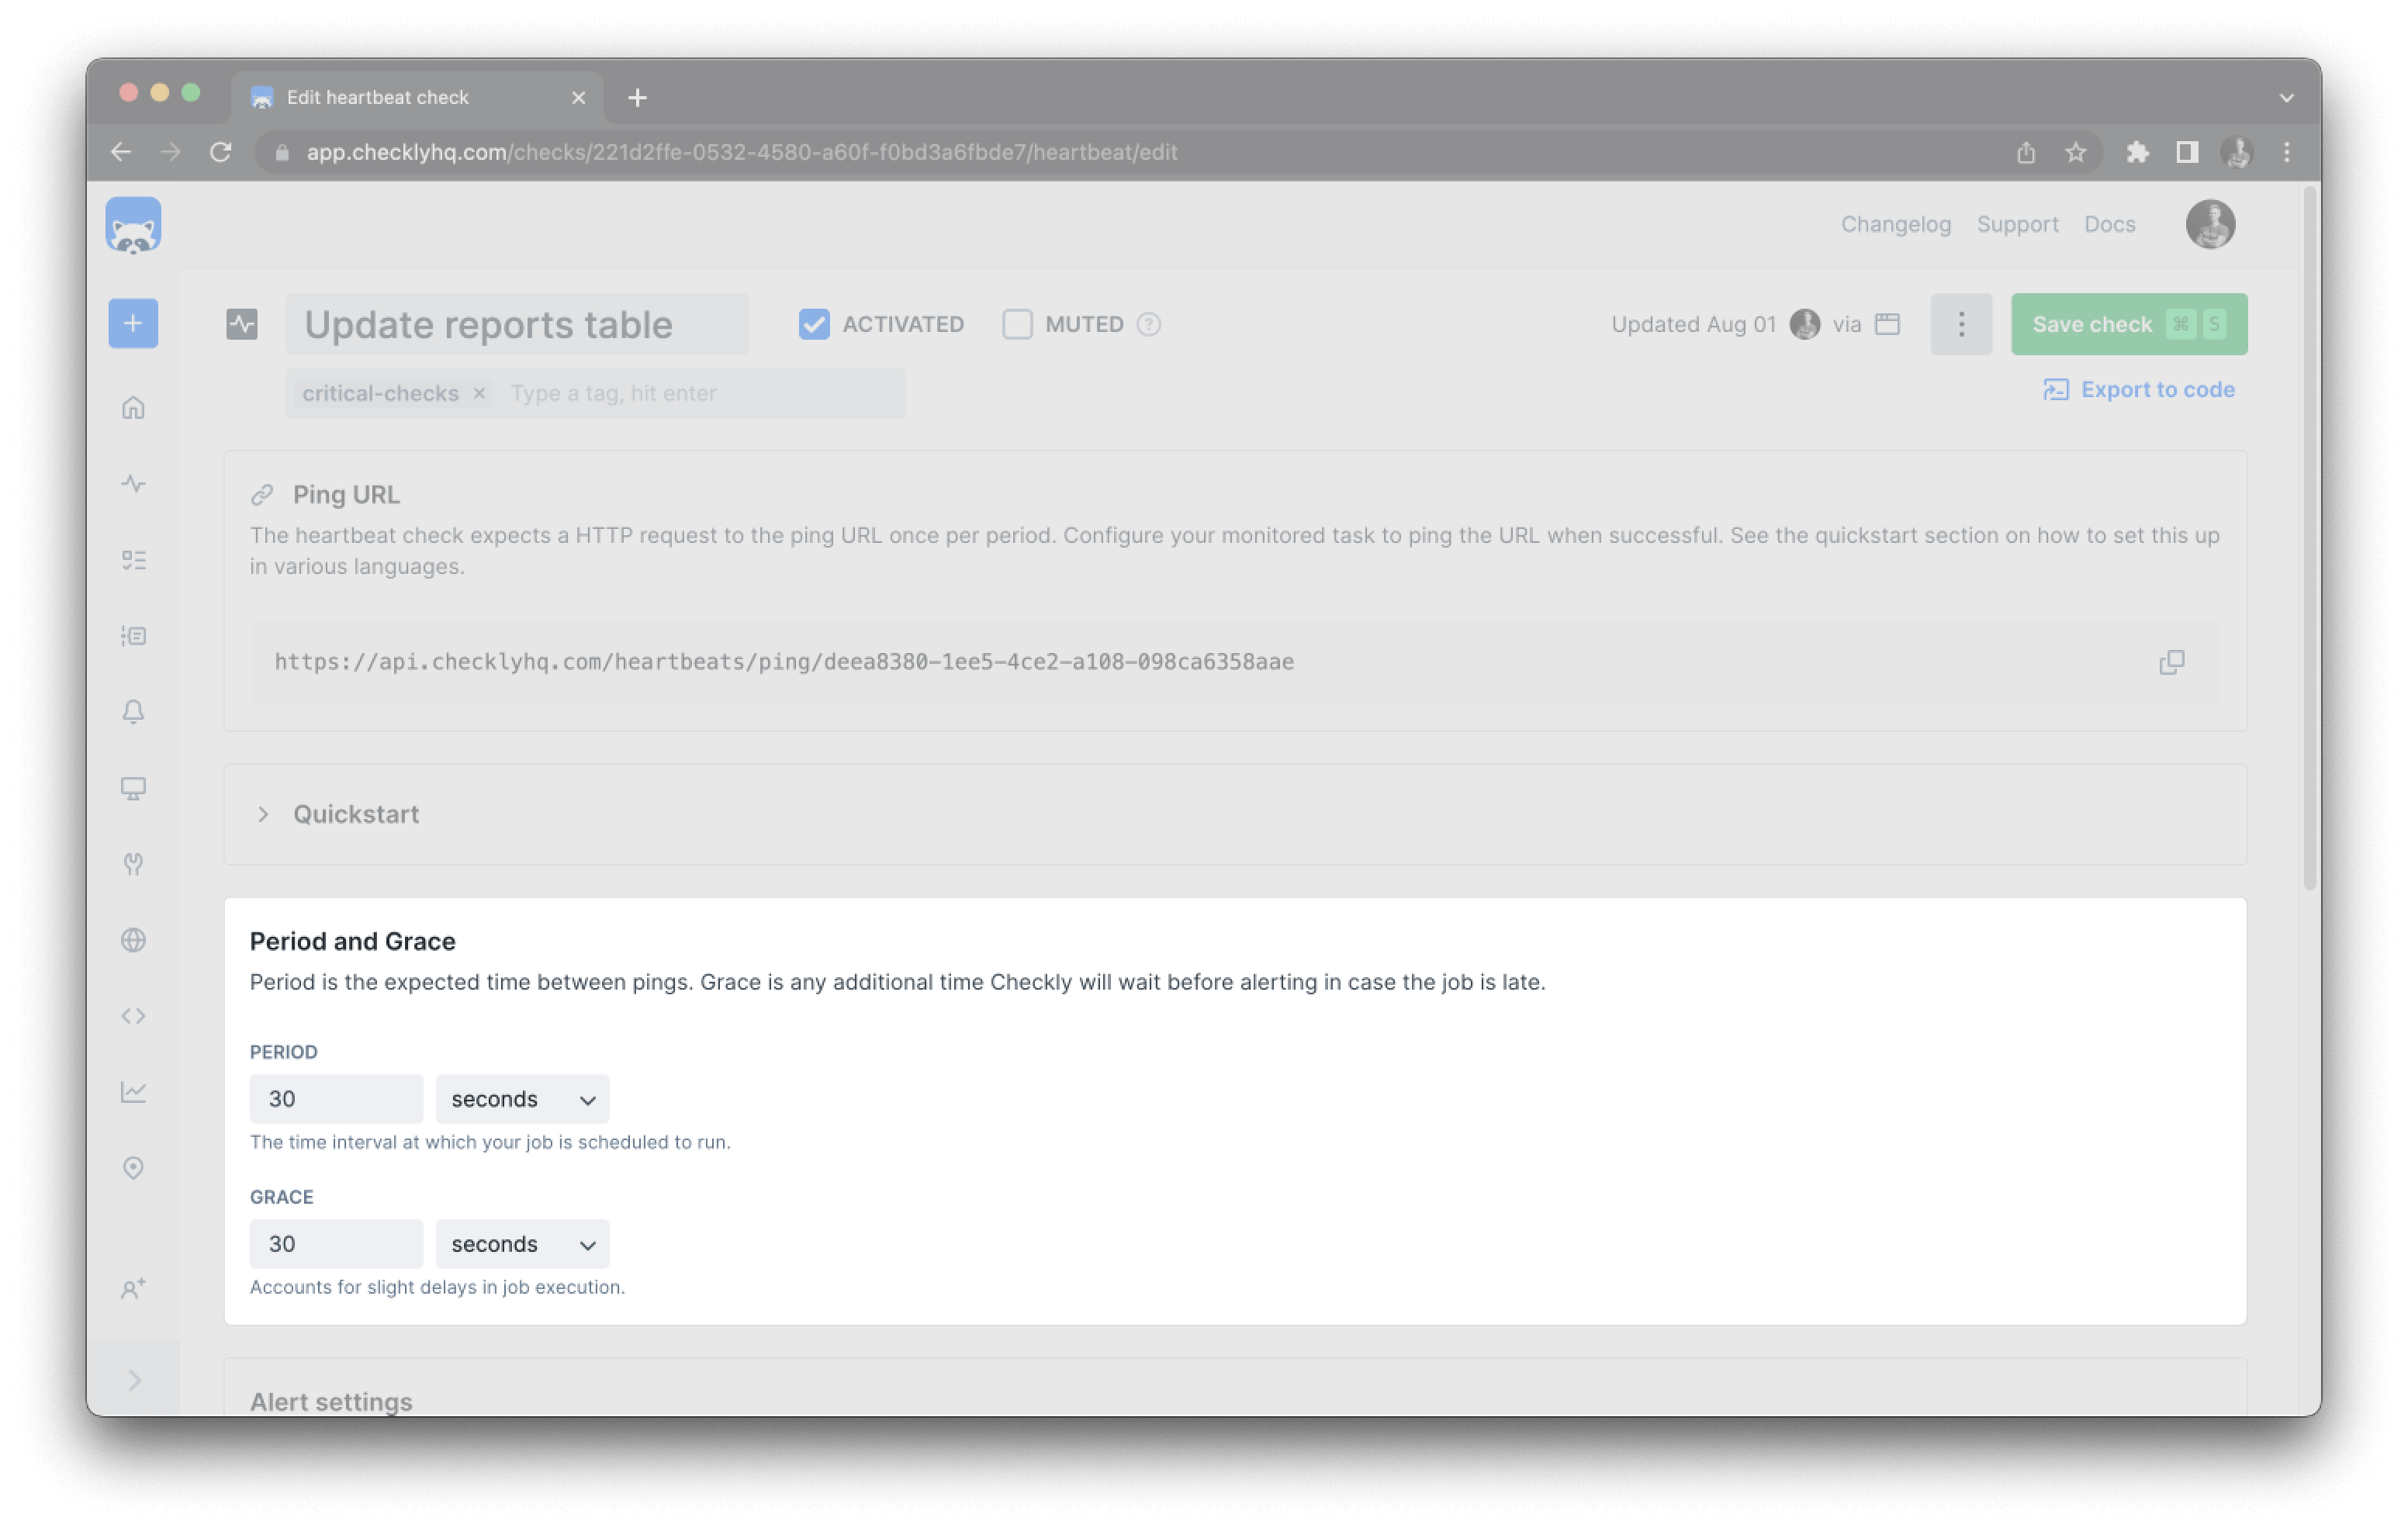
Grace Period
The grace period provides extra time before alerting, compensating for natural variance in job execution times: Common grace period examples:- Daily backup at 2 AM with 30-minute grace → Alert if no ping by 2:30 AM
- Weekly report on Fridays with 4-hour grace → Alert if no ping by end of Friday
- Hourly sync job with 5-minute grace → Alert if ping is more than 5 minutes late
Understanding Grace Periods
Understanding Grace Periods
Grace periods compensate for natural variance in job execution times. For example:
- Daily backup at 2 AM with 30-minute grace → Alert if no ping by 2:30 AM
- Weekly report on Fridays with 4-hour grace → Alert if no ping by end of Friday
- Hourly sync job with 5-minute grace → Alert if ping is more than 5 minutes late
- Normal variance in your job execution time
- Acceptable delay before you need to know about failures
- Time needed for any retries or recovery processes
Timer Behavior
Timer Behavior
The heartbeat timer works predictably: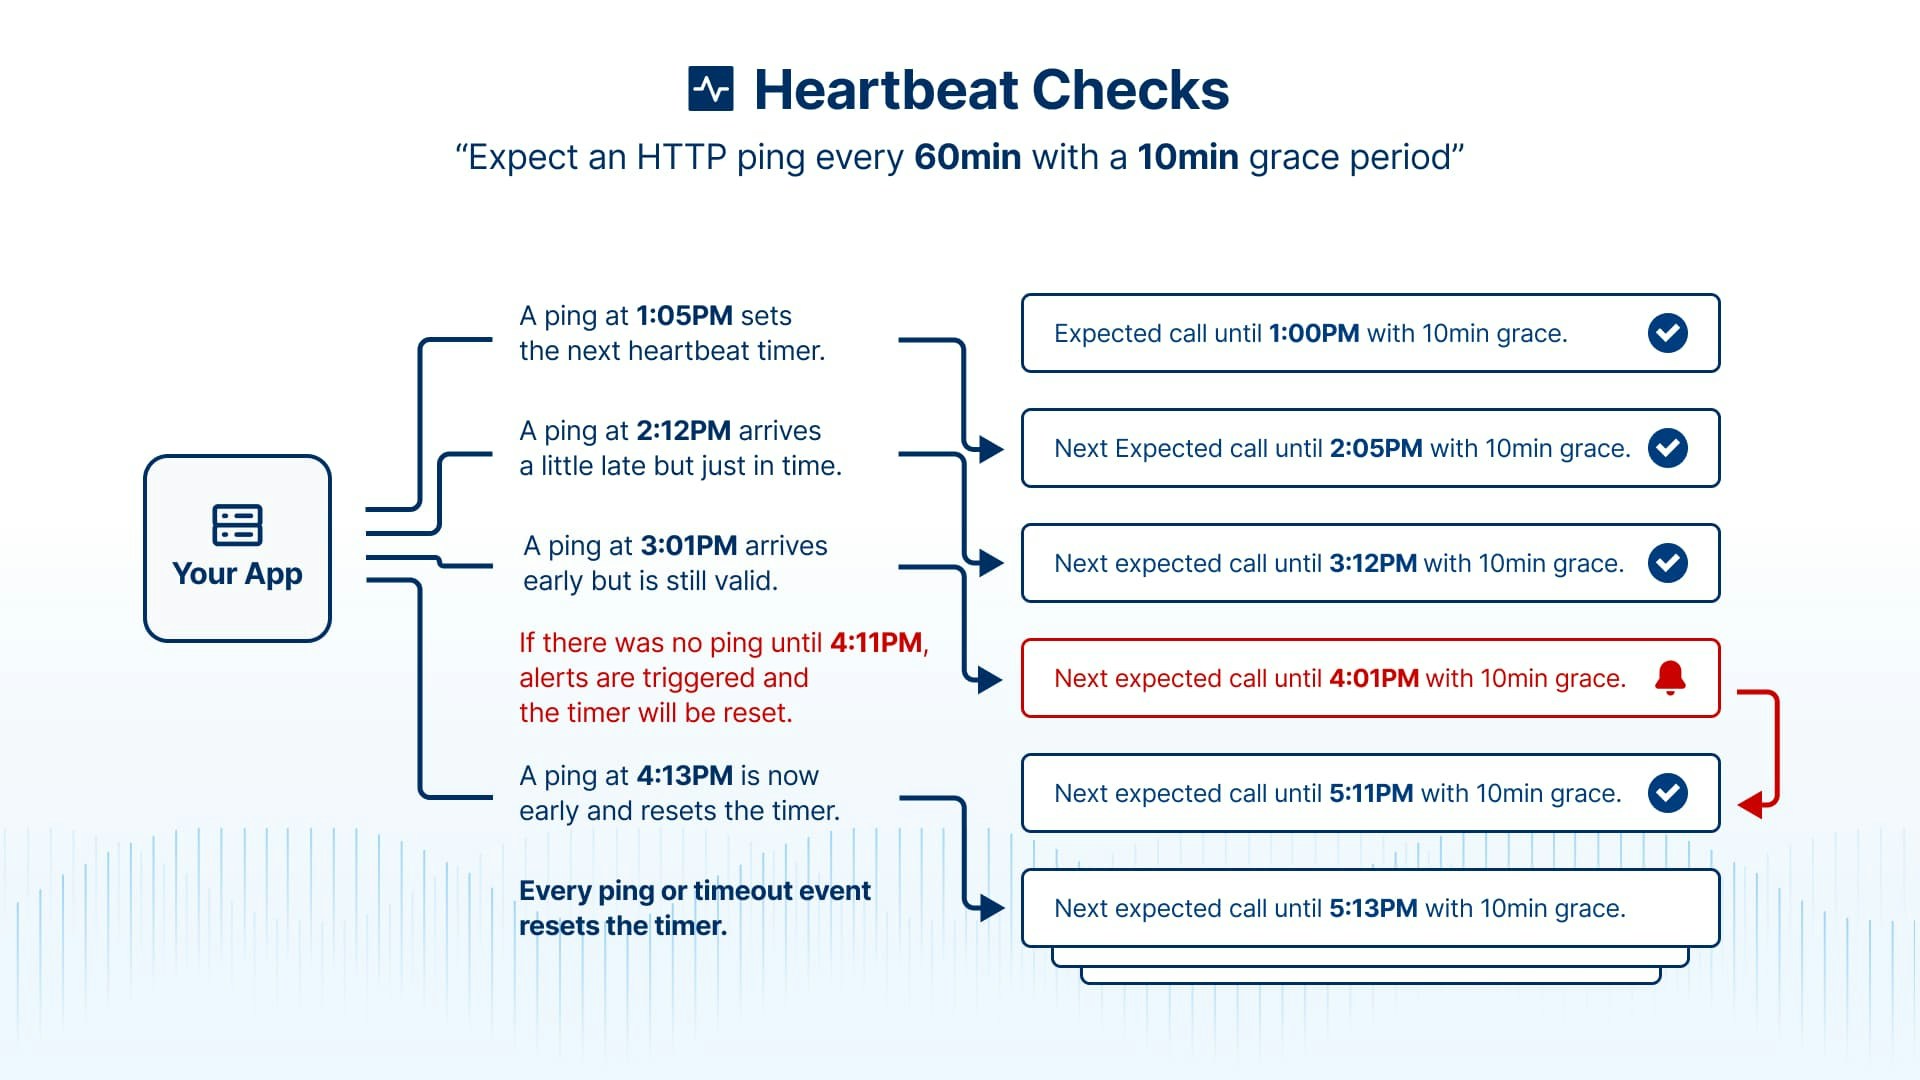
- First ping starts the timer - When you send the first ping, monitoring begins
- Each ping resets the timer - Every successful ping resets the countdown
- Alerts also reset the timer - After an alert fires, the timer restarts
- Deactivation resets everything - Pausing and resuming a monitor restarts timing
How to Choose the Right Grace Period
How to Choose the Right Grace Period
Consider Your Job Variance
- How much does your job’s runtime vary?
- Account for network delays and system load
- Include time for any retry logic
- Too short: False alerts during normal delays
- Too long: Slower failure detection
- Start conservative, adjust based on experience
Step 3: Alert Configuration
Connect your heartbeat monitor to alert channels to be notified when pings are missing.Choosing Alert Channels
For immediate awareness:- Email notifications - Good for individual monitoring
- Slack or Teams - Great for team coordination and visibility
- PagerDuty - Escalation and on-call management
- Webhooks - Custom integrations with your systems
- Low priority: Email only
- Medium priority: Slack + Email
- High priority: PagerDuty + Slack + Email
Alert Timing
Configure when alerts should fire:- Immediate: Alert as soon as grace period expires
- Delayed: Wait for multiple missed pings before alerting
- Escalation: Start with email, escalate to PagerDuty after delays
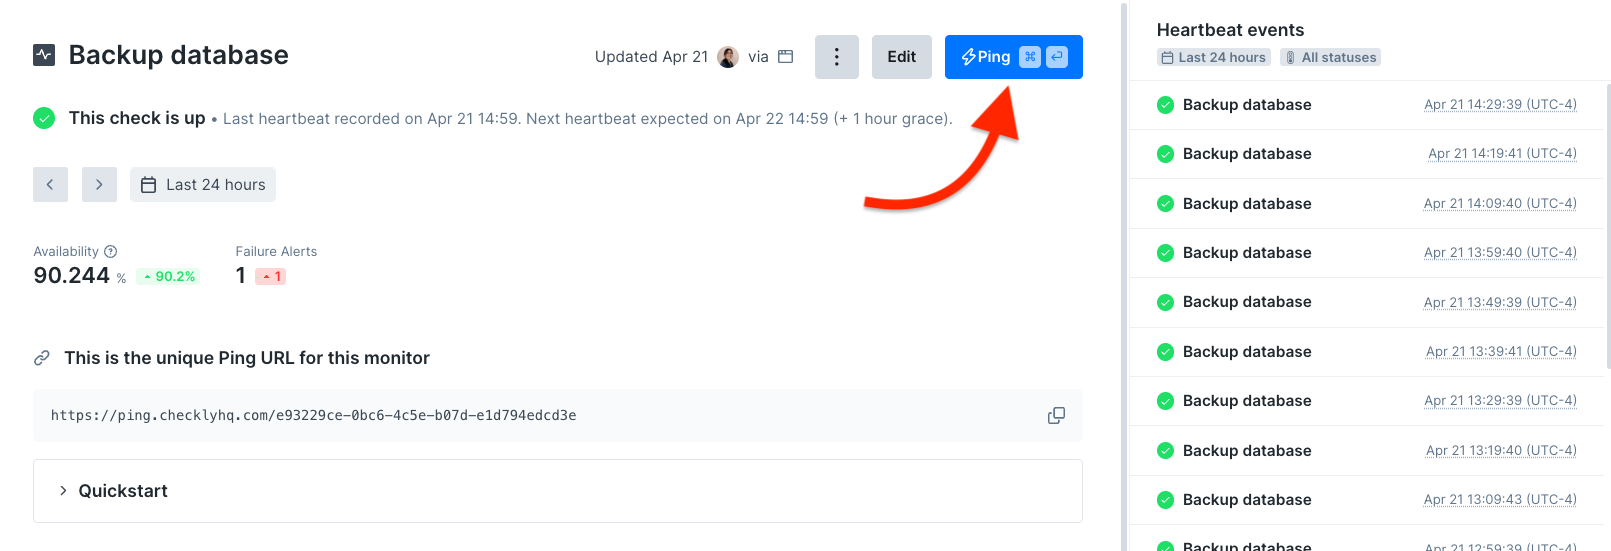
Step 4: Ping URL and Implementation
Once created, your heartbeat monitor provides a unique ping URL. Your tasks should make an HTTPGET or POST request to this URL when they complete successfully.
Step 5: Testing Your Setup
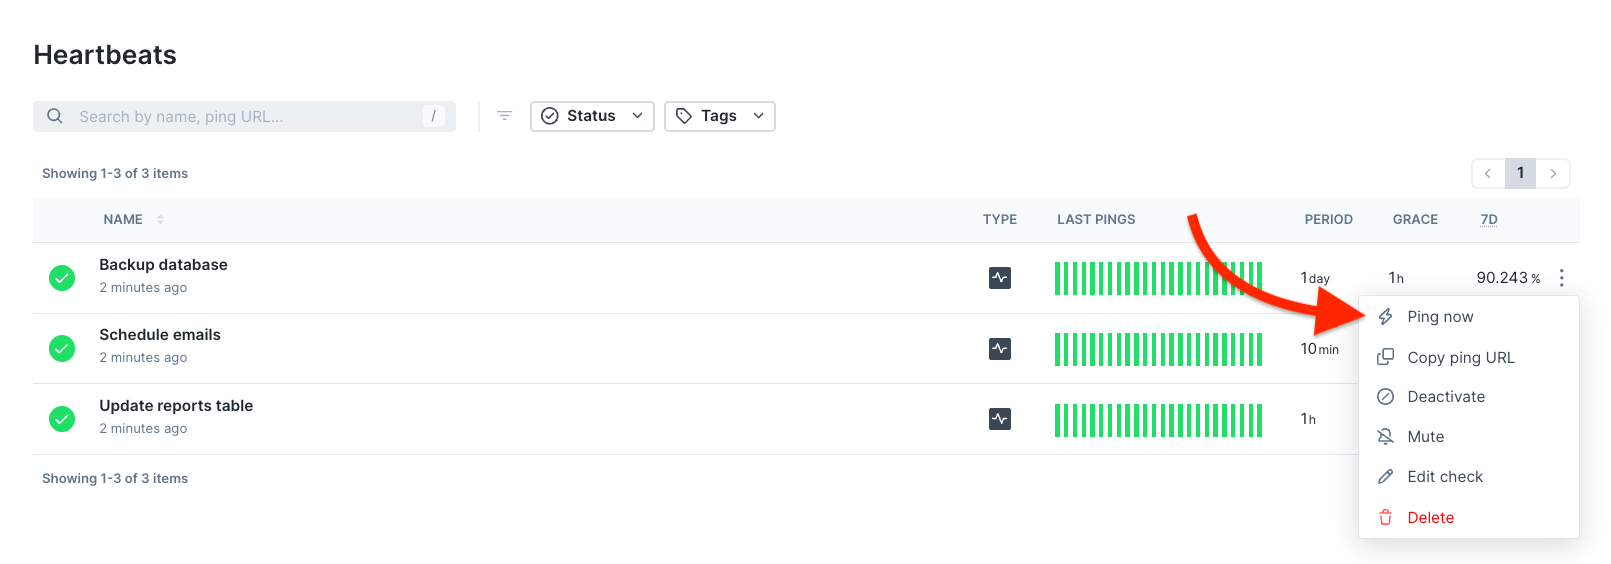
Before deploying to production, test your heartbeat monitor:Manual Testing
You can manually send pings through the Checkly interface to:- Test your monitor setup before deployment
- Start the timer for a newly created monitor
- Reset alerts during maintenance windows
- Verify alert configurations are working
Common Configuration Patterns
- Daily Backup Job
- Weekly Report Generation
- Hourly Data Sync