Multistep checks allow you to monitor complex API workflows that span multiple endpoints and validate complete business processes. In this comprehensive guide, you’ll create your first multistep check to ensure your critical API workflows function correctly end-to-end.Documentation Index
Fetch the complete documentation index at: https://checklyhq.com/docs/llms.txt
Use this file to discover all available pages before exploring further.
You’ll need a series of API endpoints that work together to complete a business process. Multistep checks excel at testing workflows that require data to flow from one API call to the next.
Name, tags, and description
- Name: a meaningful name will not only help you and others identify your checks within Checkly, but it will help provide a better alerting experience if your checks fall into an alert state
- Tags: let you relate your checks together. They also determine which checks are shown on your dashboards
- Descriptions: add context about what a check does or why it exists
Playwright script
A valid Multistep check is based on a valid Playwright API test script. You can create these scripts either in the in-app editor, or write them in your IDE and deploy them using the Checkly CLI. For production, we recommend using the CLI so you can leverage best practices such as version control and code reviews before updating your checks.Valid Playwright Test API scripts are the foundation of a valid Multistep check. If the script passes, your check passes. If the script fails, your check fails.
Structuring a Multistep check
To preserve test isolation and provide a structured report view of Multistep checks, Checkly relies on Playwright’s test.step method. Your Multistep check can have several test steps. API requests and assertions in the same test step will be presented under the same node in the reporting structure.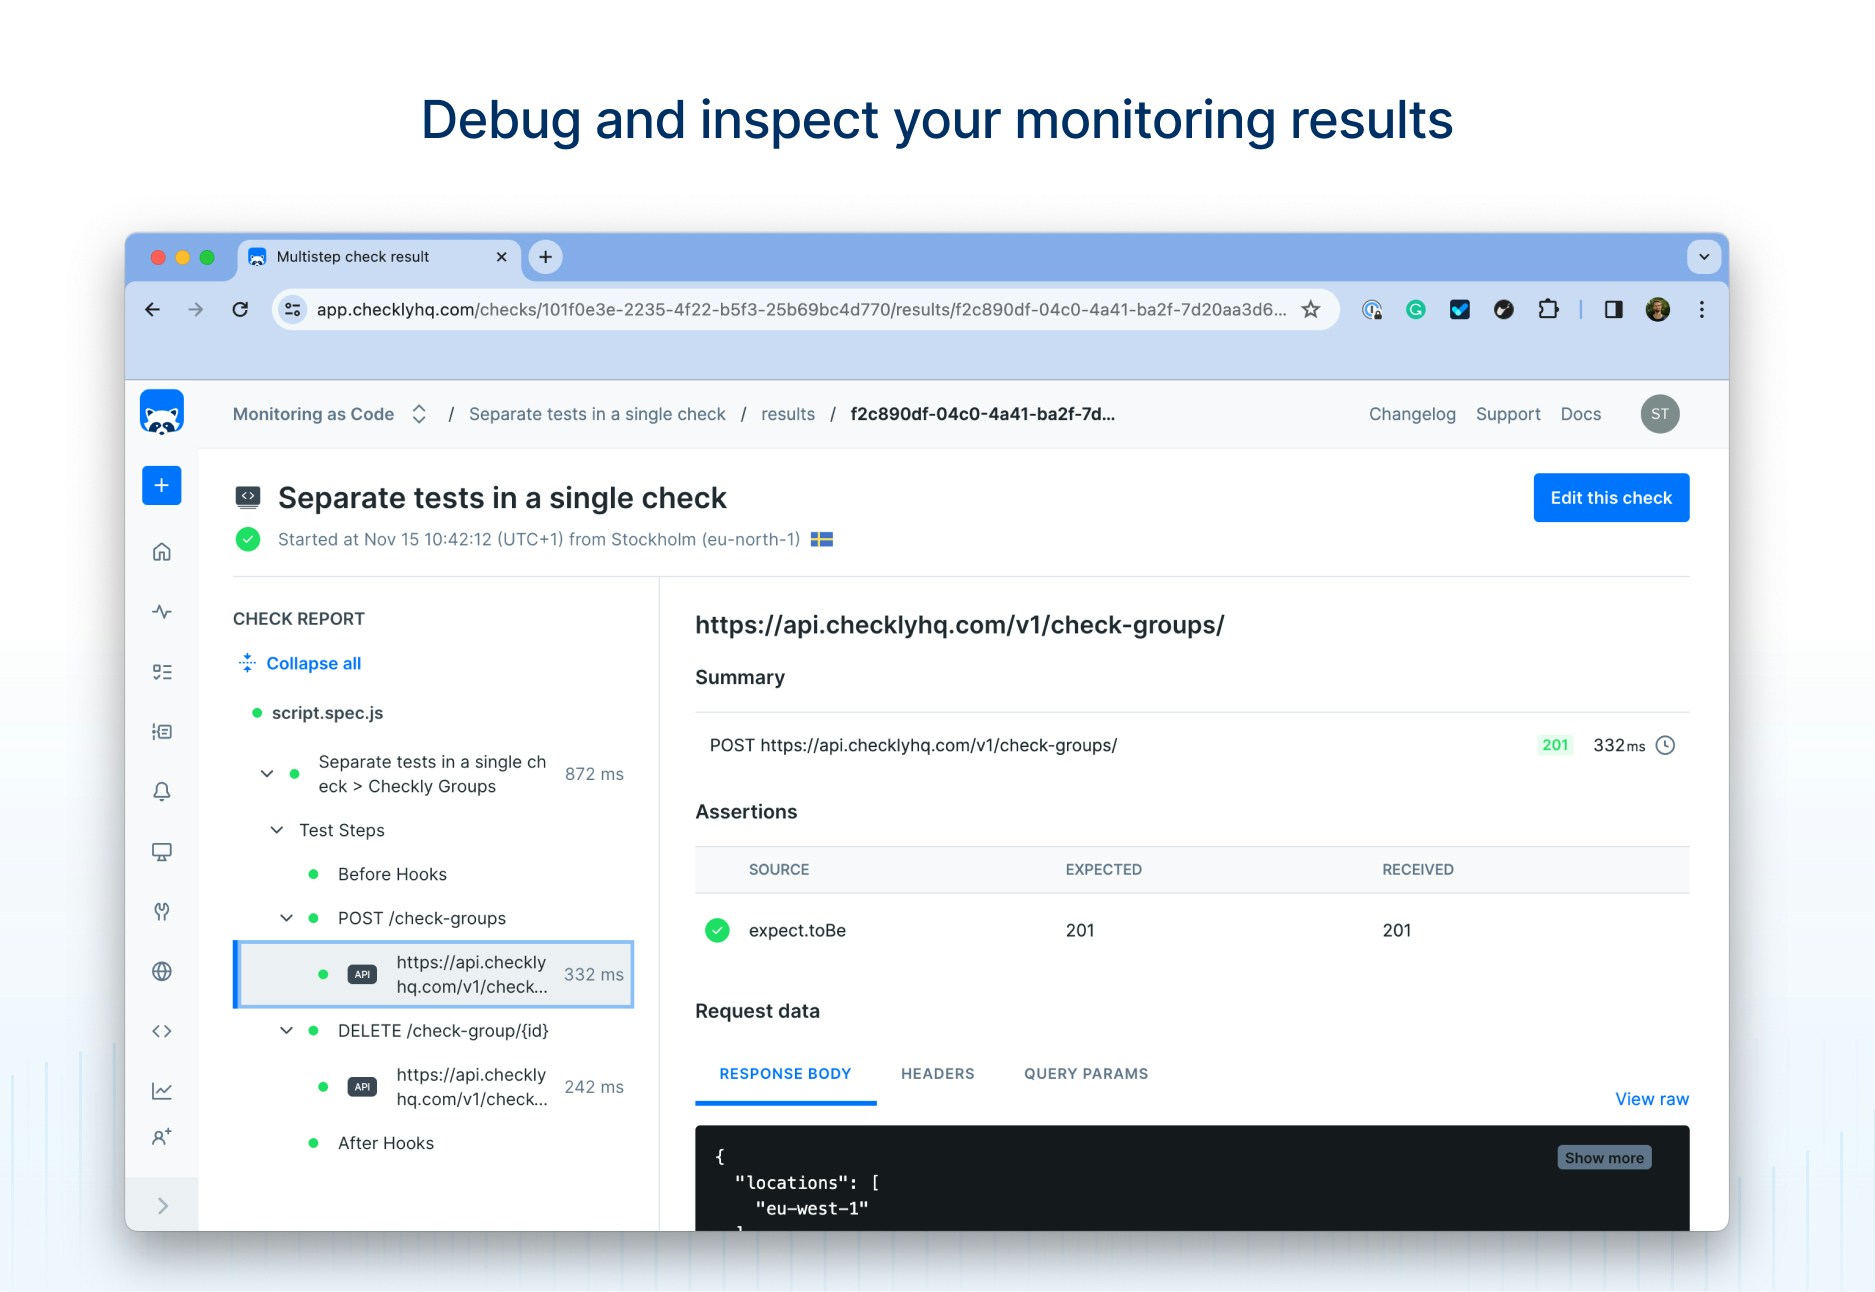
test.step() structure when writing the Playwright script for you Multistep check.
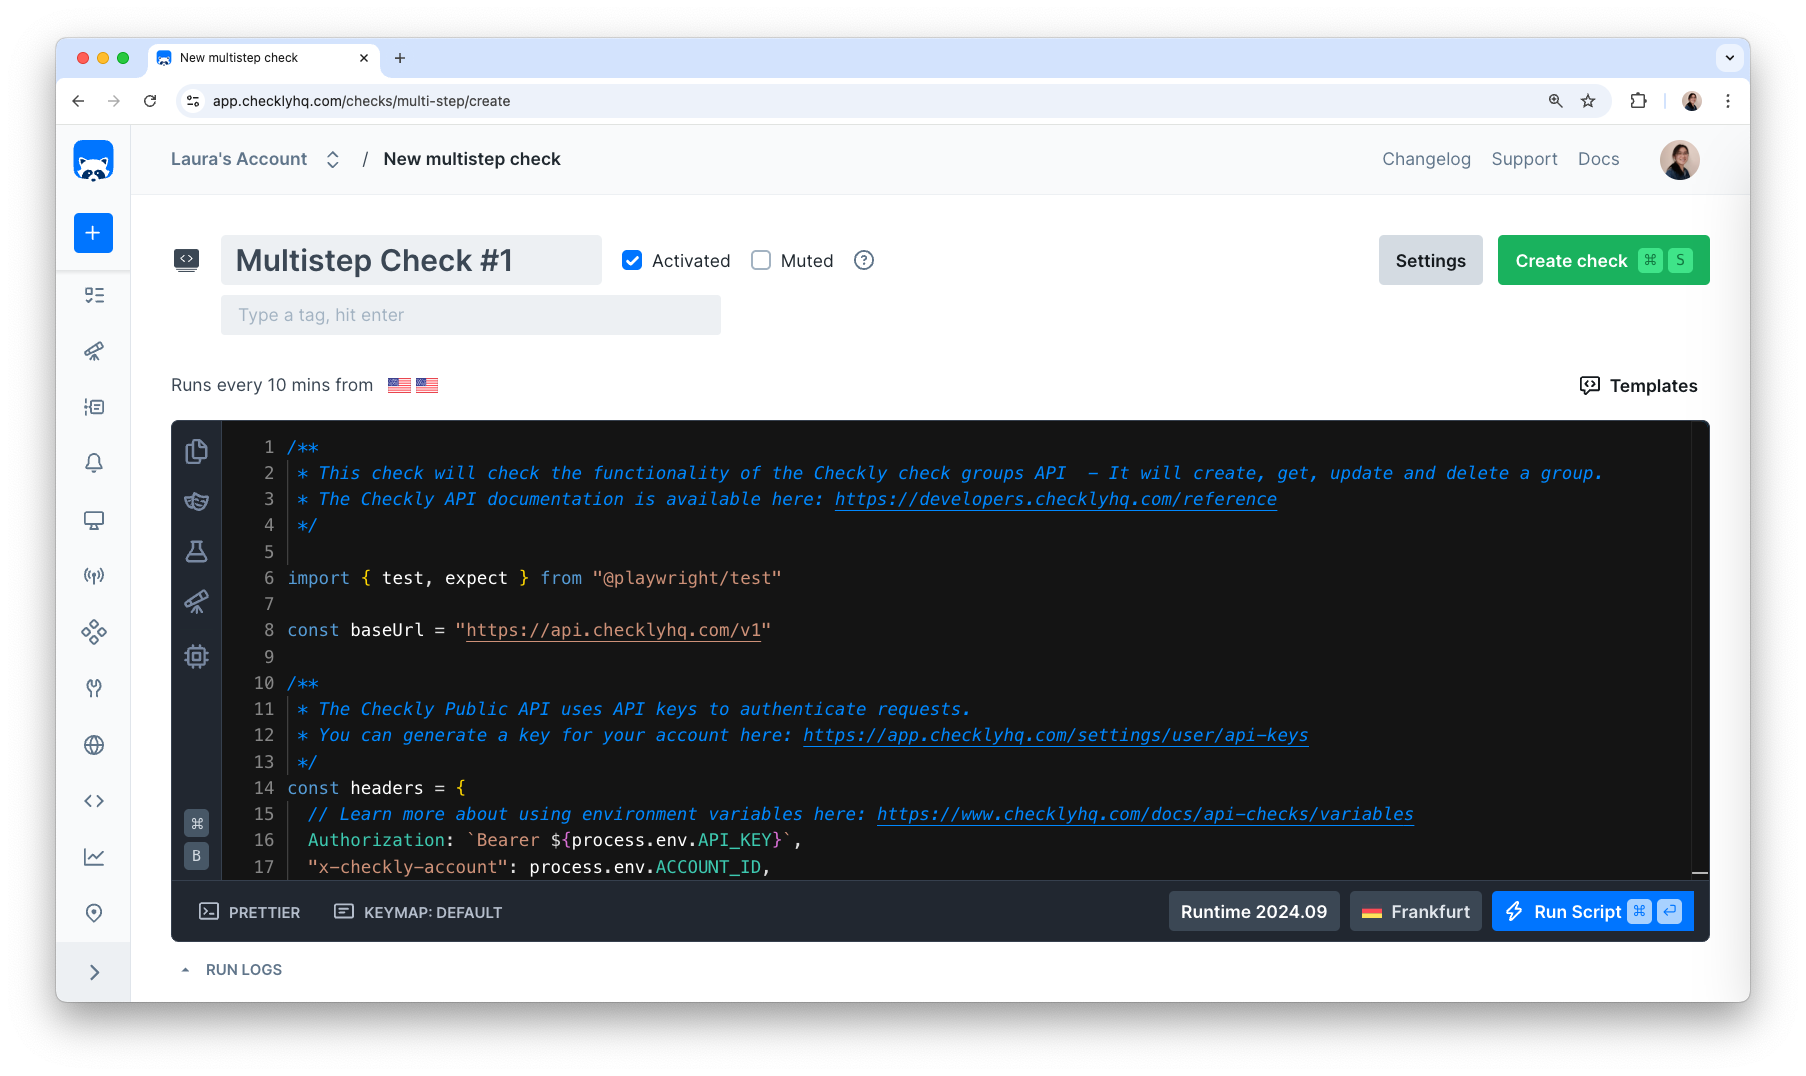
Building scripts in the web editor
You can edit and debug Playwright scripts straight from the web editor. Use the “Run Script” button to run your script ad-hoc, without recording it as a scheduled run.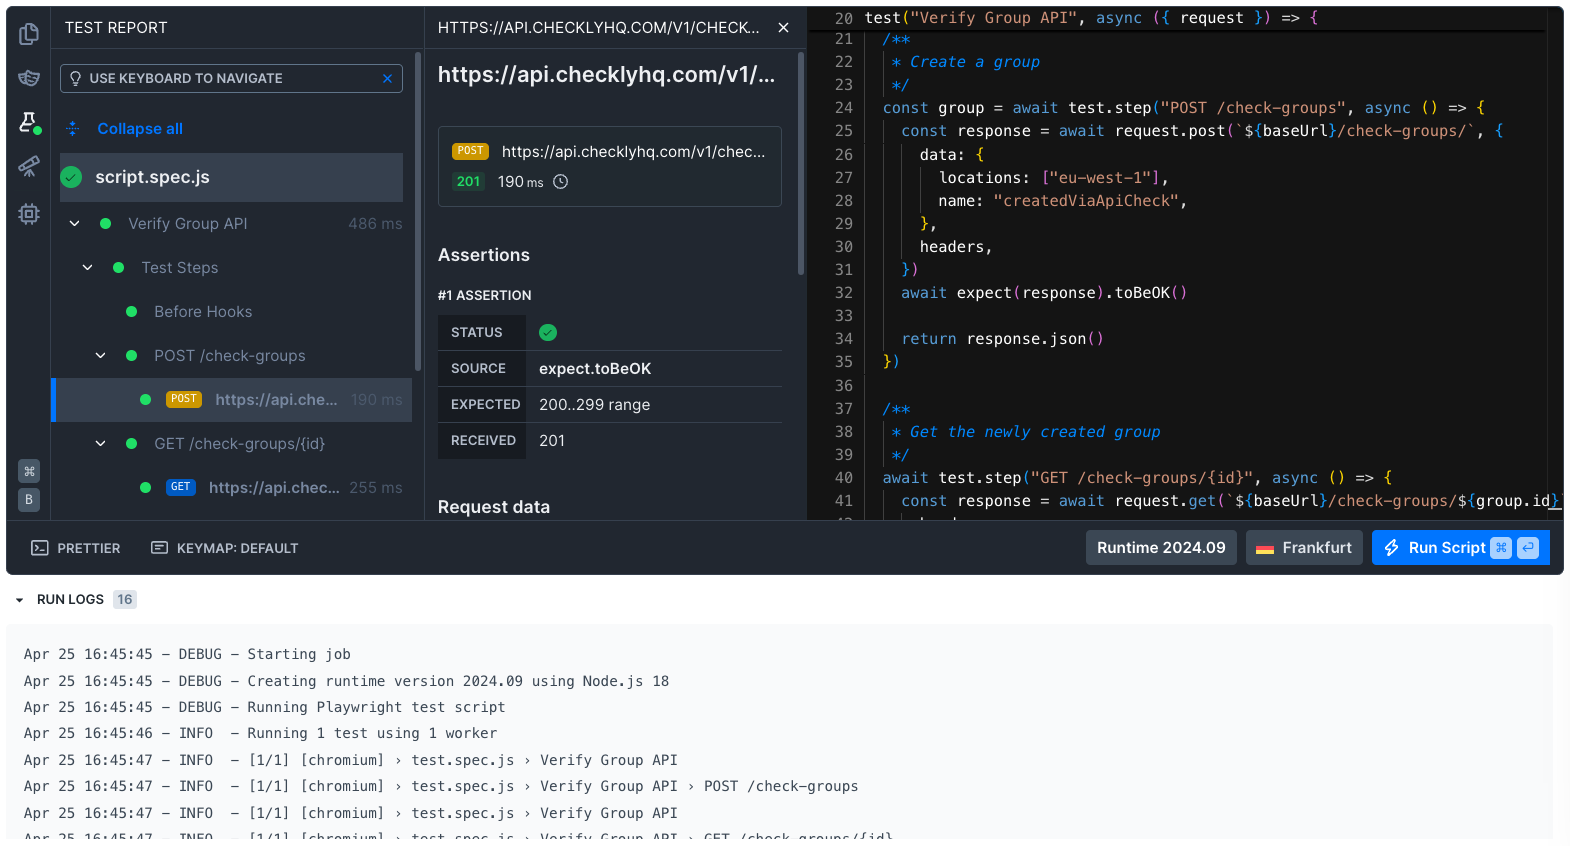
- File dependencies
- Your Playwright config file (if your check was created with the Checkly CLI)
- The test report
- OpenTelemetry traces for this run (if you’ve enabled Checkly Traces)
- Runtimes, including the packages in your current runtime