Why Monitoring as Code?
Before diving into the specifics of Checkly’s CLI, it’s important to understand why MaC is beneficial:- Version Control: With MaC, you can store your monitoring configurations in a version control system, such as Git. This allows you to track changes, revert to previous configurations, and collaborate with your team more effectively.
- Scalability: MaC allows you to define and manage monitoring for multiple environments (development, staging, production) and services in a consistent manner.
- Collaboration: Engineers and operations teams can collaborate more effectively, as monitoring configurations are treated as code and reviewed through pull requests.
- Automation: Automated checks and alerts can be integrated into CI/CD pipelines, providing real-time feedback on the application’s health and performance before it reaches production.
- Consistency and Reproducibility: Monitoring configurations are versioned alongside the application code, ensuring that changes are tracked and can be rolled back if necessary.
Introducing Checkly’s CLI
The Checkly CLI gives you a JavaScript/TypeScript-native workflow for coding, testing and deploying synthetic monitoring at scale, from your code repository. Getting started is pretty easy. You can be up and running in no time to ensure your crucial web apps and sites are performing up to spec. The Checkly CLI provides two main workflows:- Coding: These encompass scripts (such as ApiCheck, BrowserCheck, or SlackAppAlertChannel) written in JavaScript/TypeScript. They are intended to be deployed and executed on the Checkly cloud backend.
- Command: These constitute the fundamental commands for executing your monitoring scripts. The
testcommand is utilized for running monitoring checks locally or in continuous integration, while thedeploycommand is employed to push your monitoring scripts to the Checkly cloud backend.
Getting Started with Checkly’s CLI
1. Installation
We’re going to pretend we are working on adding a feature to a web application that also requires some updates to our API backend. We will assume we already bootstrapped our repository with a Checkly CLI project using:install-checkly-cli
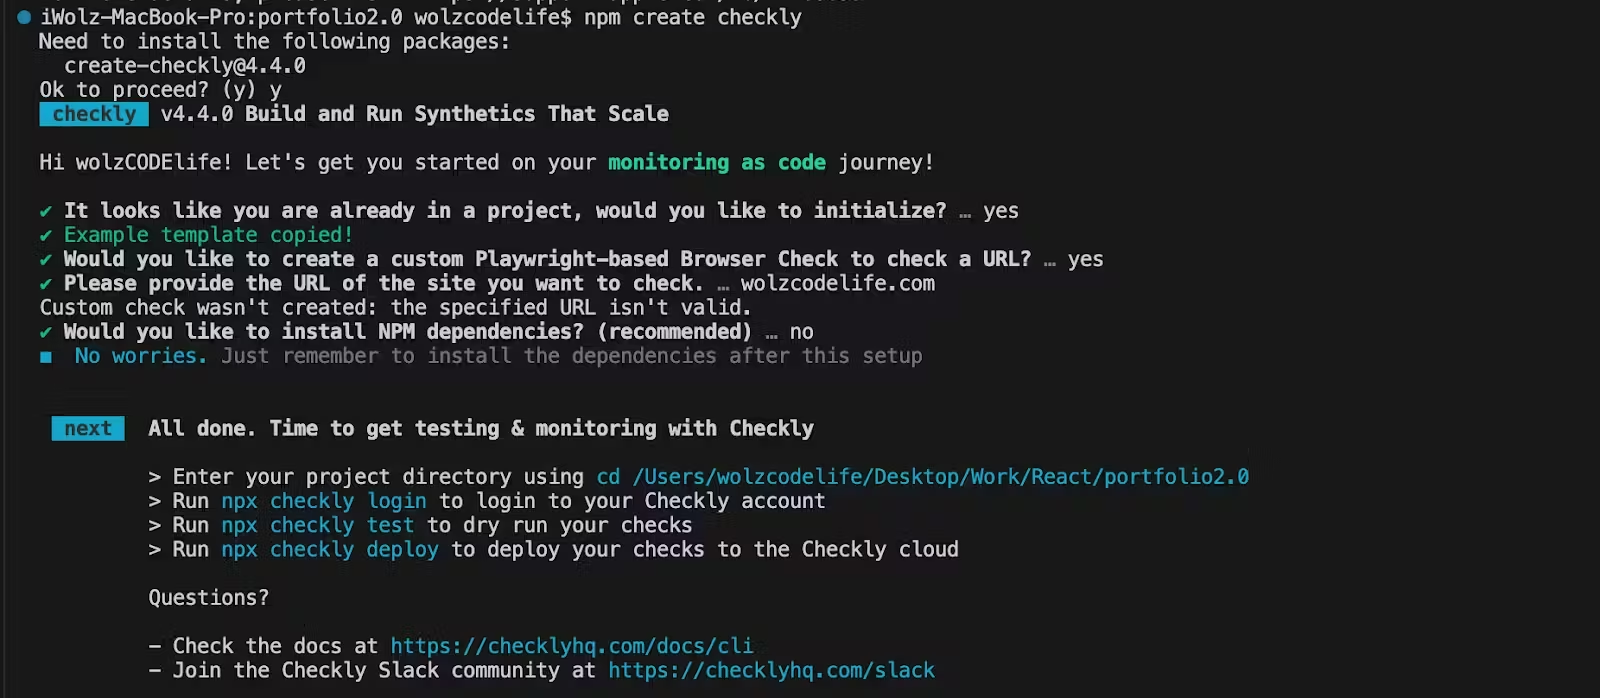
project-structure
npx checkly login
You can choose to log in from the browser or in your terminal. After logging in, you’ll be able to update Checkly Checks from your local machine as long as you’re connected to the internet.
2. Write Your First Check
In your development environment, write JavaScript/TypeScript tests for your code updates, similar to unit tests. We typically use the Playwright testing framework in the .spec.ts or .check.ts file. Consider a scenario where you want to monitor the title of the Checkly documentation and take a screenshot of the page. To do this, replace the code in the homepage.spec.ts with the following:homepage.spec.ts
This test uses the page.goto method to navigate to the specified URL (‘https://www.checklyhq.com/docs/browser-checks/’). The method returns a response object, which is stored in the response variable. Then we use the expect function to assert that the HTTP status code of the response is less than 400. This is a way to ensure that the page is loaded successfully without any HTTP errors. page.title() retrieves the title of the page and compares it with the expected title (‘Introduction to Checkly | Checkly’) using the expect function. This ensures that the page title matches the expected value. Finally, we take a screenshot of the page and save it as ‘homepage.jpg’.
3. Running Test Sessions
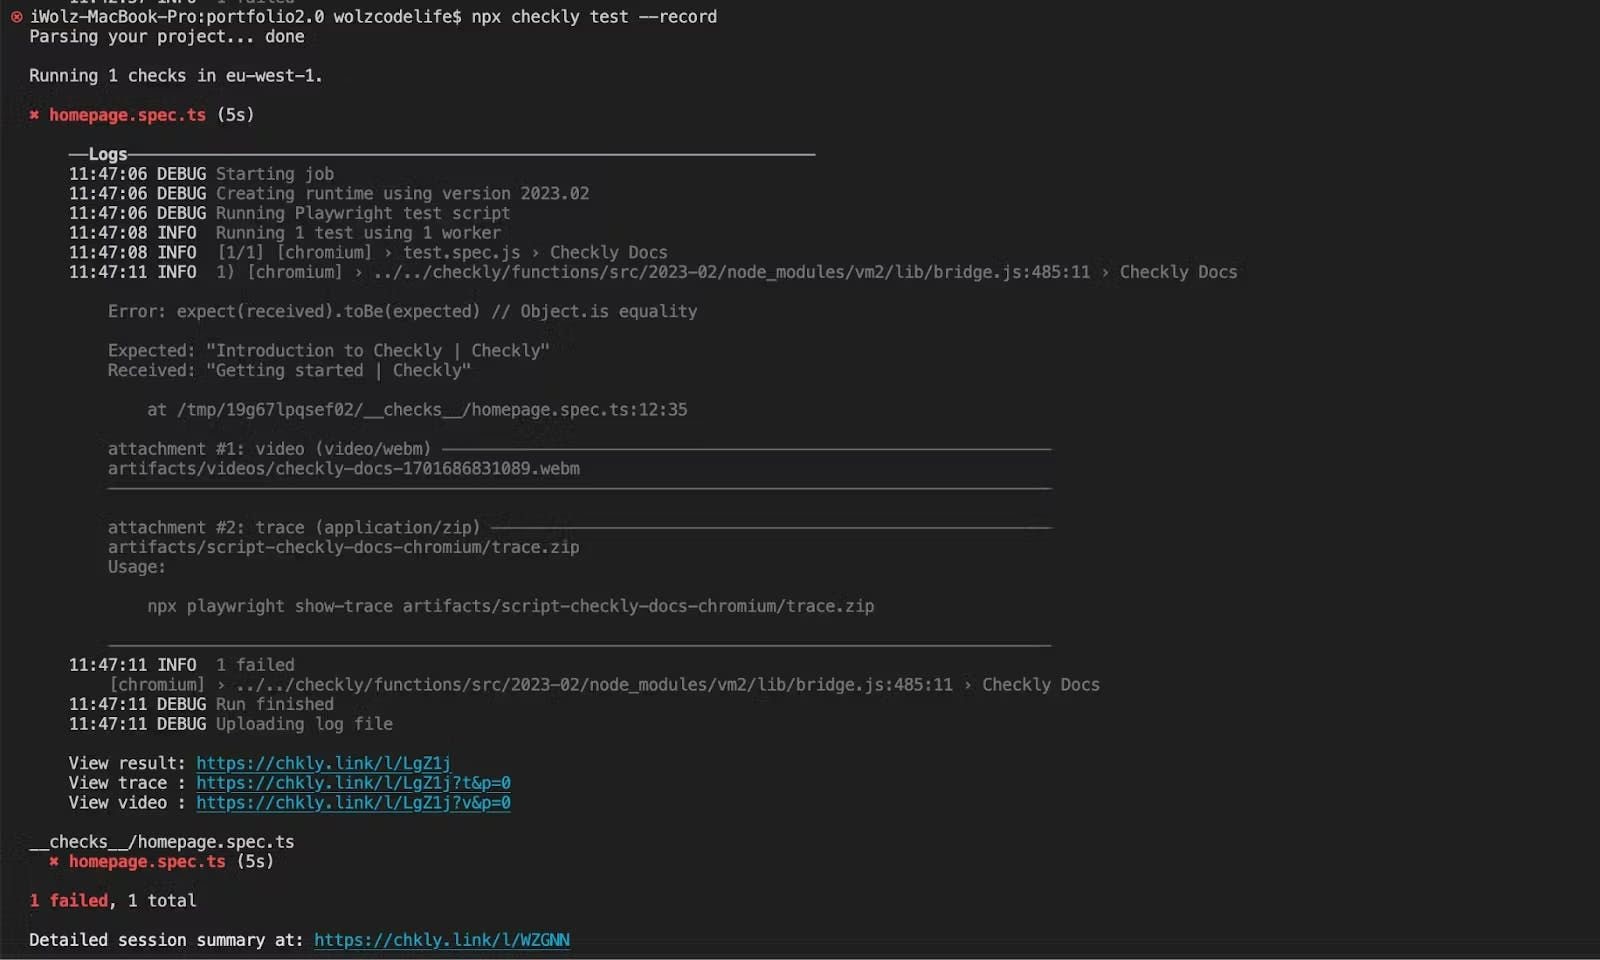
Now that we have our test scripts ready, let’s execute them. Run the following command in the terminal of your project repository to test your checks against Checkly’s infrastructure:npx checkly test
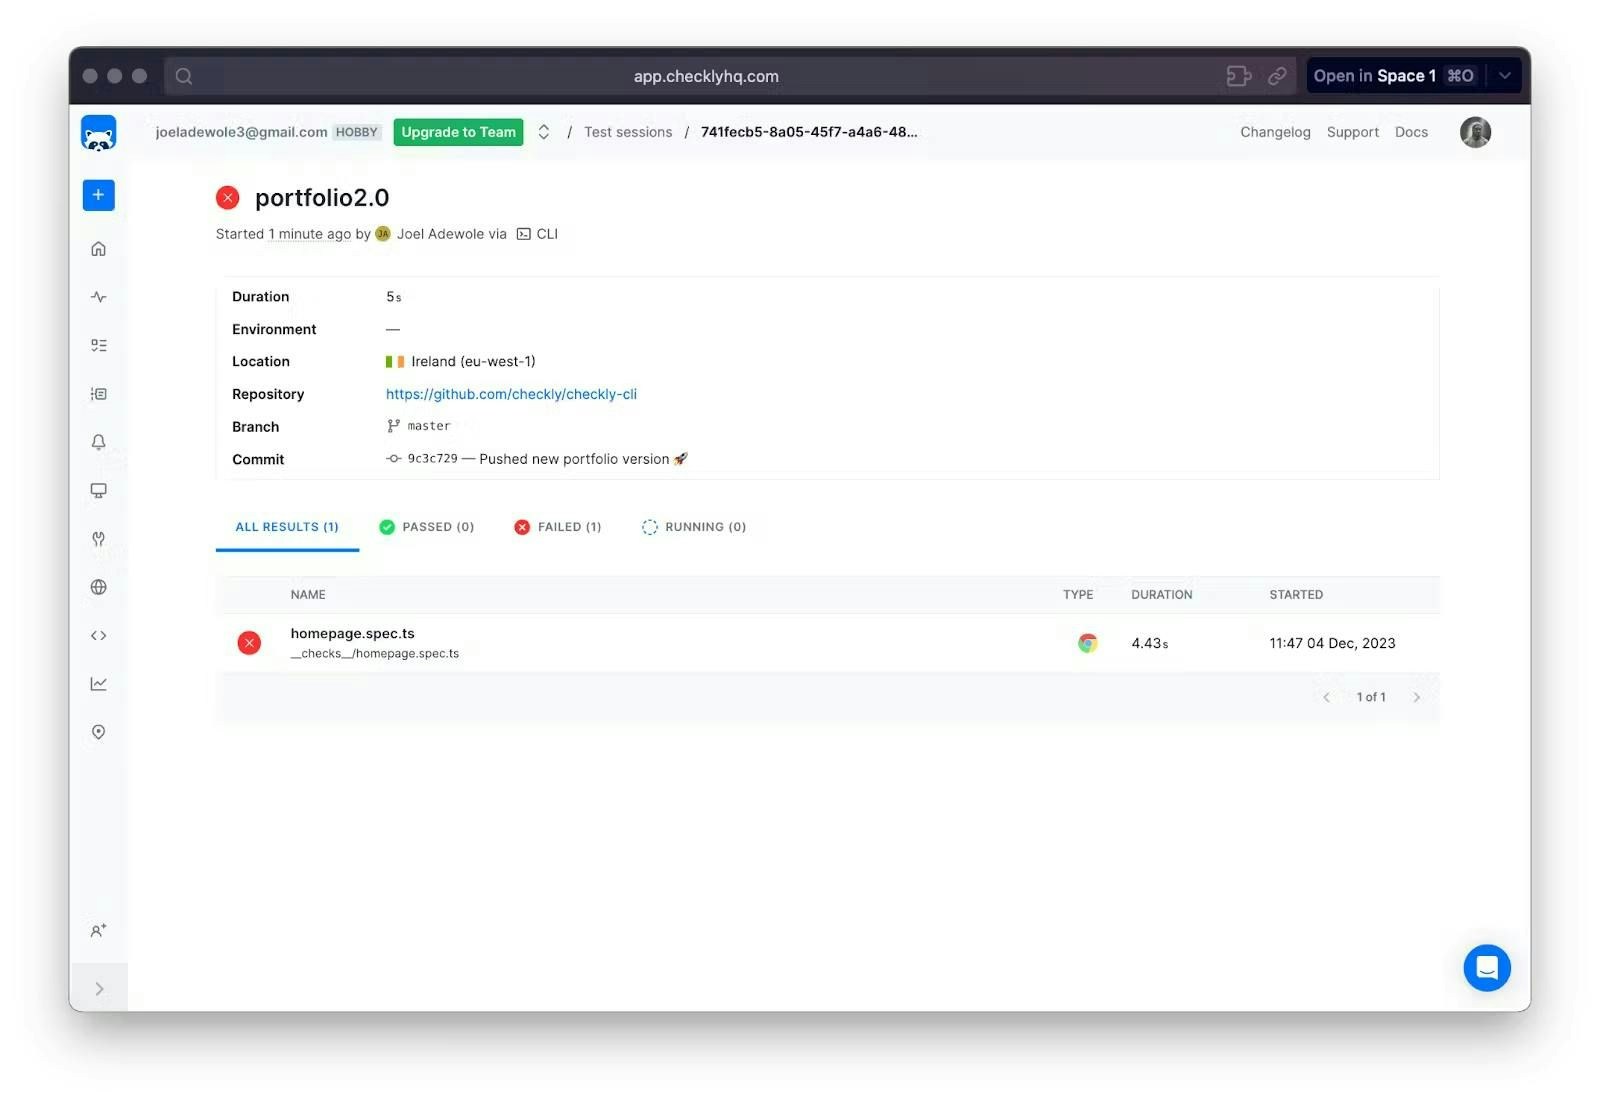
You can review the test session with full logging, videos and traces in the Checkly web interface.
Here is the result of the test we just executed:


4. Deploy Your Check
Now that you’ve reviewed and updated your tests, you can proceed to deploy your MaC workflow and related resources, such as alerts and dashboards. Run the following command in your project terminal to deploy the tests to your Checkly account:npx checkly deploy
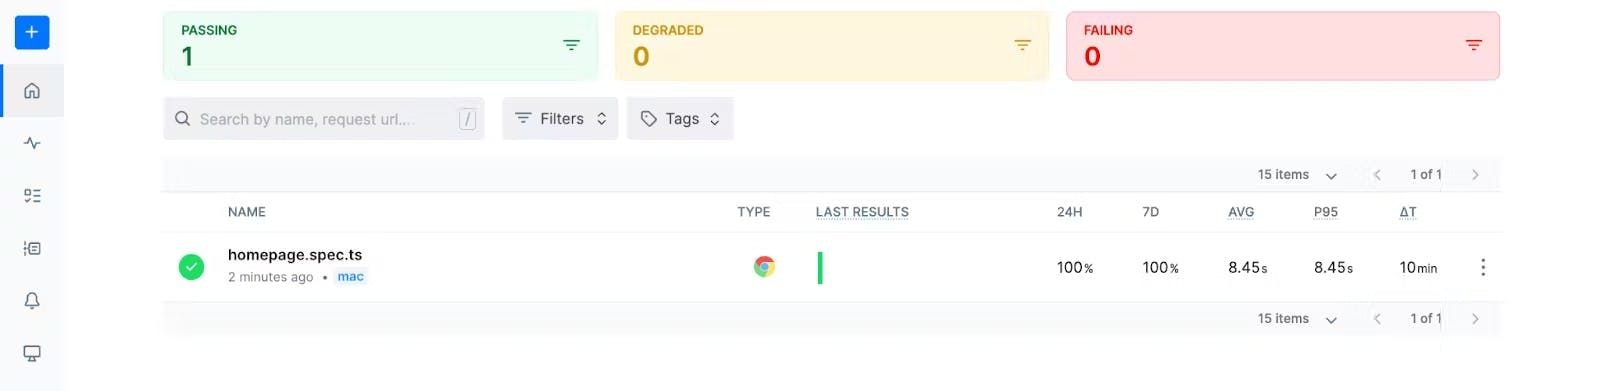
Once the deployment is complete, you’ll see a success message in your terminal, indicating that the project has been deployed to your Checkly account.
To verify this, navigate to the home section on the left side of the Checkly UI, and you’ll find the project with the name of the test script from your local repository.
5. Setting up Alerts
Checkly offers alert services to notify you whenever a check fails. Various alert channels are available, including Slack, SMS, webhook, phone call, email, Opsgenie, PagerDuty, etc. To set up alerts for your check, go to the specific project, in this case, “homepage.spec.ts.” At the top right corner of the code editor, click the “Settings” button. In the revealed side panel, access “Alert Settings” under “Retries & alerting.”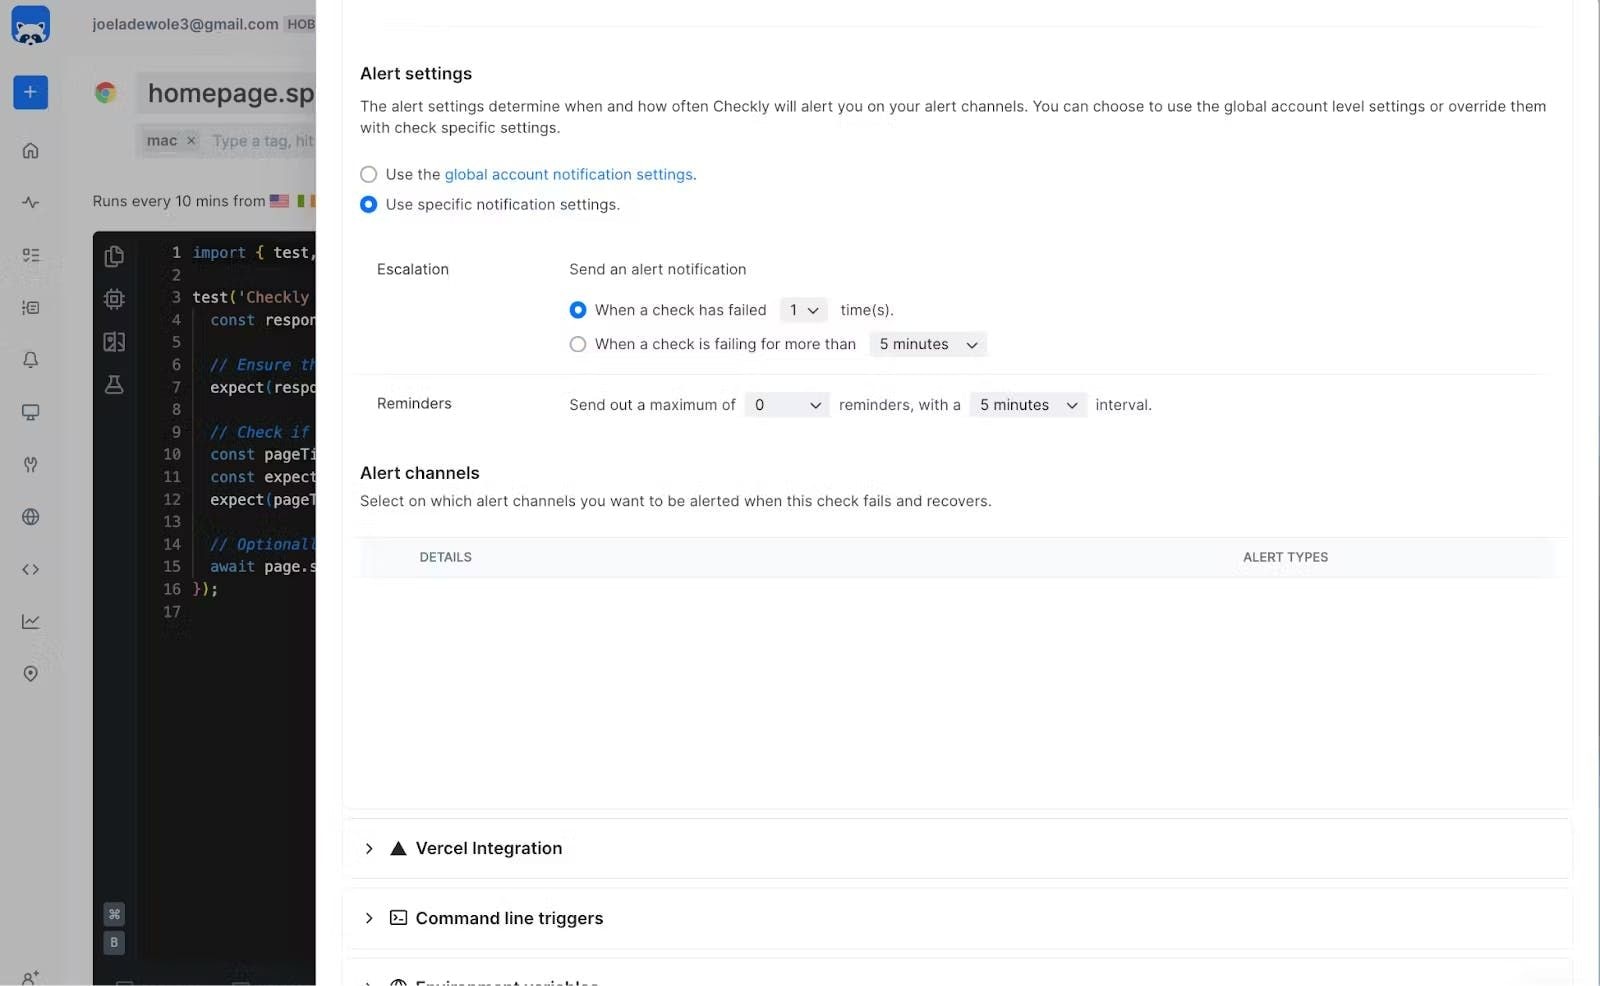
Integrating Monitoring as Code into Your CI/CD Pipeline with Checkly
As you just saw, with Checkly’s CLI, you can run your checks directly from your CI/CD pipeline, using them as end-to-end (E2E) tests. This strategy allows you to validate your application and infrastructure before deploying to production, staging, or any other environment. Additionally, you can manage the entire lifecycle of your checks—creating, updating, and deleting—right from your codebase as part of your CI/CD workflow. Here’s how to integrate your checks and the Checkly CLI if you’re already using one of the popular CI/CD platforms:- GitHub Actions: Run the Checkly CLI from GitHub Actions, export summary reports, and integrate with monorepos for streamlined monitoring across multiple projects.
- GitLab CI: Use GitLab CI pipelines to run the Checkly CLI, setting up separate jobs for E2E testing and deployment.
- Jenkins: Integrate the Checkly CLI into a Jenkins pipeline using a Jenkinsfile to automate your monitoring checks and deployments.