Documentation Index
Fetch the complete documentation index at: https://checklyhq.com/docs/llms.txt
Use this file to discover all available pages before exploring further.
A Basic GitLab Pipeline Example
Create a new .gitlab-ci.yml file in your repo, or add the steps and stages from the example below to your existing file.
This pipeline is “branch aware” and treats the main branch as the production branch. This means checks are only deployed
to Checkly after they are ran against production (after merging to main) and the checks passed.
image: node:latest

# define your stages to deploy your app, run tests and then deploy the tests as monitors.
stages:
  - deploy
  - checkly-test
  - checkly-deploy

# Set the necessary credentials and export variables we can use to instrument our test run. Use the ENVIRONMENT_URL
# to run your checks against staging, preview or production.
variables:
  CHECKLY_API_KEY: "$CHECKLY_API_KEY"
  CHECKLY_ACCOUNT_ID: "$CHECKLY_ACCOUNT_ID"
  CHECKLY_TEST_REPO_BRANCH: "$CI_COMMIT_BRANCH"
  CHECKLY_TEST_REPO_URL:  "$CI_PROJECT_URL"

deploy-app:
  stage: deploy
  script:
    - echo "add your deployment logic here"
    # - ENVIRONMENT_URL= <add some command to extract a branch specific url to target

# Set a different environment name based on the branch you are testing against.
e2e-staging:
  stage: checkly-test
  cache:
    key:
      files:
        - package-lock.json
    paths:
      - node_modules
  variables:
    CHECKLY_TEST_ENVIRONMENT: review/$CI_COMMIT_REF_SLUG
  script:
    - npm ci
    - npx checkly test --record
  except:
    - main

e2e-production:
  stage: checkly-test
  cache:
    key:
      files:
        - package-lock.json
    paths:
      - node_modules
  variables:
    CHECKLY_TEST_ENVIRONMENT: "production"
  script:
    - npm ci
    - npx checkly test --record
  only:
    - main

monitor:
  stage: checkly-deploy
  cache:
    key:
      files:
        - package-lock.json
    paths:
      - node_modules
  needs: ["e2e-production"]
  script:
    - npx checkly deploy --force
  only:
    - main
- deploy: this is where your application specific deployment logic happens
- checkly-test: after the deploy stage, we run the
checkly test command. We run two different jobs based on whether
we are on the main branch of a different, feature branch so we can set a different environment.
- checkly-deploy: the last stage, that only runs on
main is to deploy the checks to Checkly. Note that this stage
only runs when the previous e2e-production job is successful.
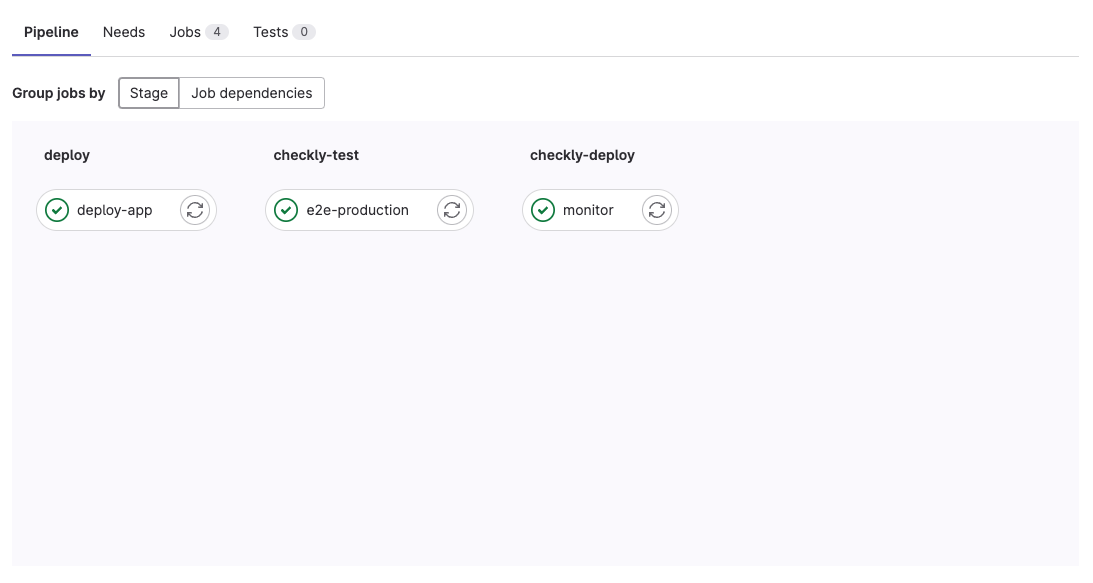
The output in the GitLab CI CI/CD -> Pipelines tab will now look similar to this: