

Table of contents
In a recent post on customer feedback I mentioned being a recent convert to chat widget-driven tools. I thought they sucked, but I was wrong. Since then, I actually switched from Drift to Intercom because Intercom's focus — support & communication — matched my business better than Drift's heavy sales focus.
To get the most out of Intercom, you need to integrate it with your app. This means instrumenting some code and tweaking some bits of your app's navigation. Checkly is a 100% Vue.js app, so in this post we'll look at the following:
- Identifying a user with some handy attributes
- Getting page views right with Vue Router
- Sending events with Vuex
- Some nice things you can now do in Intercom
Onwards!
Identification & custom attributes
To get Intercom working at all in Vue I just used this vue-intercom package and followed the instructions. Done
// main.js
import Vue from 'vue'
import VueIntercom from 'vue-intercom'

Vue.use(VueIntercom, { appId: 'your-app-id' })
Next, you need to identify every user that enters your app. In what part of your code would you do this? In the Login component? On the "homepage" component or whatever page your user sees first?
All possible, but it makes most sense to do it right in the Vuex action that actually fetches your users. In our code this is the...wait for it... fetchUser() action! This is one of the first actions called whenever a user enters the app.
// Vuex user.js store
const actions = {
  fetchUser ({ commit }) {
    return http.get('/users/me')
      .then(user => {
          commit(types.SET_USER, user)
          this._vm.$intercom.boot({
            user_id: user.id,
            name: user.name,
            email: user.email,
            Account: user.account.id,
            created_at: user.created_at,
            PlanType: user.plan,
            Dashboards: user.account.dashboards.length,
            PlanExpiry: user.account.currentPeriodEnds
          })
      })
  }
}
Two things going on here:
- We call the
.boot()on the intercom object injected into Vue by the library mentioned above. Very convenient if not for the slightly weirdthis._vmsyntax for accessing the Vuevminside a Vuex action. - We add a bunch of extra attributes like plan type, when the plan expires and how many dashboards this user has.
We also want to know about the amount of checks a user has because it tells me a lot about how active this user is. The procedure is the same here, we instrument the fetchCheckCount() action and relay it to Intercom.
// Vuex checks.js store
const actions = {
  fetchChecksCount ({ commit, getters }) {
    return http.get(`/accounts/${getters.id}/checks?count=true`)
      .then(res => {
        this._vm.$intercom.update({
            APIChecks: res.data.BROWSER
            browserChecks: res.data.API
        })
        commit(types.SET_CHECKS_COUNT, res.data)
      })
  }
}
In Intercom, the result looks like this.
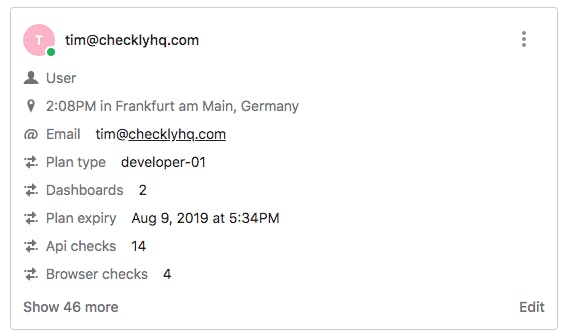
Extremely useful to have right in front of you when answering support questions.
But wait, there is more!™
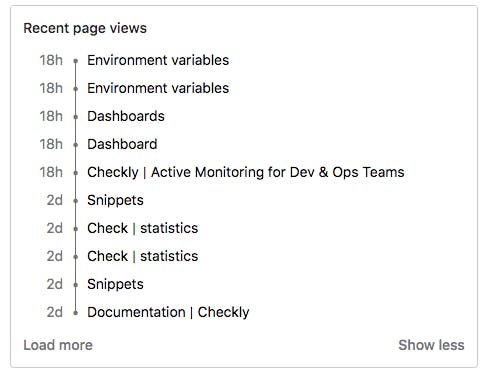
Recording "page views"
Let's start with the goal. Next to the user's details and custom attributes, you want to have an overview of what pages a user has visited in your app.
In an SPA like Vue, there are no real page views. But Vue Router has your back and with a little bit of tinkering we can make this work.
First make sure you have "nice" page titles. Here's a snippet of our router.js file showing a nested route that has to do with the browser check edit screens.
// router.js
{
 path: 'browser',
 component: EditBrowserCheck,
 children: [
   {
     path: '',
     name: 'checks:edit:browser:script',
     component: ViewScript,
     meta: {
       title: 'Browser check | script'
     }
   },
   {
     path: 'variables',
     name: 'checks:edit:browser:variables',
     component: ViewVariables,
     meta: {
       title: 'Browser check | variables'
     }
   },
   {
     path: 'scheduling',
     name: 'checks:edit:browser:scheduling',
     component: ViewScheduling,
     meta: {
       title: 'Browser check | scheduling'
     }
   }
}
Notice the meta object with the title property. This is where we declare the nice, human friendly title for each page / route. We actually set this title using the following router hook.
// router.js
router.beforeEach((to, from, next) => {
  const nearestWithTitle = to.matched.slice().reverse().find(r => r.meta && r.meta.title)
  if(nearestWithTitle) document.title = nearestWithTitle.meta.title
  next()
})
Ok, now we have nice titles but we still need to trick the Intercom library into thinking a user actually navigated to a new page. For this we create a watch on $route in the root of the Vue app.
// main.js

new Vue({
  store,
  router,
  template: '<App/>',
  components: { App },
  watch: {
    '$route': () => {
      window.Intercom('update')
    }
  }
}).$mount('#app')
Now, every time a route changes, Intercom gets an update. Note, you have to call window.Intercom as I couldn't get this to work with the aforementioned library.
I stole this code from someone on StackOverflow but can't find the source anymore. Whoever you are, bless you and may you and your children prosper 🙏
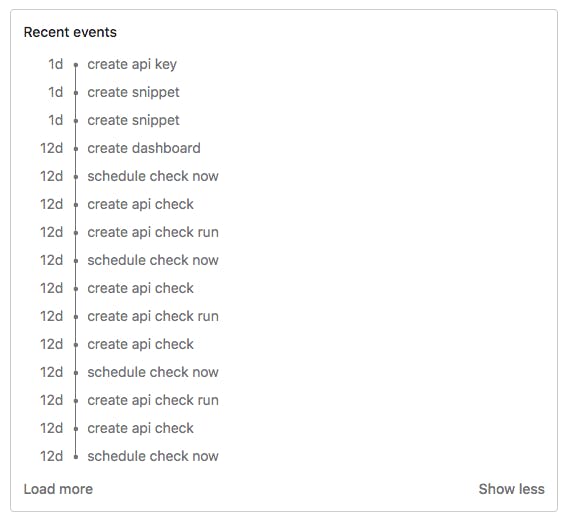
Recording events
Next to page views, we also want to record what a user does in your app as it happens. What you want to record is very app specific, but mostly CRUD actions are good candidates. Here's an example of a typical Checkly user:
You probably guessed how this works. You instrument the actions in your Vuex store. Here is another of snippet of the Vuex check store.
// Vuex checks.js store

const actions = {
  createCheck ({ commit, getters, dispatch }, check) {
    return http.post(`/accounts/${getters.id}/checks`, check)
      .then(res => {
        this._vm.$intercom.trackEvent(`Create ${check.checkType} check`)
        commit(types.CREATE_CHECK, res.data)
      })
  }
}
Note two things:
- We grab the payload of the action and just use the
checkTypeproperty. We're not really interested in all the details of a check, just that it was created and what type of check it was — this can be API or Browser in this specific case. - We call the
trackEvent()method on the injected$intercomobject and then proceed to the normal commit so our app also nows this check was created.
Intercom is weird but nice
Intercom is a bit weird. It's known for its chat widget — turn the sound off!! — and is heavily used for customer support. But it's also a mini-CRM and email marketing tool. Oh and they also do automated product tours now!
So once you instrumented your code, what more can you do in Intercom? Here are some examples that took me literally five minutes to set up.
Using the plan expiry date and plan type, I set up some segments so I can very easily see what type of users I'm dealing with and how full my pipeline is. Just use the filters and go nuts 🥜
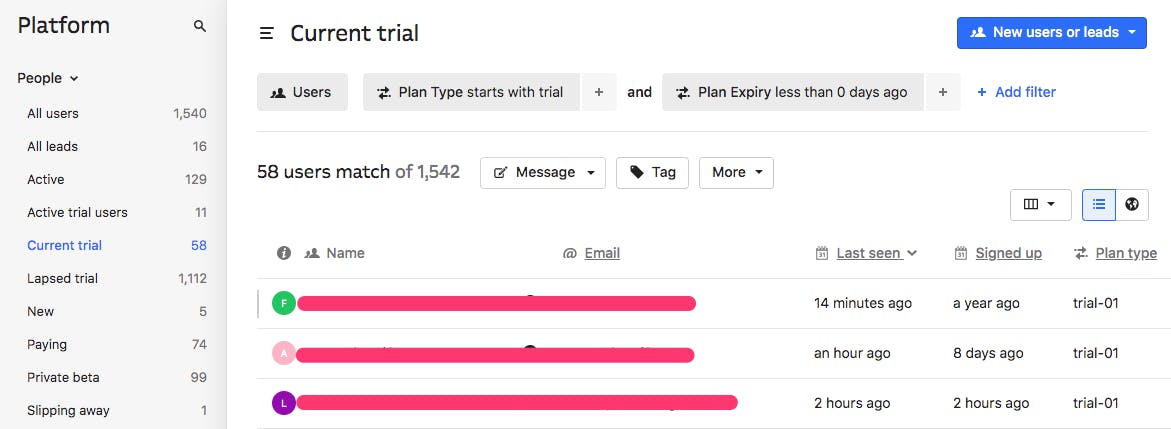
The example below is the "Current trial" segment and lists all users currently in an active trial. You can can also see the "Lapsed trial" and "Active trial users" segments which are variations on this.
Another way to leverage your customer attributes is by sending active users an extra email. For example, this is an email I send to what I call VIP customers when they are still in trial.
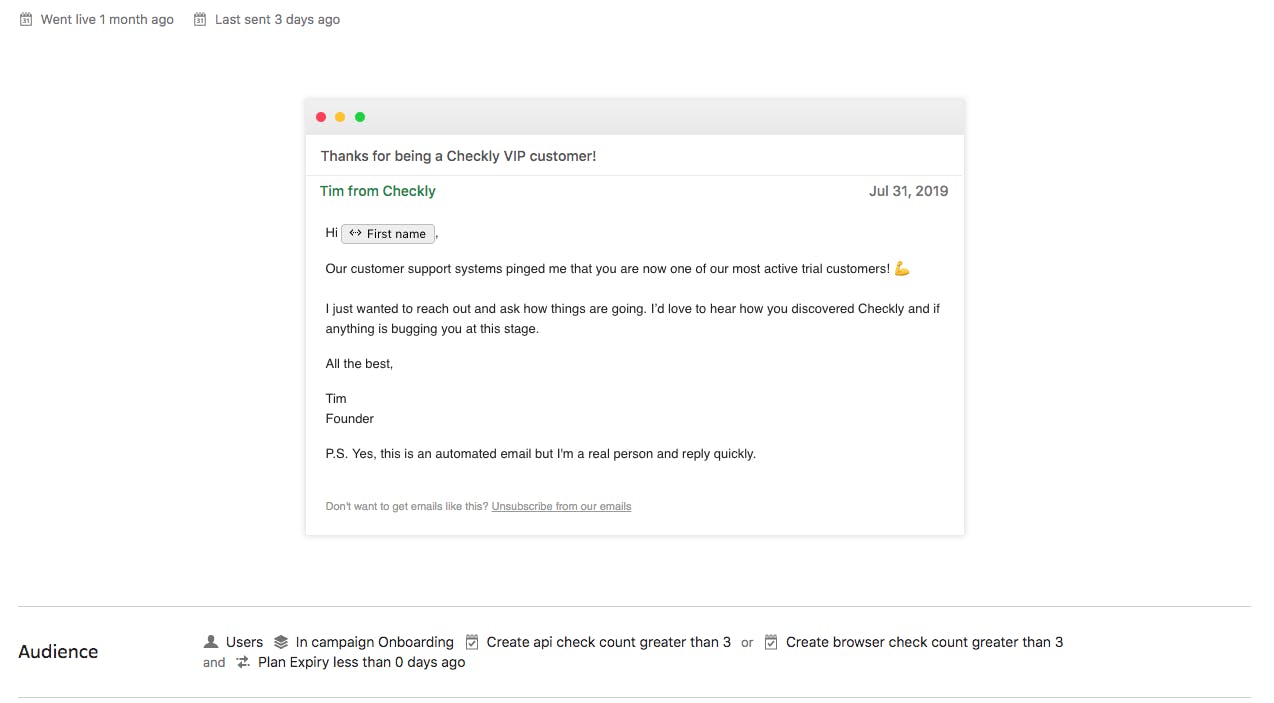
The Audience configuration uses the amount of browser checks or the amount of API checks created as a trigger to send out this email.
banner image: detail from "Dragonflies and Hollyhocks". Ohara Shoson, 1877-1945, Japan. Source