
Exciting times ahead. With the Jamstack gaining momentum, the landscape around it is offering more and more tools to streamline developer workflows and free up time for actual development. A cutting edge solution in this interesting space is Vercel, formerly known as ZEIT.
In this blog post we will get a taste of Vercel's capabilities by using it to deploy and preview a sample Gatsby blog - and while we're at it, we will of course take the chance to kick off some E2E testing and monitoring automatically from Checkly.
What is Vercel?
Vercel is a cloud platform that combines the strengths of static websites and serverless functions to enable instant deployment and automated scaling of Jamstack applications - all with the simplicity and transparency of your familiar Git workflow.
Let's jump straight into it to see the benefits in action.
Setting up our blog with Gatsby
For our project we will use Gatsby.js, a massively popular free and open source framework based on React. Gatsby works for us like a static site generator would: it can take content from a variety of sources, then build it into a static website that loads quickly and is search engine-friendly.
Let's get started. First off, make sure you have the fundamentals already installed on your machine:
You will also need an account on GitHub.
Additionally, we will use Gatsby CLI:
npm install -g gatsby-cli
Next, we can start by creating a new project. You can choose to start your own from scratch, if you are comfortable enough with Gatsby, or select one from the starter library - for this tutorial, we will go ahead with the popular Gatsby Starter Blog:
gatsby new gatsby-starter-blog https://github.com/gatsbyjs/gatsby-starter-blog
cd gatsby-starter-blog
We can take a quick look at how our Gatsby blog will look like by just running gatsby develop. This will serve our blog in its current state through a local development server, normally accessible at localhost:8000.
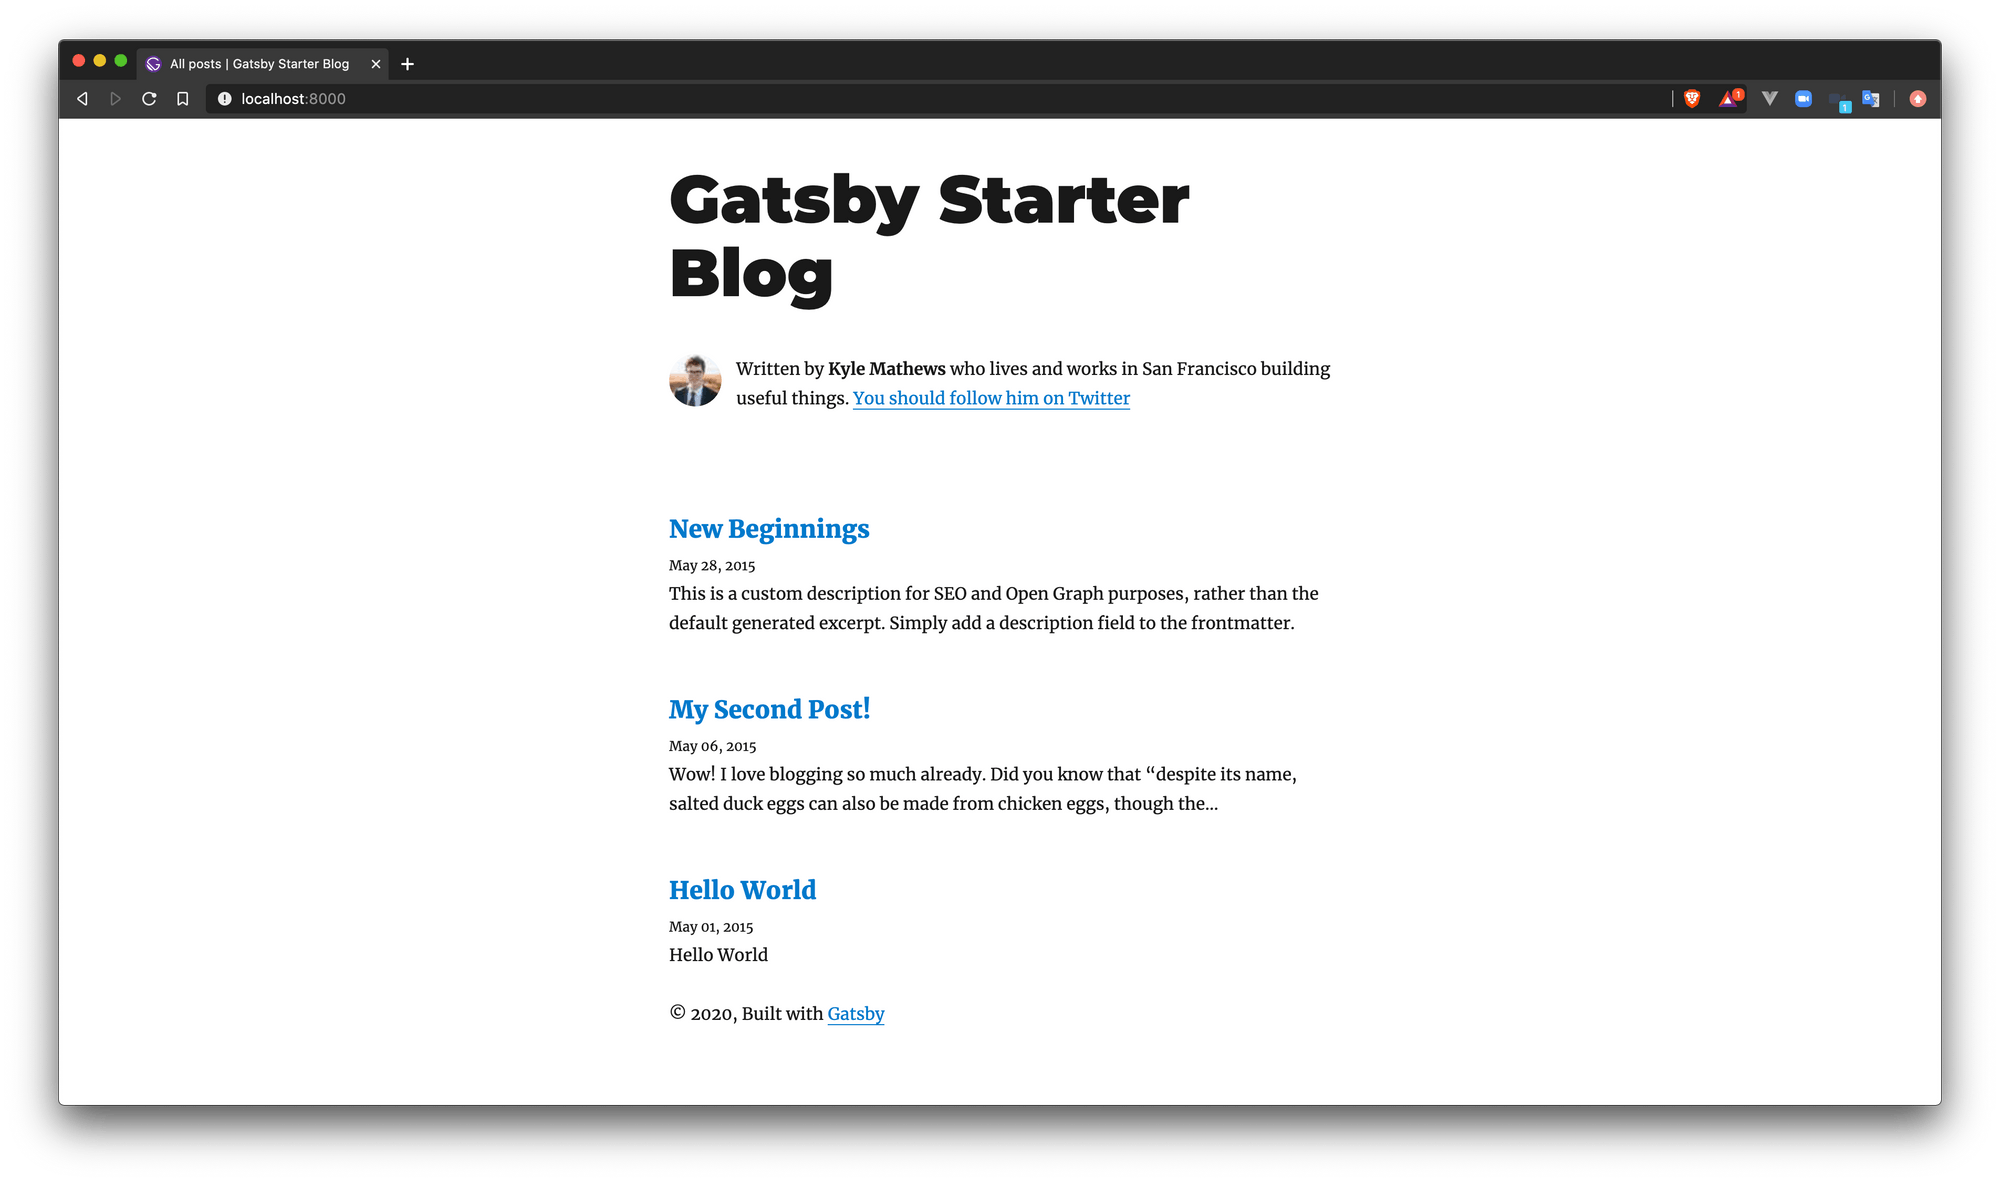
The server will automatically pick up changes and update what we see in our browser.
Set up with E2E testing and monitoring with GitHub
To leverage Vercel and Checkly’s GitHub integration, we first create a repository for our new blog, so we can then update it with our local content.
git init
git remote add origin https://github.com/myuser/my-project.git
git push origin master
Next, we are going to set up both the Vercel and Checkly integrations on this repository.
Up and running with Vercel
Vercel makes it easy for us to link our GitHub repository to their platform - just sign up for a free account using your GitHub handle.
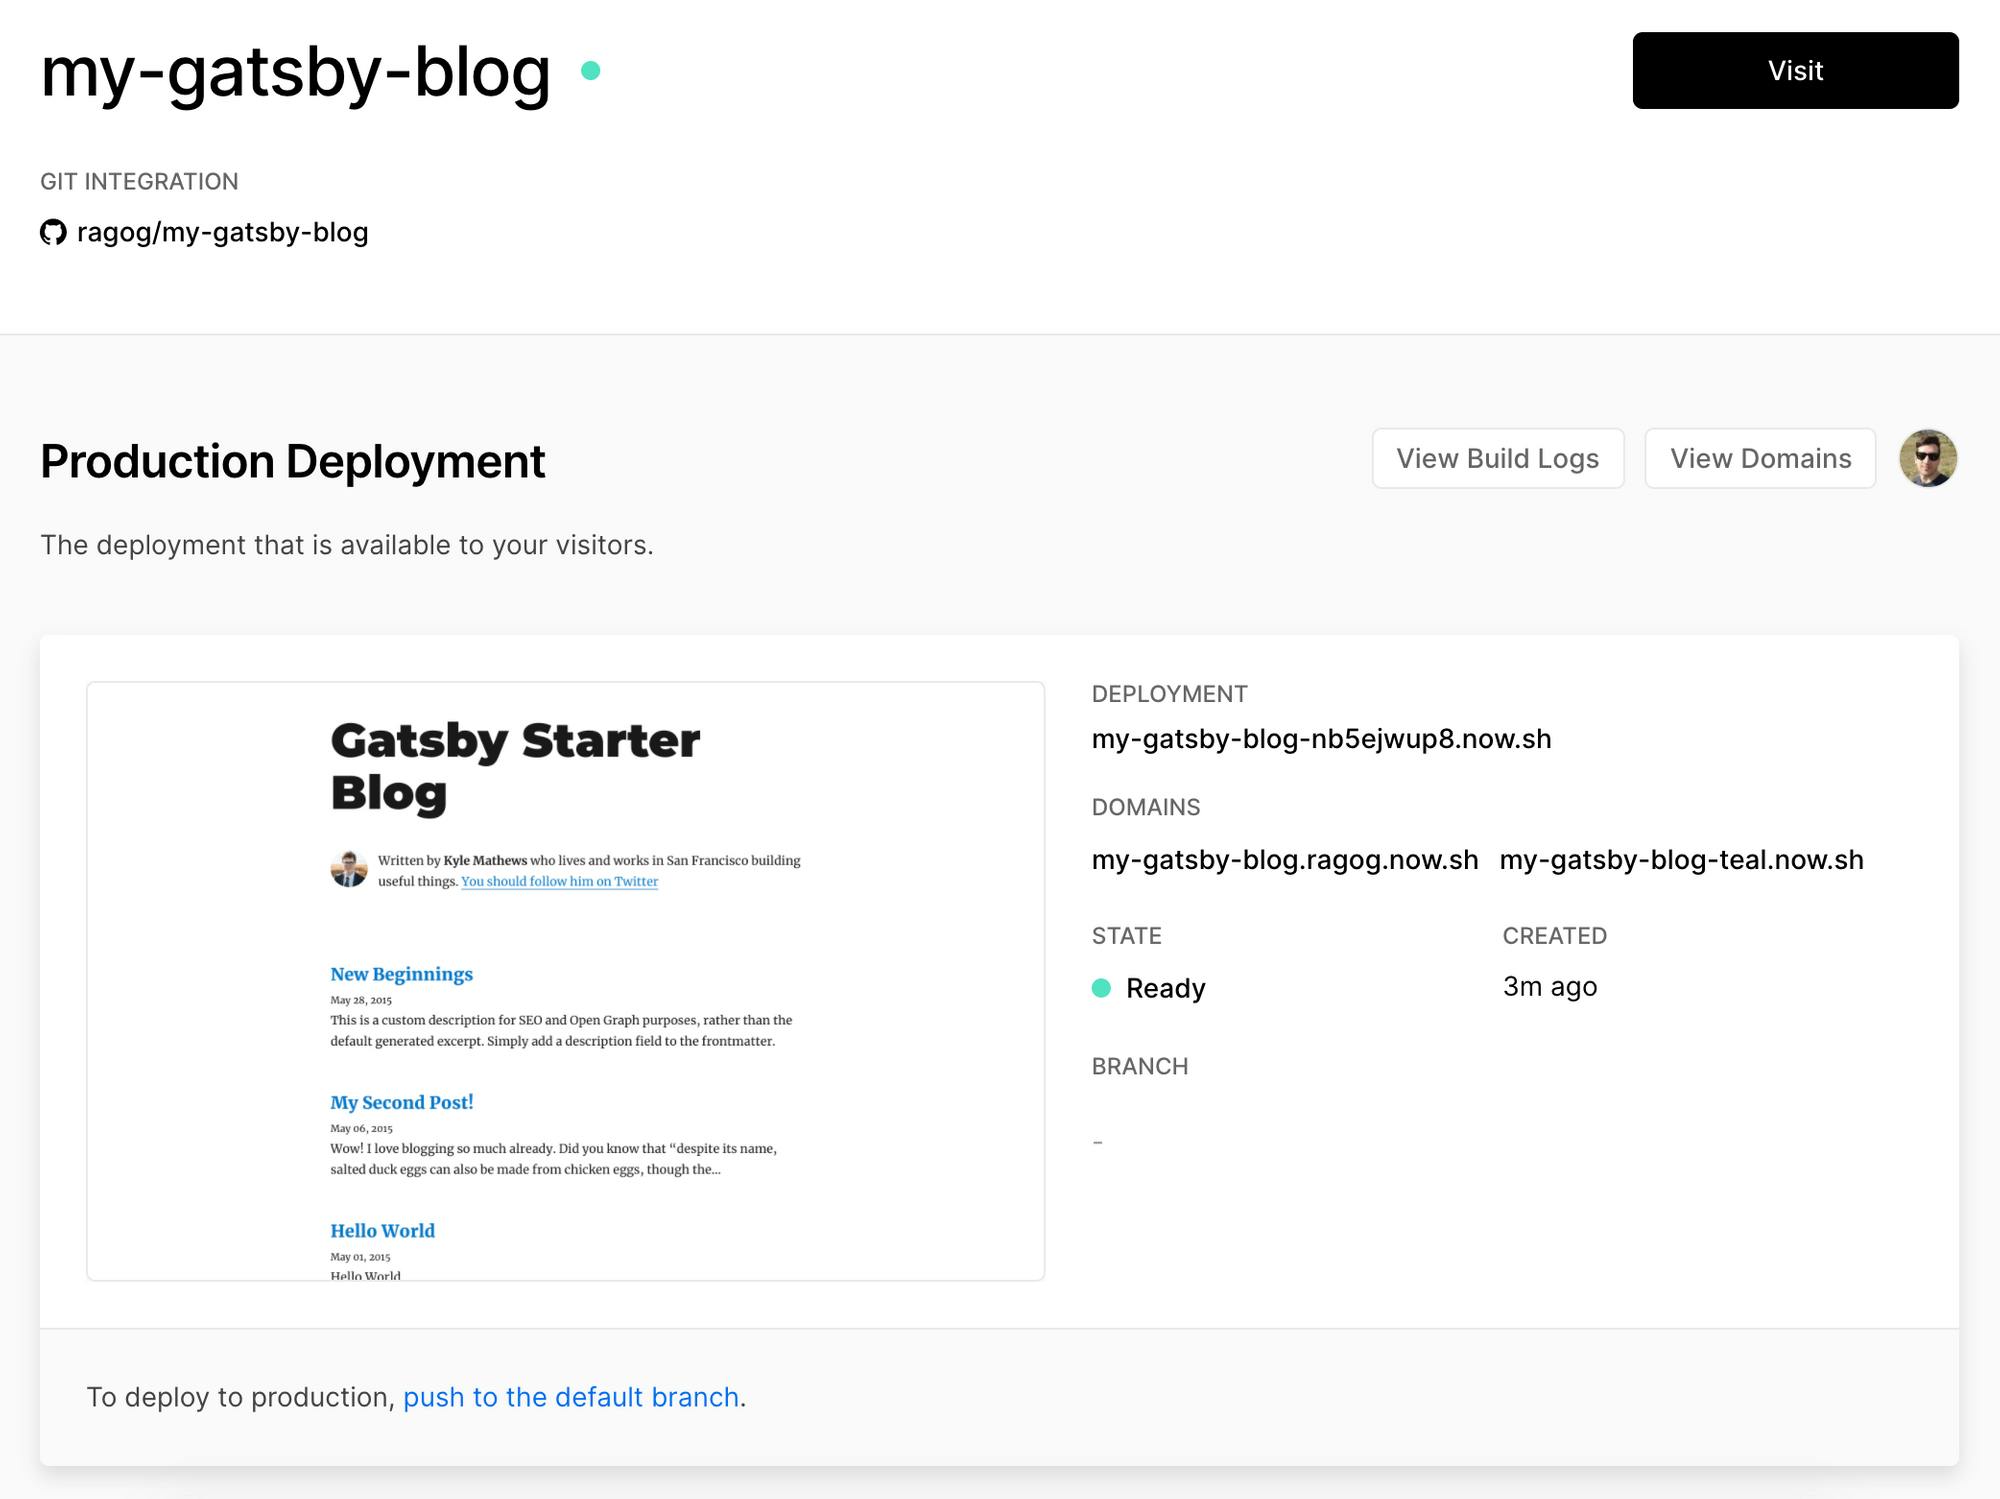
Once your account has been set up, select Import Project and point Vercel to your repository. Vercel will automatically recognise Gatsby in our repository, and will default to the right configuration - there are no needed changes from our side.

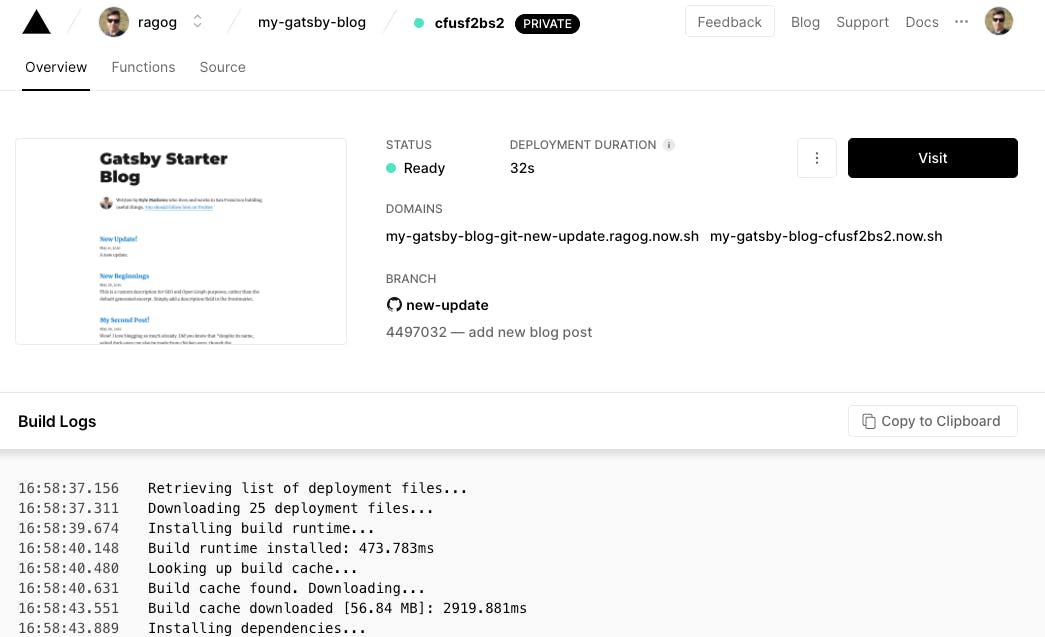
Vercel will kick off a first build automatically and, after a few seconds, you will be able to visit your new production URL based off of your master branch. By default, your project will be built each time you push new code to the linked repository. New pull requests will have their own preview URL for you to access.
Active monitoring with Checkly
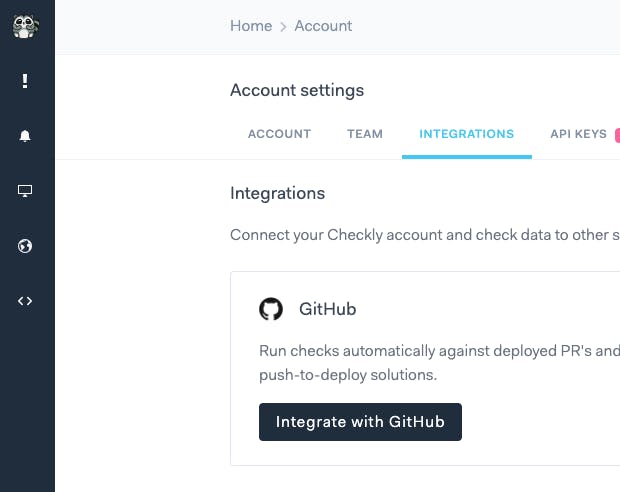
Much like we did with Vercel, we can use our existing GitHub user to create an account on Checkly.
To activate Checkly's GitHub Deployments integration, click on your user profile and select the Integrations tab, then choose the GitHub account you want to link.
Now we can proceed and write our first check. For our very basic blog, we will start with a Browser check.
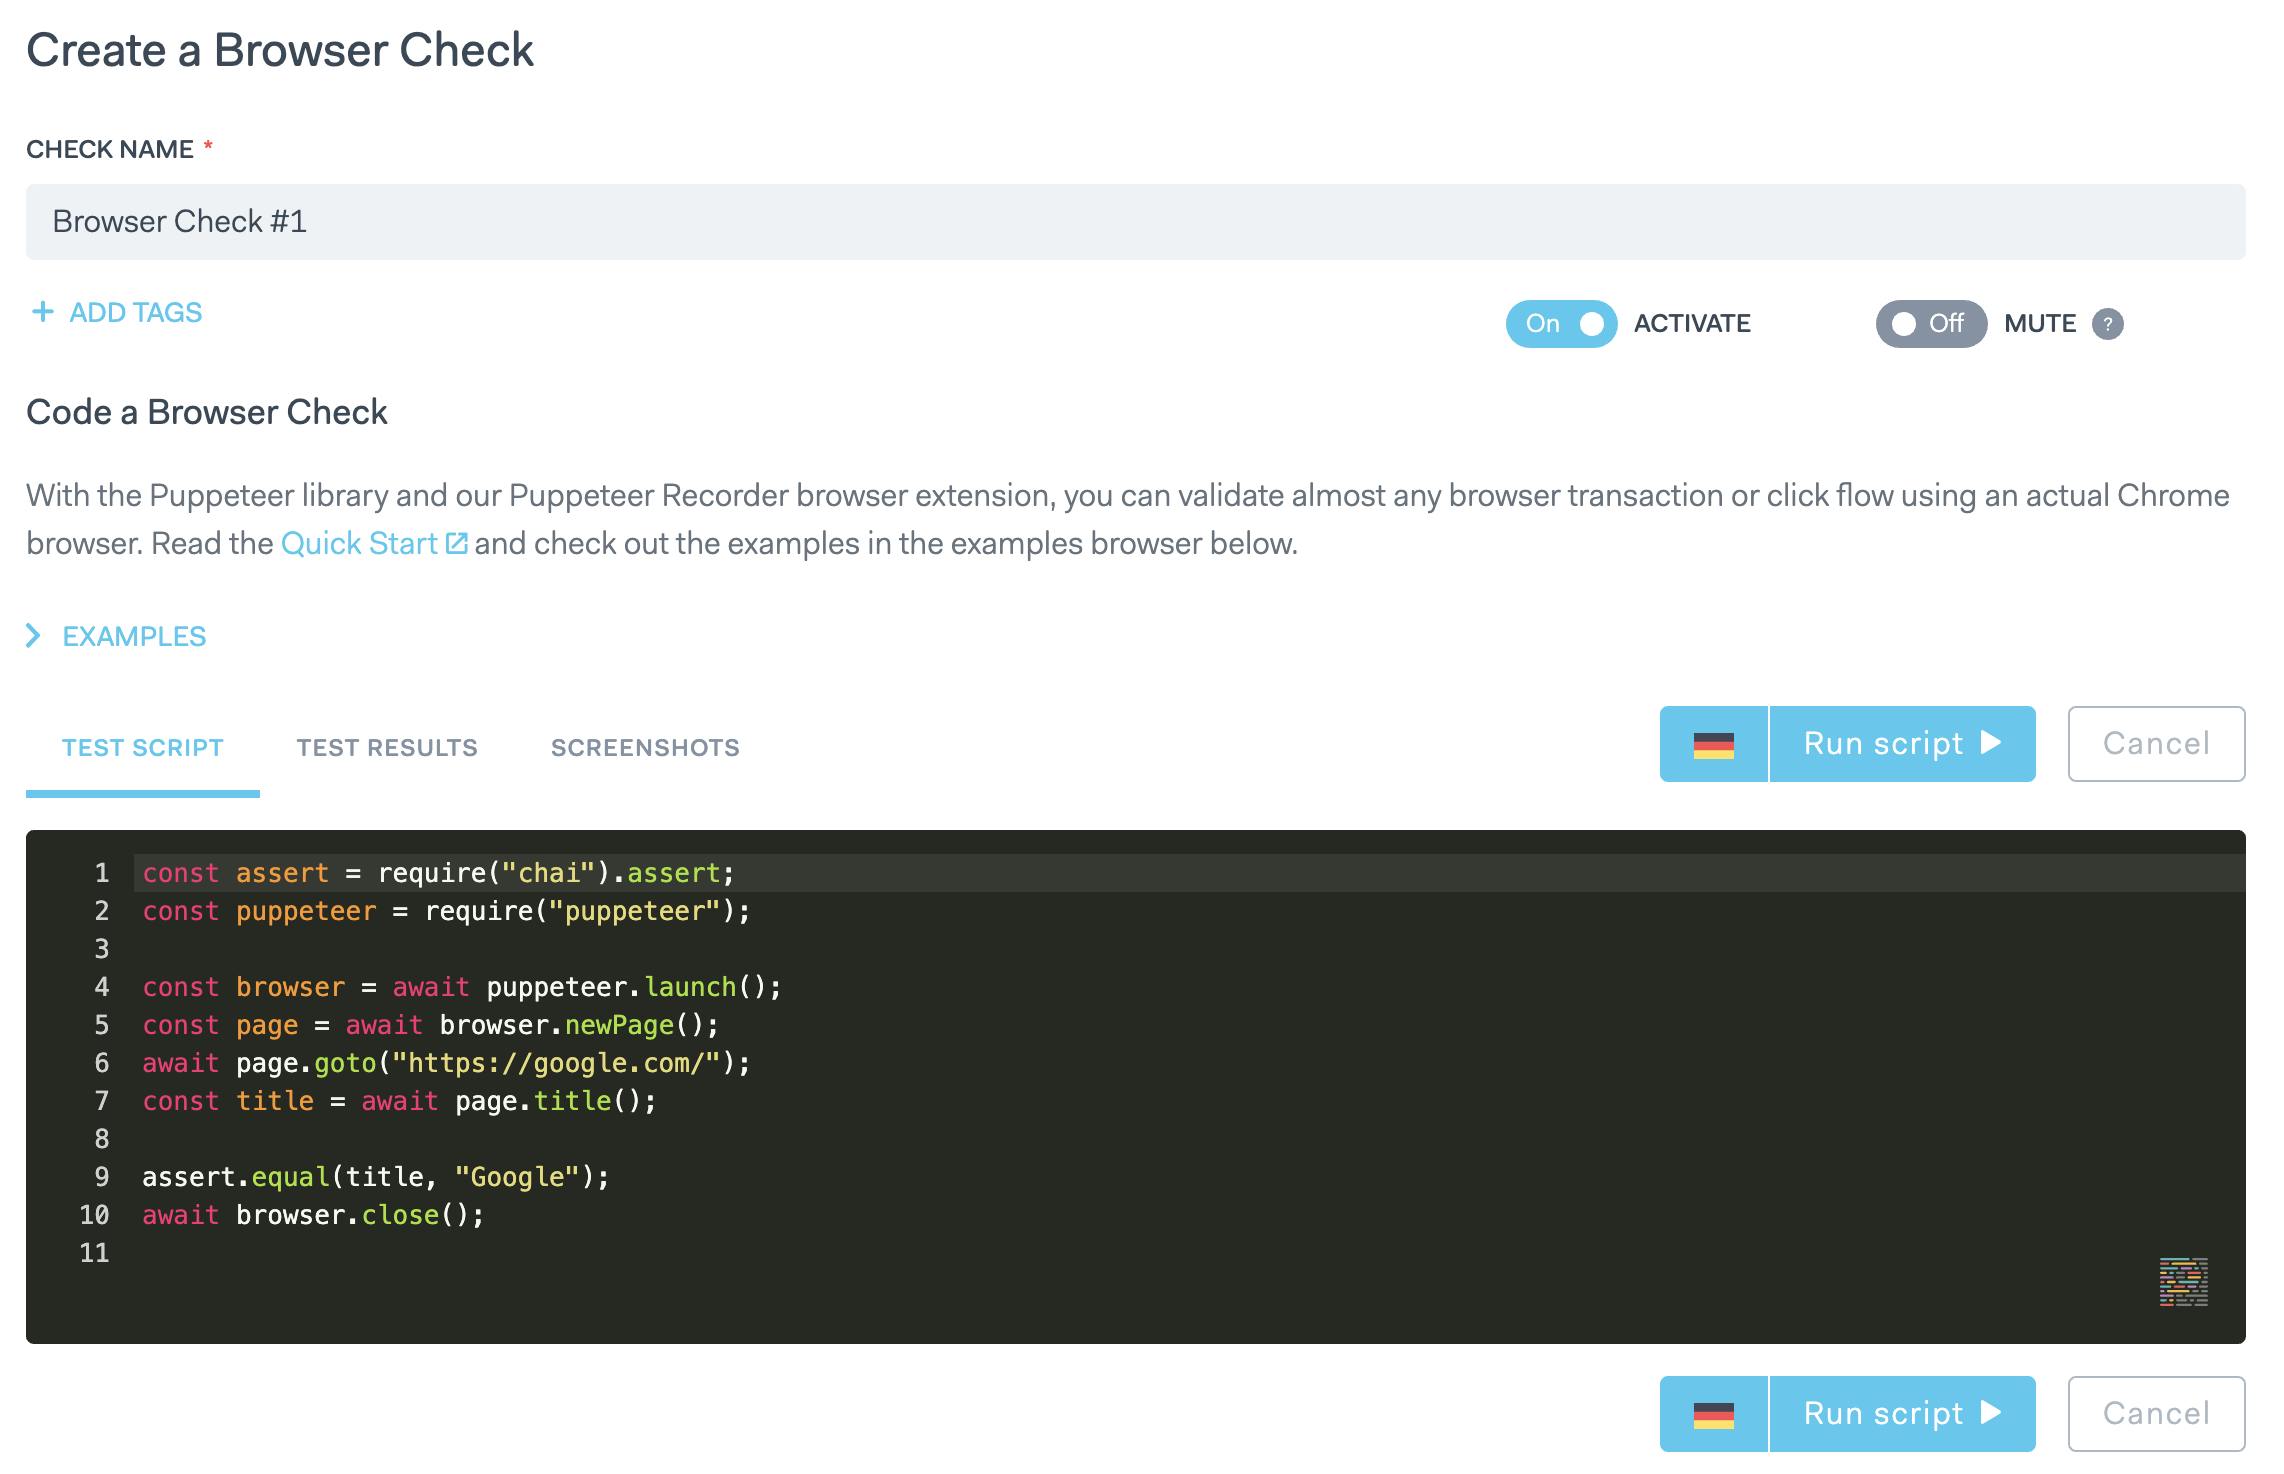
As you likely guessed from the embedded editor, we will need a Puppeteer script for our check to run. If you do not feel confident enough to write your own Puppeteer scripts, definitely check out Puppeteer Recorder: it will help you create scripts without writing any code.
We will keep our check very basic and just have it navigate through the latest blog posts. This is good enough to illustrate our case, but as you develop your blog's functionality you will want to have more structured and informative checks running. Check our example repository for more complex cases.
The code will look something like the following:
const assert = require("chai").assert;
const puppeteer = require("puppeteer");

const browser = await puppeteer.launch();
const page = await browser.newPage();

await page.goto("https://my-gatsby-blog-teal.now.sh/");

await page.screenshot({ path: "screenshot_0.png" })

await page.waitForSelector("main > article:nth-child(2) > header > h3 > a");
await page.click("main > article:nth-child(2) > header > h3 > a");

await page.screenshot({ path: "screenshot_1.png" })

await page.waitForSelector("a[rel='prev']");
await page.click("a[rel='prev']");

await page.screenshot({ path: "screenshot_2.png" })

await page.waitForSelector("a[rel='prev']");
await page.click("a[rel='prev']");

await page.screenshot({ path: "screenshot_3.png" })

await browser.close();
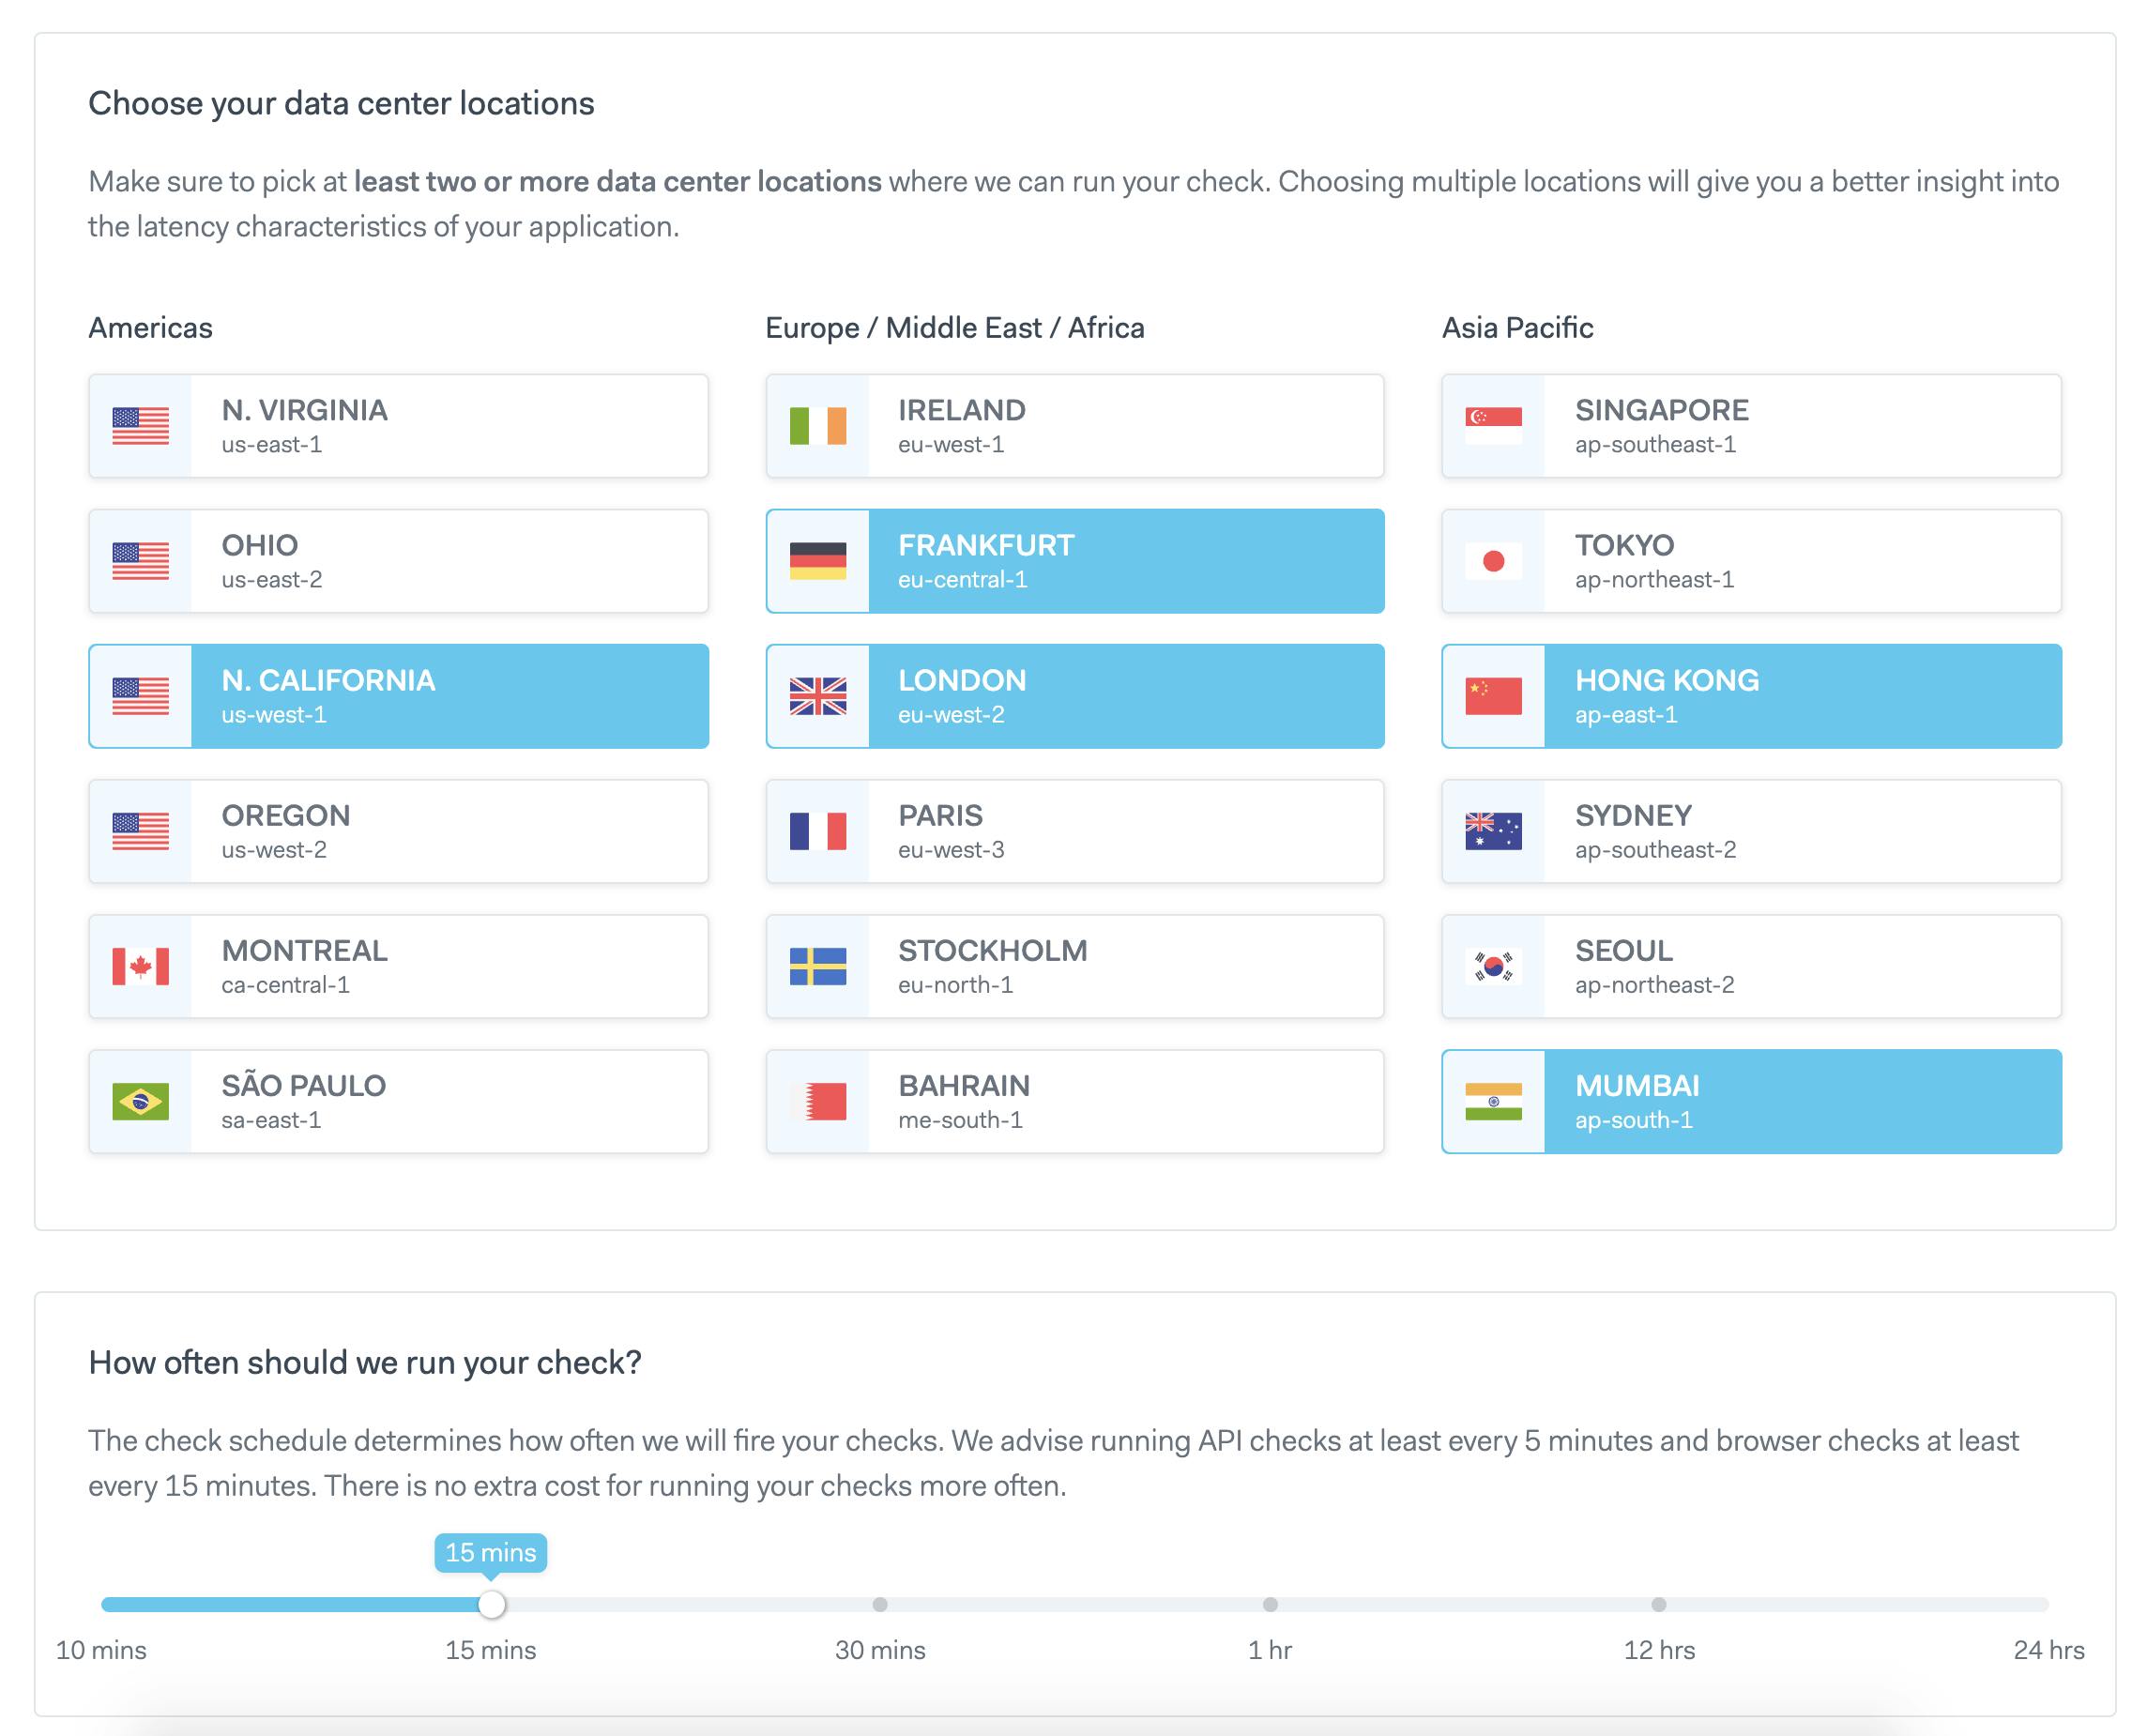
After pasting that into the embedded editor, we can name our check, select two or more locations from which to run it, set a frequency and finally save our progress.
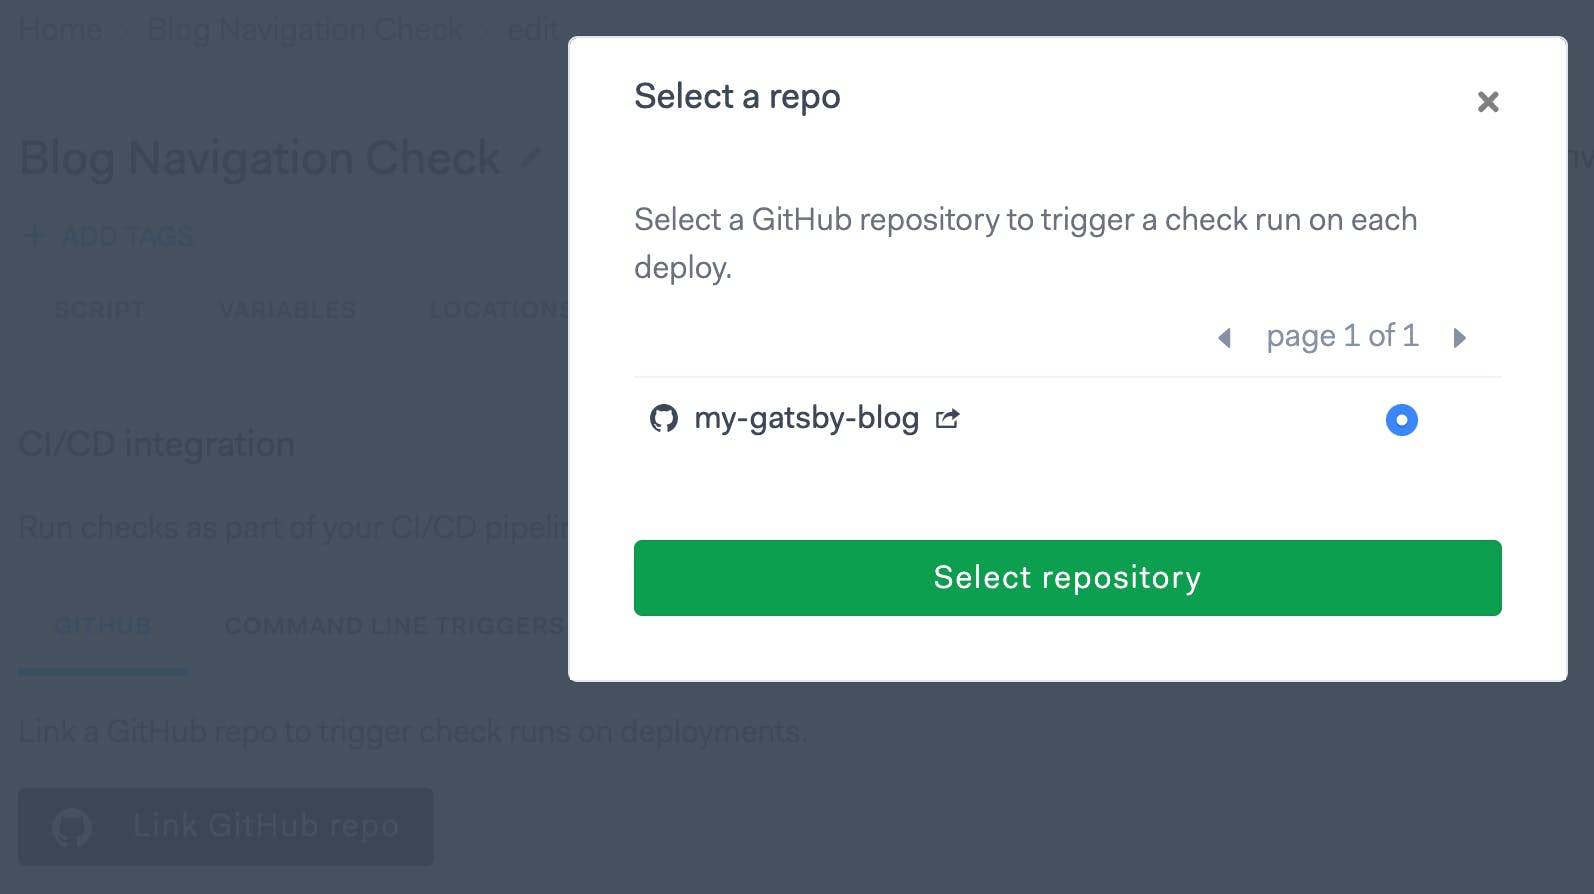
Our browser check should now appear on the dashboard and keep running at regular intervals. Let's now go ahead and select it to set it up to run with our GitHub integration: select 'Edit check', then navigate to the 'CI/CD' tab, click 'Link GitHub Repo' and finally select your repository.
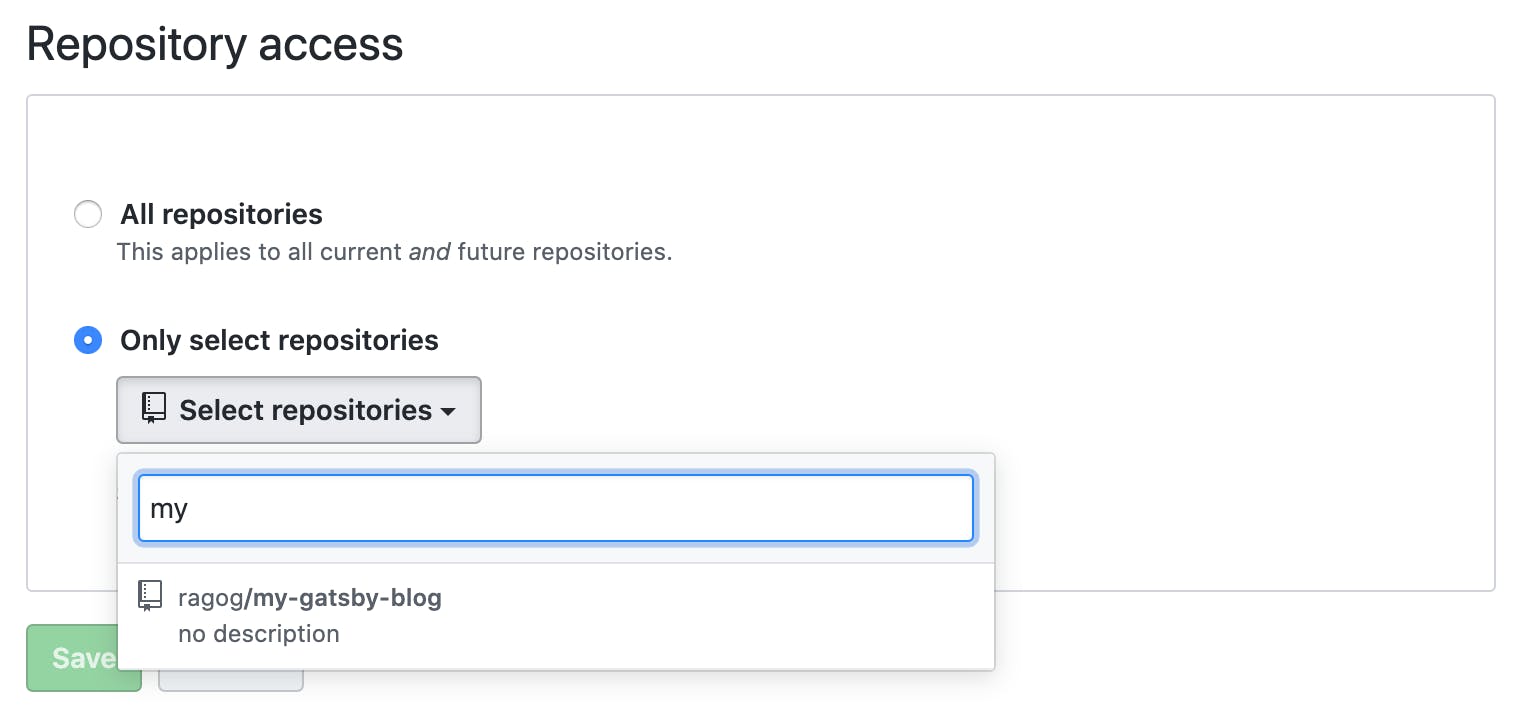
Keep in mind you will always be able to select exactly which repositories you expose to applications integrating with GitHub through Settings > Applications.
Pushing new content to our blog
We are finally ready to tie it all together: we want to be able to preview, deploy and check our new blog automatically. Let's go ahead and write a new post for our blog.
Our current setup is straightforward: every folder within content/blog holds the markdown file for that specific post, along with any assets that post will contain. Let's go ahead and add an entry on a new branch:
git checkout -b new-update
mkdir content/blog/new-update
touch content/blog/new-update/index.md
We can now open our index.md file with our favourite editor and add some content:
---
title: New Update!
date: "2020-05-11"
description: "A new update."
---

Hey, today I managed to set up my Gatsby blog with Vercel, how cool is that?
Once again, we can get a local preview of our latest changes with gatsby develop.
Next, let's save our file and push the changes to our remote repository.
git add content/blog/new-update
git commit -m "add new blog post"
git push origin new-update
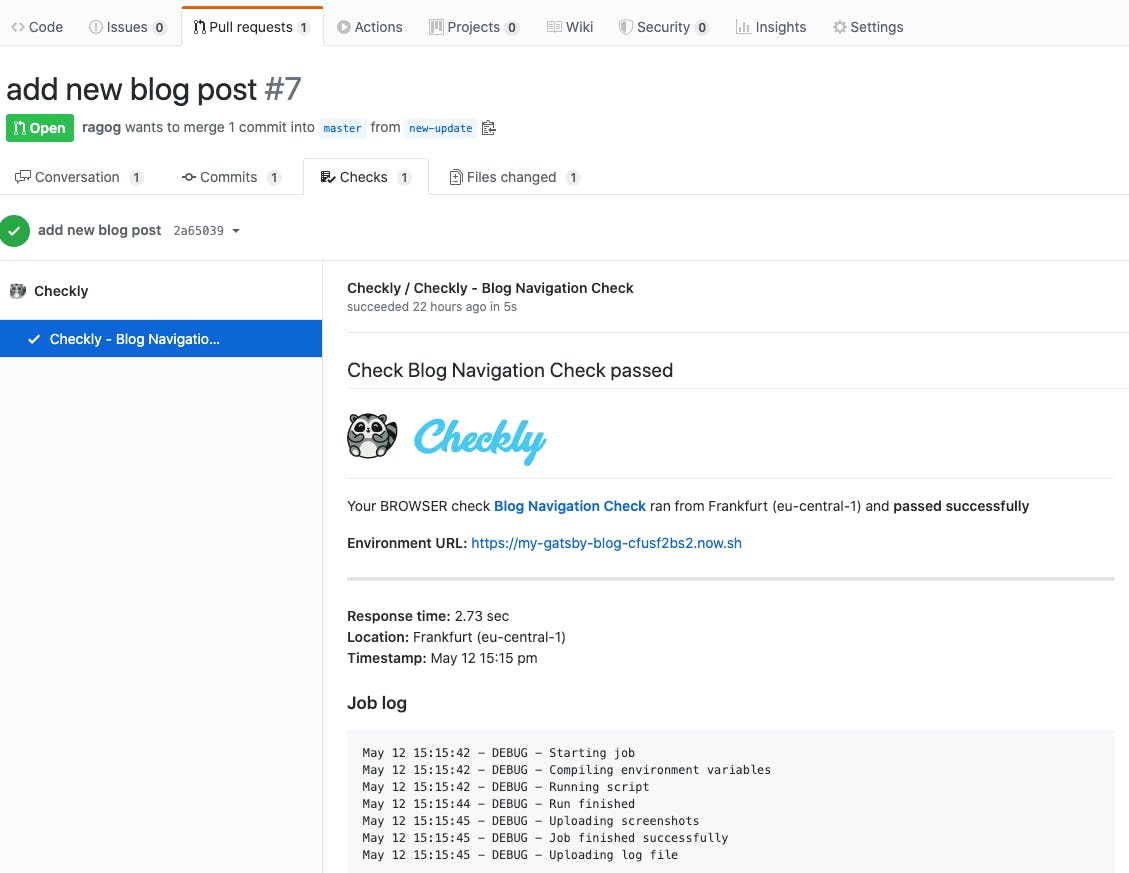
If we now open our browser and navigate to the repository, we should see the new branch pop up as recently updated. We can select it and open a new pull request. This will kick off a new Vercel preview deployment - we can use this to verify our changes before merging to master and having them hit production. The result, together with Checkly's check run will be visibile right above the 'Merge pull request' button.
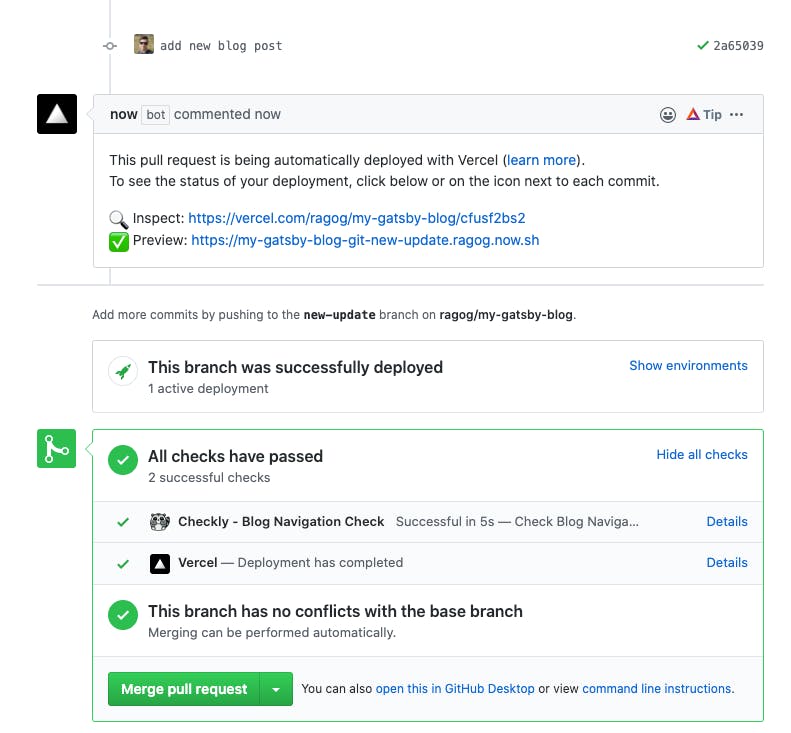
Clicking Show All Checks > Details will show details around both our checks and the deployment status of our blog.
We can now go ahead and merge our pull request - Vercel will pick up on that and automatically deploy the latest changes to our production environment.
That was easy, wasn't it?
Conclusion
In just a handful of steps, we have managed to
- set up a starter blog based on a modern, lightweight framework
- establish a workflow that enables us to leverage our known Git flow
- get our content served from a CDN at blazing fast speeds
- have automated checks running both on PRs and on schedule
We are now free to focus on building the most stunning blog out there.
banner image: detail from "Konan Red Peonies". Kawase Hatsui, 1951, Japan. Source