request and response, and popular npm packages
like moment, axios, and lodash.
To get the most power out of API checks with setup and teardown scripts, we advise using the Checkly CLI.
You can also use them via the web UI.
Setup and teardown scripts have a maximum execution time of 10 seconds each.Check the video below for a quick overview of using setup and teardown scripts through the web UI and with the CLI.
How it works
Setup and teardown scripts run at specific points in the API check lifecycle. Understanding this flow helps you use them effectively. Execution order:- Setup scripts run first and can modify the request before it’s sent.
- The HTTP request executes.
- Teardown scripts run and can access or modify the response.
- Assertions evaluate against the (possibly modified) response.
Setup scripts
Setup scripts execute before the HTTP request. Use them to prepare test data, configure request parameters, and handle authentication. You have access to built-in variables to modify the HTTP request and a set of libraries available in each runtime.Modifying the request
You can modify any property of therequest object:
Authentication example
A common task for setup scripts is fetching or signing session tokens. You can centralize this logic and reuse it across API checks.- Create an API check and reference the setup script (
setup.ts) using theentrypointproperty. - Encapsulate authentication logic in a separate
auth-client.tsfile. - In the
setup.tsfile, import the auth client and update therequestobject.
GET on an authenticated endpoint:
api.check.ts
Authorization header:
setup.ts
common/auth-client.ts
- Reuse authentication logic across multiple API checks
- Test authentication logic separately from Checkly-specific code
Error handling in setup scripts
If a setup script throws an error or times out, the check aborts immediately. The HTTP request never executes, and assertions don’t run.Teardown scripts
Teardown scripts run after the HTTP request completes but before assertions evaluate. They have access to both therequest and response objects.
Common use cases:
- Cleaning up test data created during the check
- Scrubbing sensitive data from responses before logging
- Normalizing response data for consistent assertions
- Extracting and storing values for subsequent checks
Accessing the response
Theresponse object contains the full HTTP response:
Modifying the response
You can modify response properties before assertions run. This is useful for scrubbing sensitive data or normalizing inconsistent API responses.Cleaning up test data
If your setup script creates test data, use the teardown script to clean it up:Error handling in teardown scripts
Unlike setup scripts, teardown errors do not abort the check. The check continues and assertions still evaluate. However, if an error occurs, it may mark the check as failed depending on the error type.Built-in variables
Inside each script, you have access to specific data structures from the API check lifecycle.Environment variables
You have access to all environment variables configured in your account. You can create, read, update, and delete attributes, but mutations only persist for the duration of a single check run. The current data center location is exposed as the region code in theREGION constant,
e.g., eu-west-1 or us-east-1.
Request
Request properties are exposed as a standard JavaScript object. This object is available in both setup and teardown scripts.Response
Response properties are exposed as a standard JavaScript object. These are only available in teardown scripts.Built-in runtime variables
The setup and teardown runtime exposes specific environment variables, in addition to generic runtime variables likeprocess.env.CHECK_NAME.
Setup & teardown specific variables
Generic runtime variables
Technical reference
Included libraries
All setup and teardown scripts run in a sandboxed environment. You do not have full access to the Node.js standard library or arbitrary npm packages. Check our runtimes documentation for a full specification of included modules.Limitations
- Setup and teardown scripts are implicitly wrapped in an async function. You can always use
awaitstatements. - You cannot use nested callbacks as there is no way to determine the callback function. Always use
awaitstatements. - You need to include modules and libraries explicitly, e.g.,
const moment = require('moment'). - You can pass a maximum of 256KB of data to and from the check’s main request.
Using setup and teardown scripts via the UI
When using the Checkly web UI, you can use setup and teardown scripts in two modes: 1. Inline scripts Write JS/TS code directly in the editor. Best for quick, one-off pieces of code.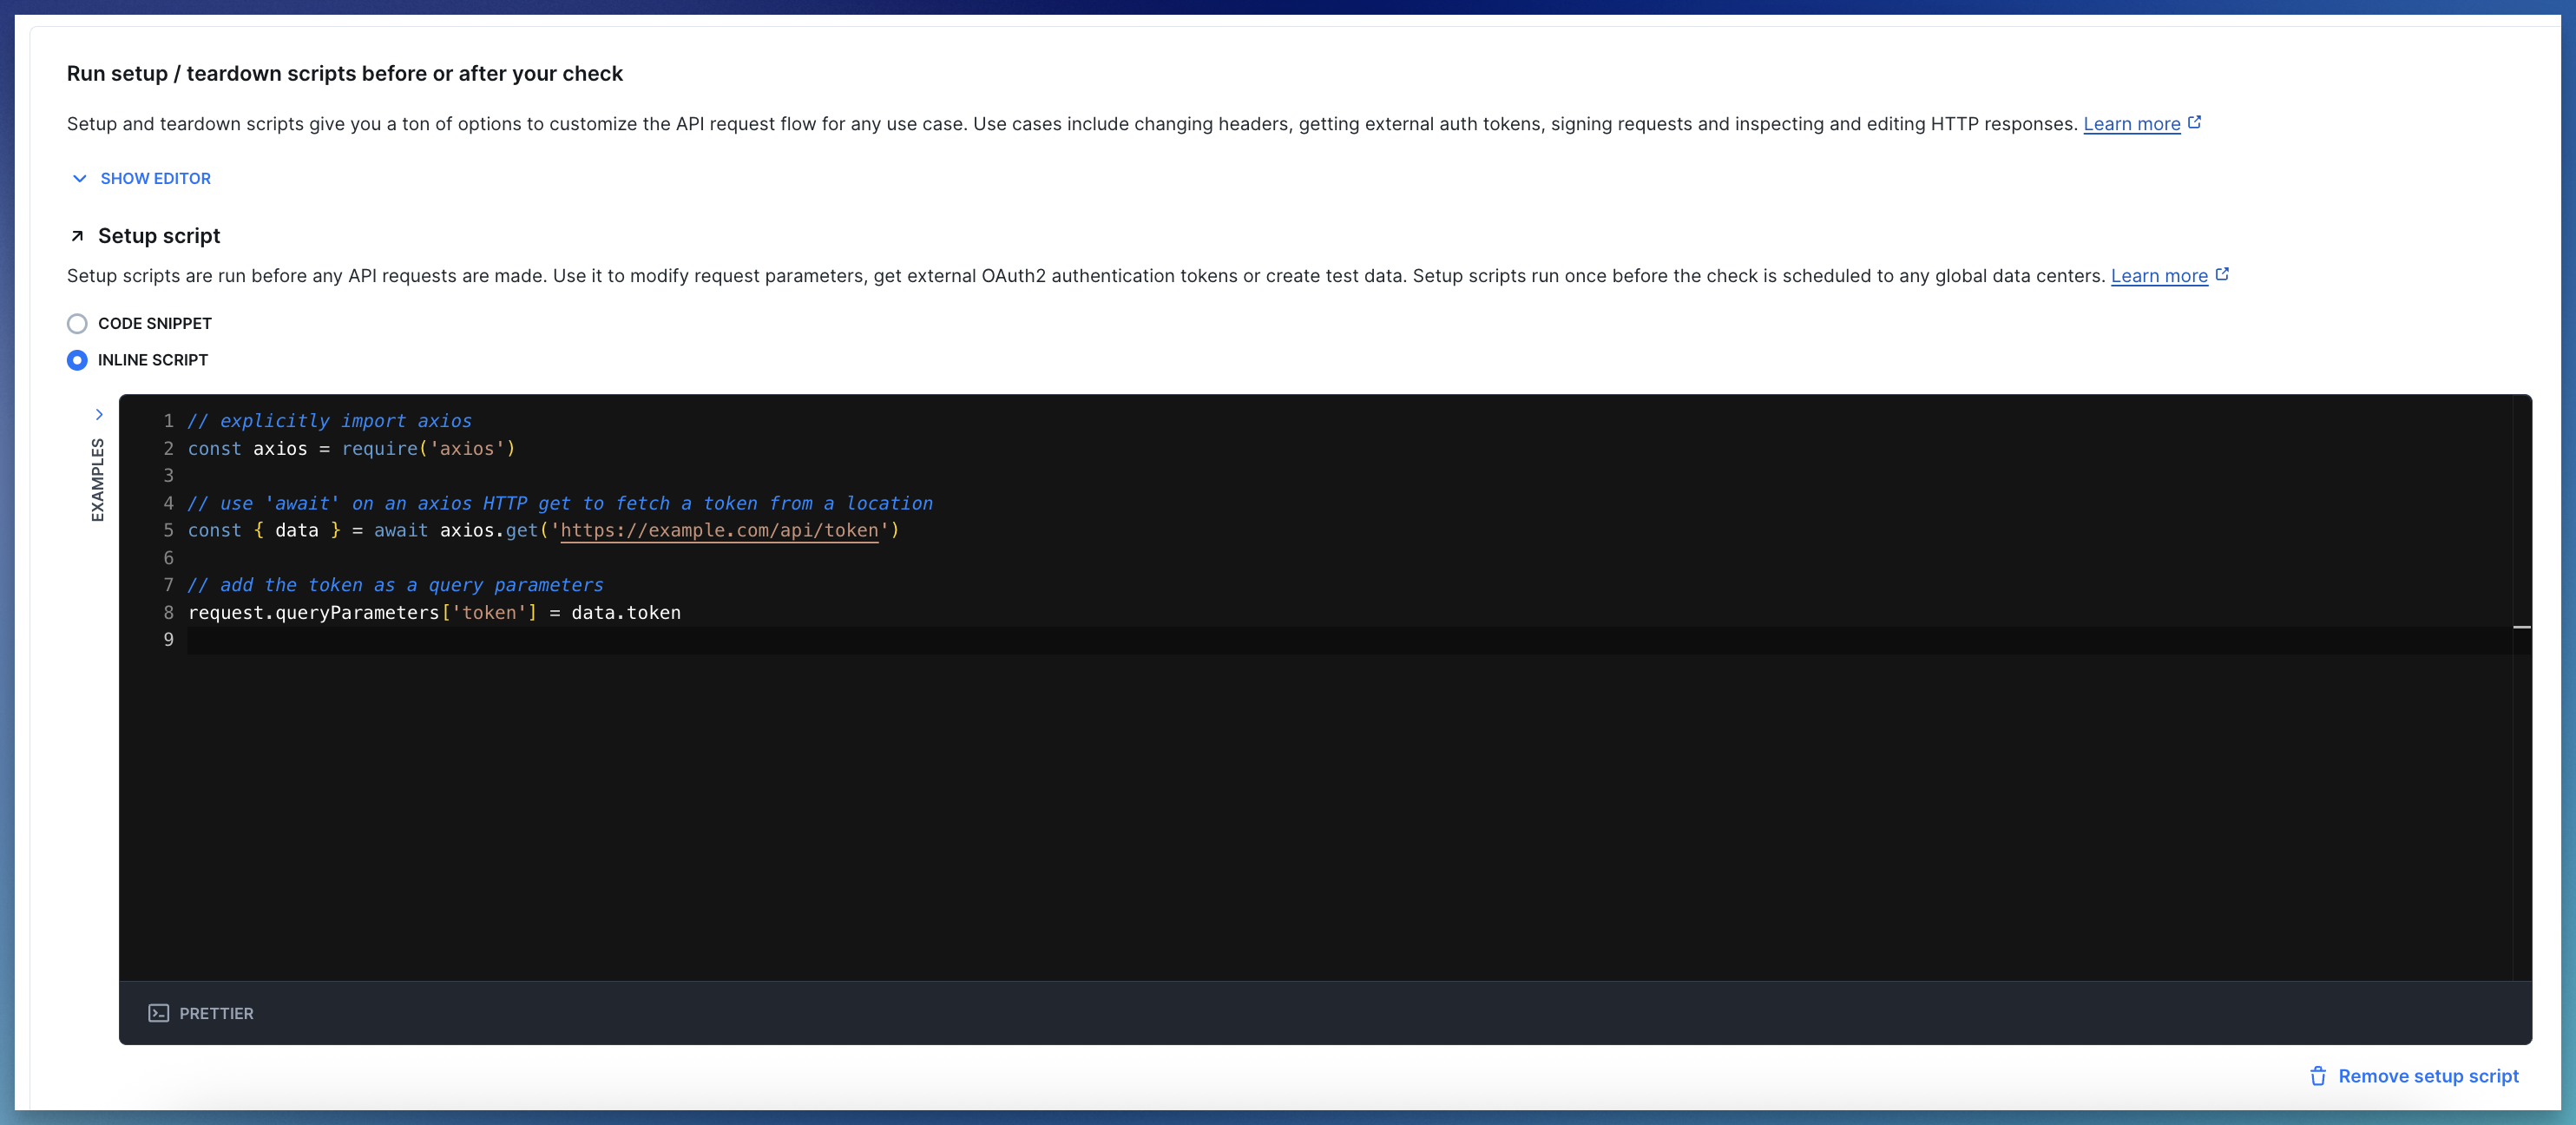

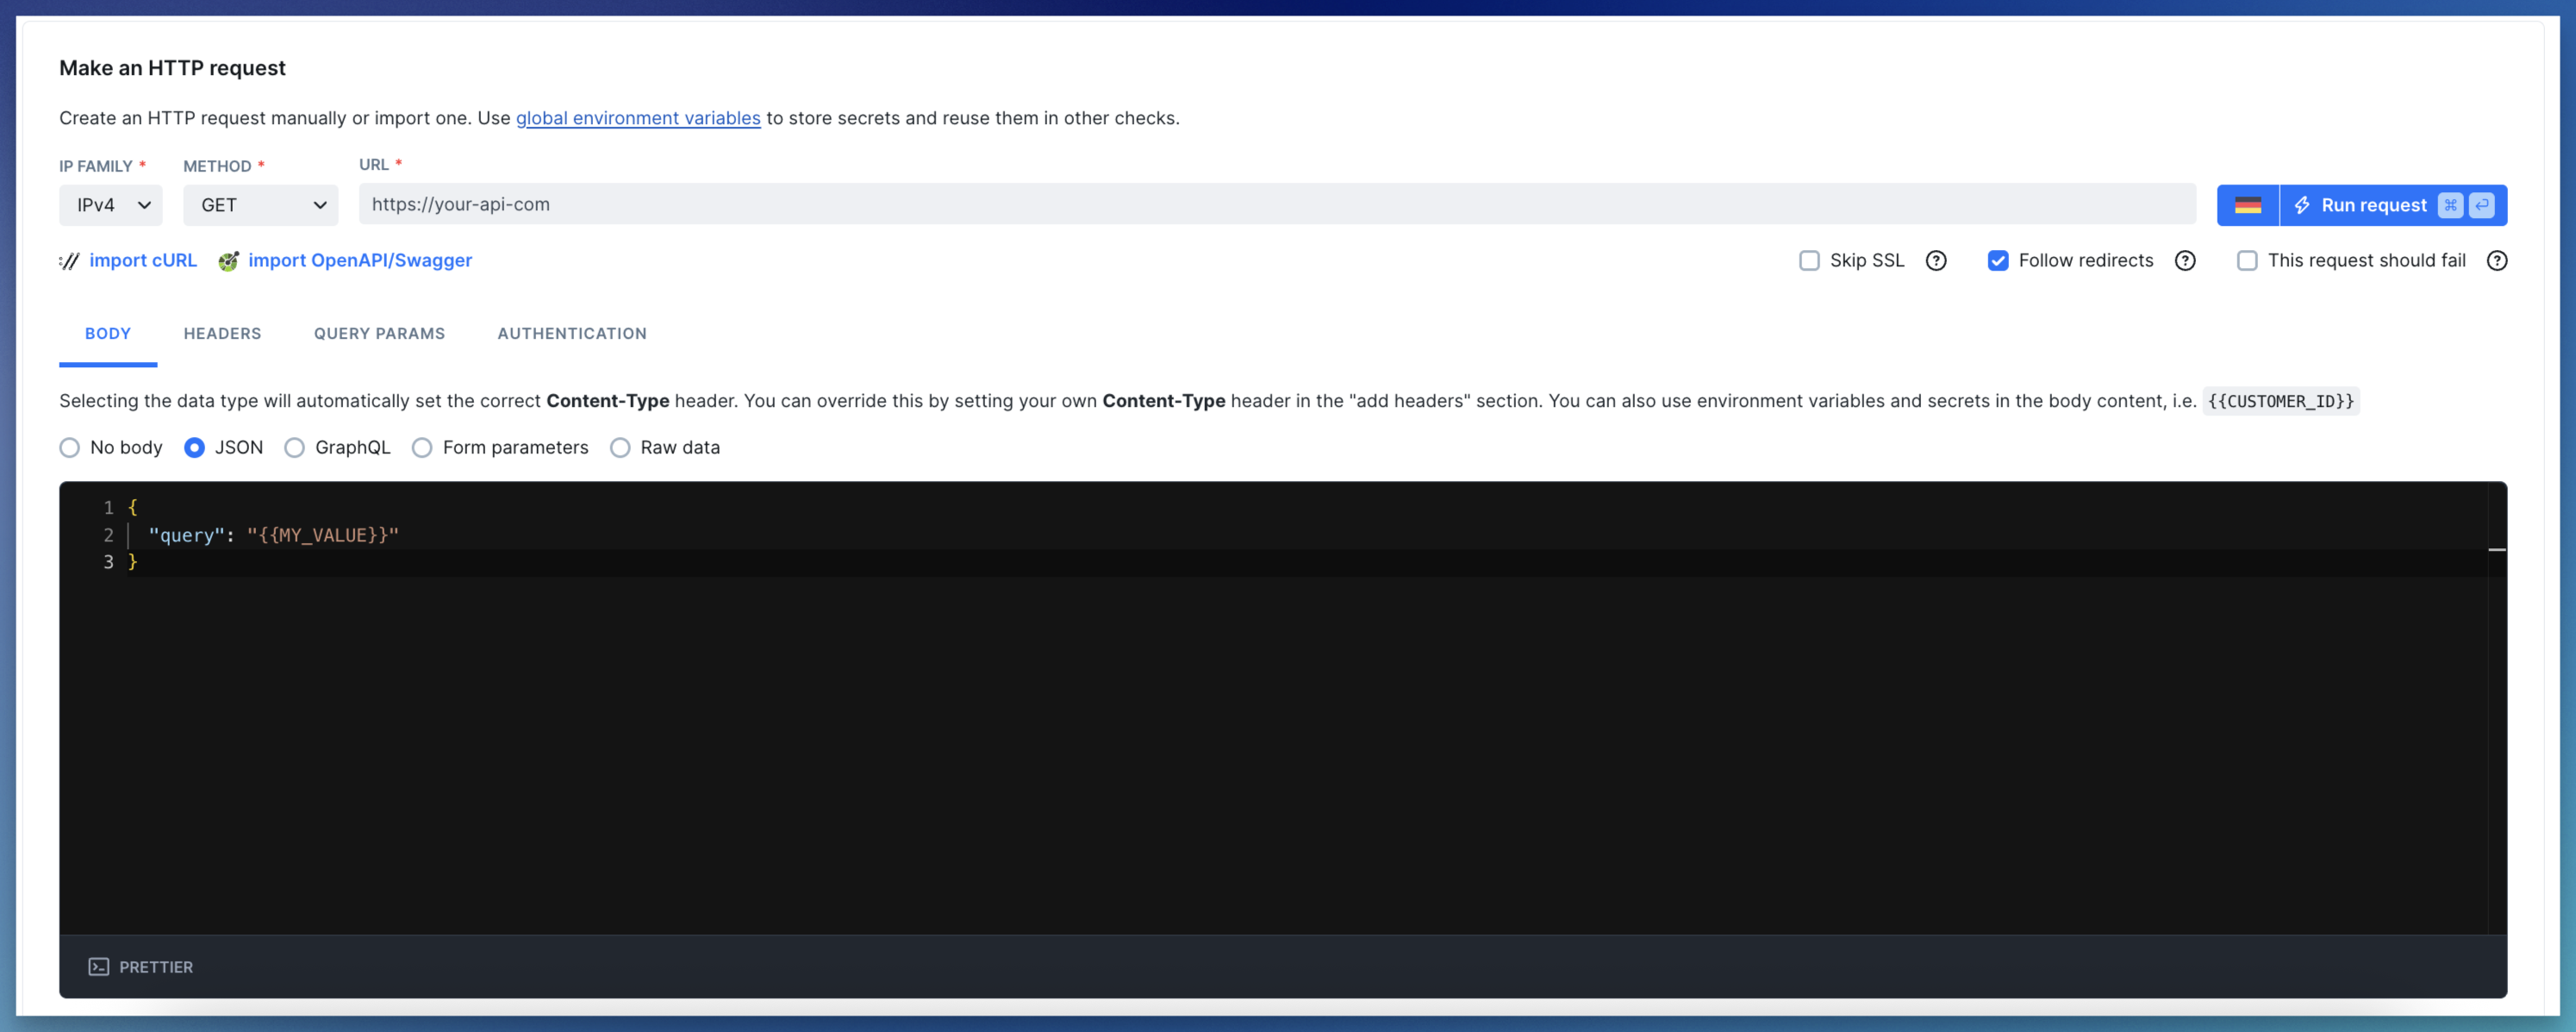
Using environment variables via Handlebars
If your API check’s request body relies on data from a setup script, use environment variables to pass it.{{MY_VALUE}} notation.