- Checkly can automatically instrument all check executions with Open Telemetry tracing and send the data to Coralogix as traces.
- Checkly can automatically instrument your Browser checks with Coralogix RUM (Real User Monitoring).
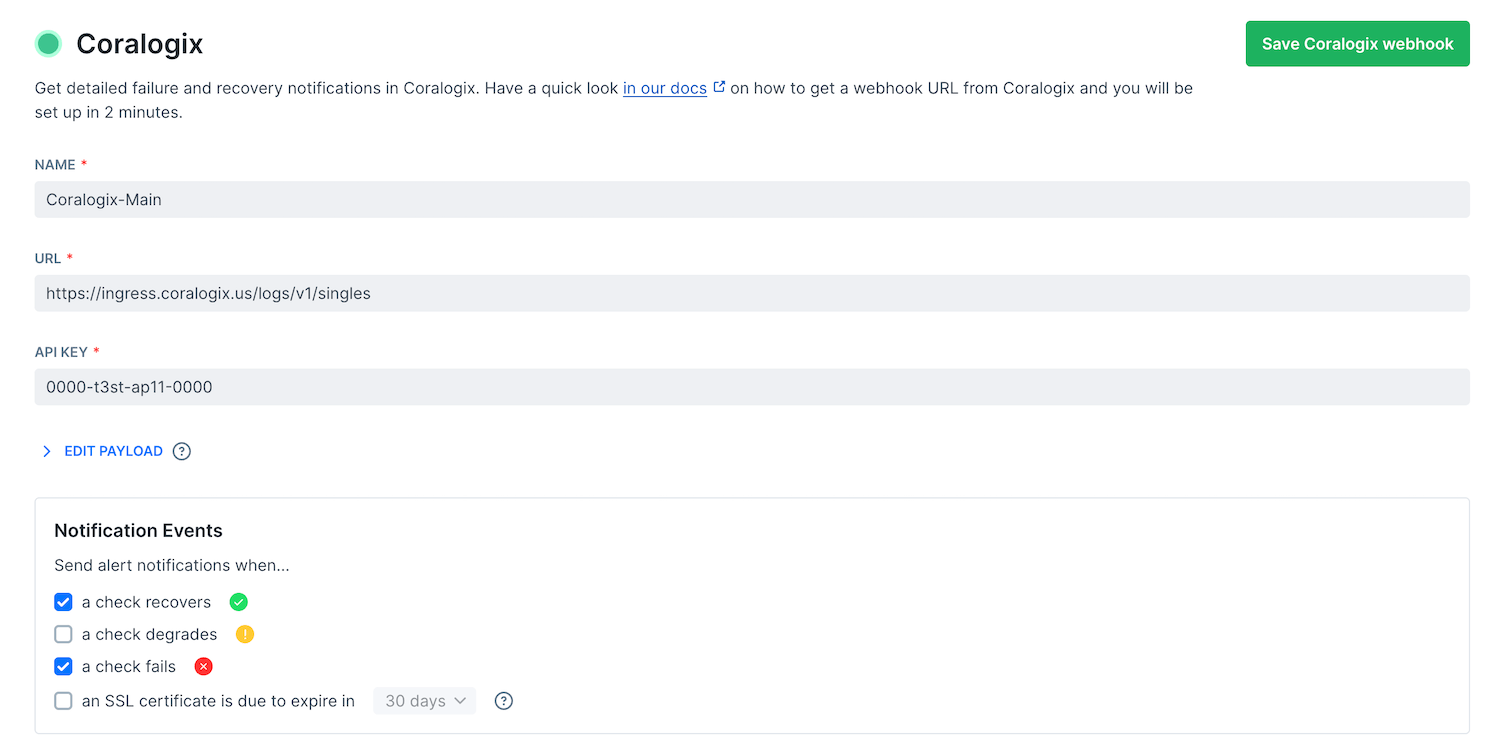
- Checkly can send alert notifications when checks pass and/or fail to Coralogix Logs.
Open Telemetry tracing integration
To set up the Open Telemetry tracing integration, first enable the Coralogix integration in your Checkly account in the integrations section.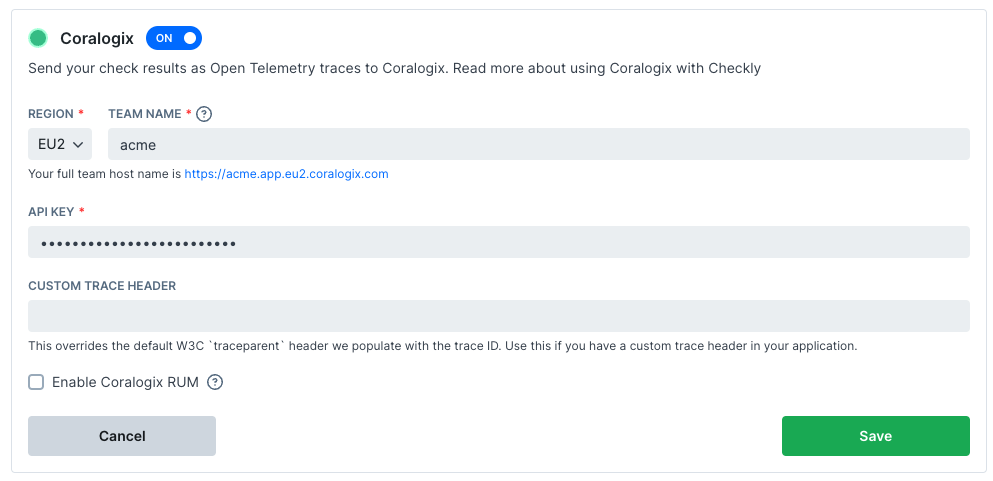
- Pick the region of your tenant and enter the team name. We use this to determine the correct trace ingest endpoint for Coralogix.
- Create a “Send Your Data” API key in your Coralogix account, you can find these in the Data Flow > API Keys section of your Coralogix dashboard. Copy and paste the API key.
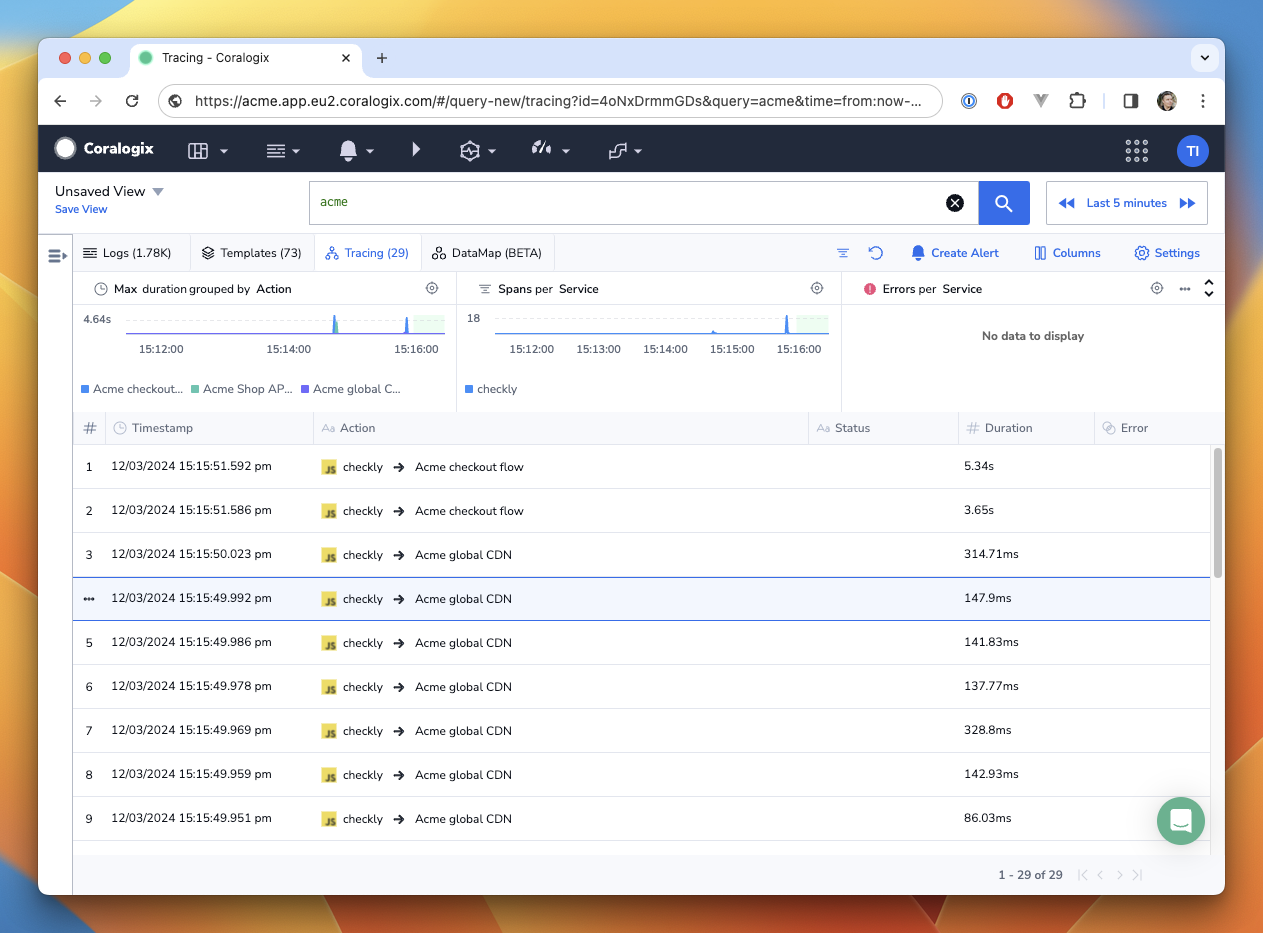
- Send a trace for every check run to Coralogix.
- Instrument all HTTP requests generated by the check with the following headers:
| Header | Value | Description |
|---|---|---|
traceparent | {version}-{trace_id}-{span_id}-{trace_flags} | A trace parent ID in the canonical w3c format |
tracestate | checkly=true | A vendor specific header so you can recognize traces originating from Checkly |
| Tag | Description |
|---|---|
checkly.account.id | The ID of the Checkly account the check belongs to. |
checkly.check.id | The ID of the Checkly check that generated the trace. |
checkly.check.name | The name of the Checkly check that generated the trace. |
checkly.check.type | The type of the Checkly check that generated the trace. |
checkly.check.runtime | The runtime ID of the Checkly check that generated the trace. |
checkly.check.session.id | The unique ID of the check session the check belongs to. |
checkly.check.result.id | The unique result ID of the check run. |
checkly.check.location | The location ID of where the check was run, i.e. us-east-1. |
traceparent, you can configure this header in the custom
trace header field in the integration settings.
What’s included
- Traces for every check execution
- HTTP request instrumentation with W3C headers
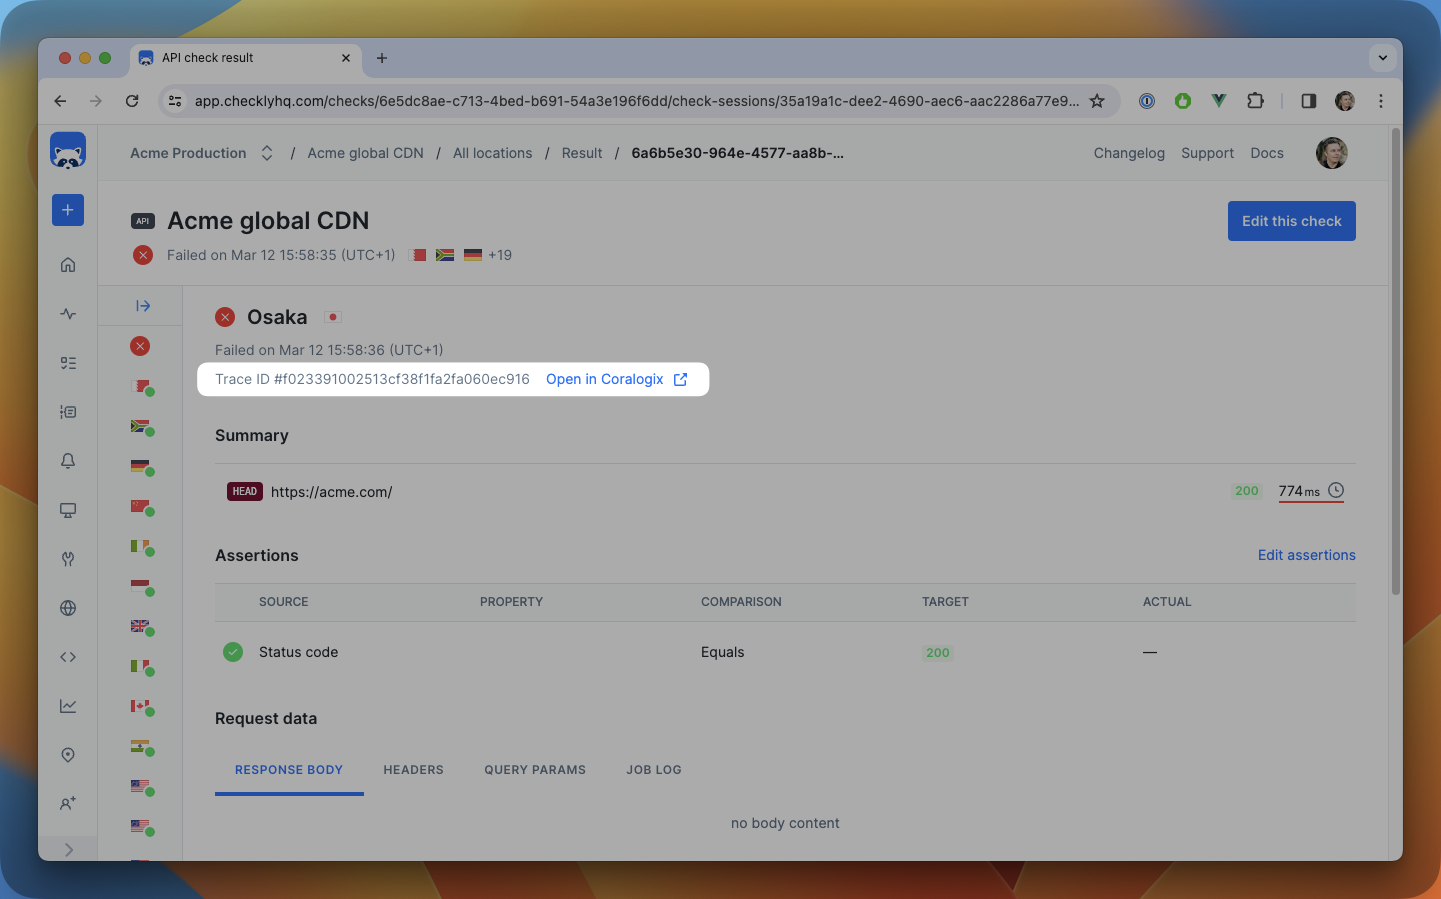
- Trace correlation metadata
Check metrics (response times, availability, etc.) are not sent through this integration. To send these metrics
to Coralogix, scrape them via the Prometheus integration
and forward to Coralogix using an OpenTelemetry Collector.
RUM integration
In addition to the Open Telemetry tracing, Checkly can also send RUM data to Coralogix for all Browser checks. This enables tracking your Playwright-powered checks to be recorded as (semi) real users, so you can compare and contrast the performance between synthetic and real users.
- Click Enable Coralogix RUM and pick the region of your tenant.
- Set the global name of the application you will be targeting with your checks, e.g. “Acme webshop”.
- Create a new RUM integration in your Coralogix account via Data Flow > Integrations > Real User Monitoring
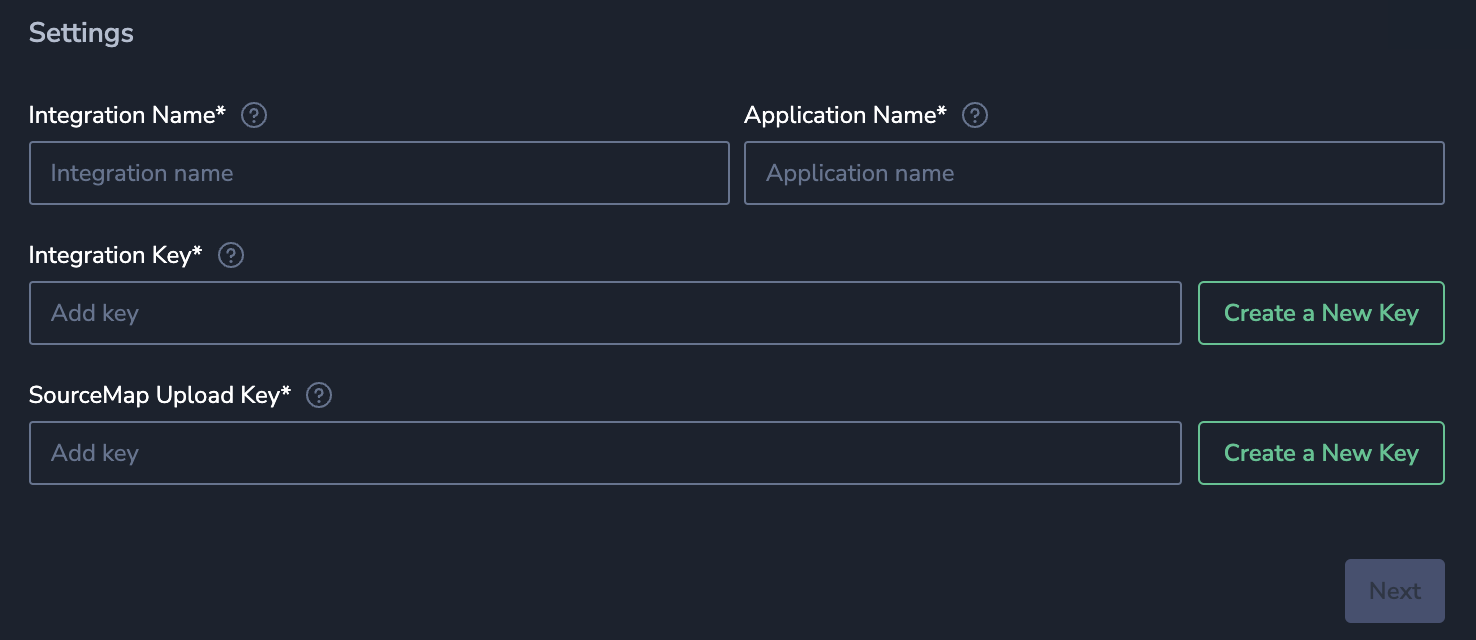
- You will need to create an Integration Key and a SourceMap Upload Key. Copy and paste the integration key into Checkly.
Only the integration key is needed for the Checkly integration.
- As Checkly automatically injects the Coralogix RUM SDK to each browser check run, uploading and setting up the SourceMap is not required. You can skip the Install & setup Browser SDK Package step and finish the set up there.
CORALOGIX_RUM_APP_NAME to your Browser check. You can find the Browser check specific environment
variables under Settings > Environment variables in the Browser check editor.
After enabling the RUM integration, Checkly will start sending RUM data to Coralogix for all Browser checks.
Note that you do not need to install the RUM SDK in your application, Checkly will automatically inject the necessary JavaScript snippet into your Browser checks. However, if you have installed the SDK we will use the existing installation and not inject the snippet.
Alert Channel → Coralogix Logs integration
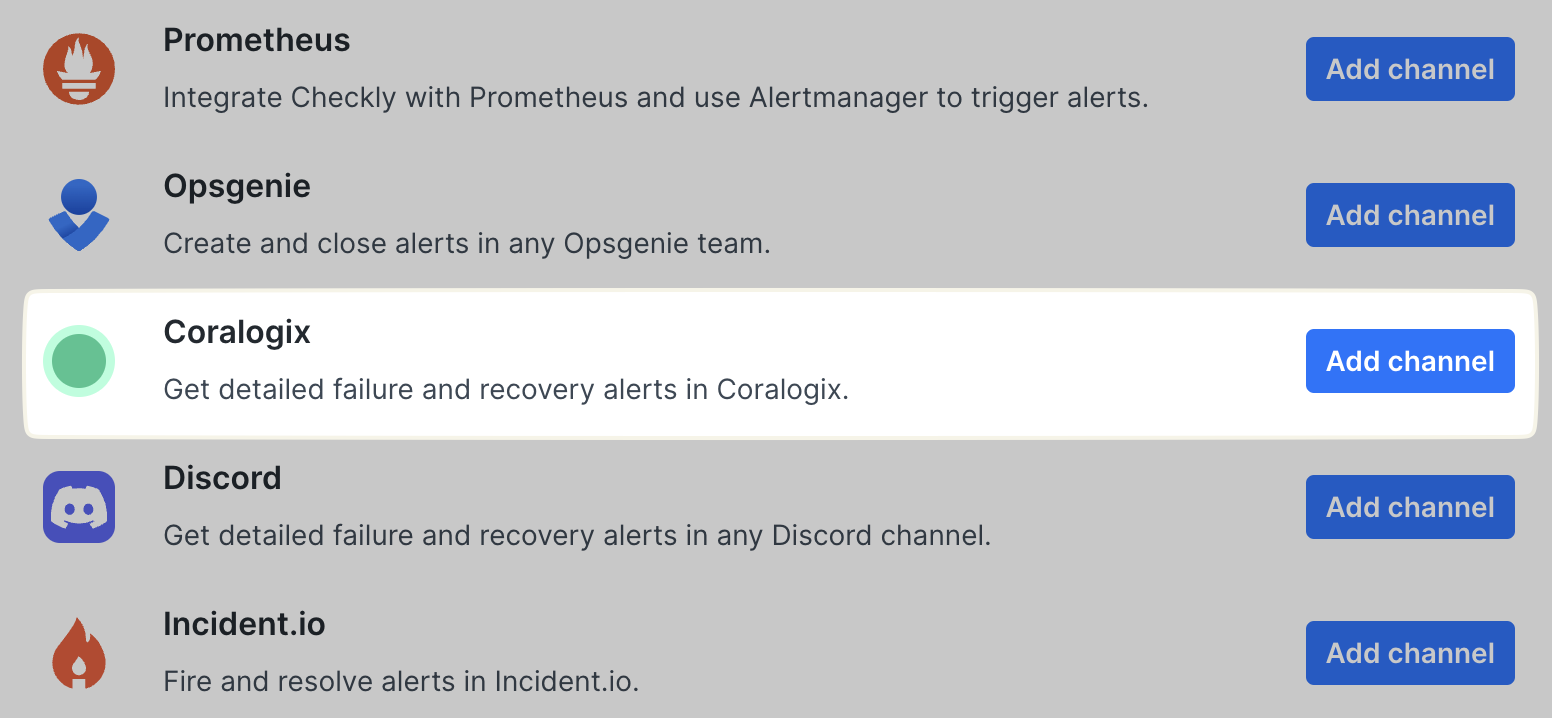
You can set up Coralogix as an alert channel destination, so Coralogix receives any alert notifications you have set up as logs. Note that you can use this integration separately from the other two integrations mentioned above.- In Checkly, navigate to alert settings. Click the Add more channels button, find Coralogix on the list, and click Add channel.
- Create a “Send Your Data” API key in your Coralogix account, you can find these in the Data Flow > API Keys section of your Coralogix dashboard. Copy and paste the API key.
-
Give your channel a name, and provide the correct Coralogix Logs API endpoint for the appropriate region, e.g.
https://ingress.eu2.coralogix.com/logs/v1/singlesMake sure that the right checks are subscribing to the channel and that the Send when rules are correctly set, then hit Save Coralogix Webhook.