Documentation Index
Fetch the complete documentation index at: https://checklyhq.com/docs/llms.txt
Use this file to discover all available pages before exploring further.
Owner or Admin permissions are required to create, edit, and delete Private Locations.
- Monitor internal systems: Test the performance and reliability of applications and APIs that are only accessible from within your network (e.g., development environments, intranet tools)
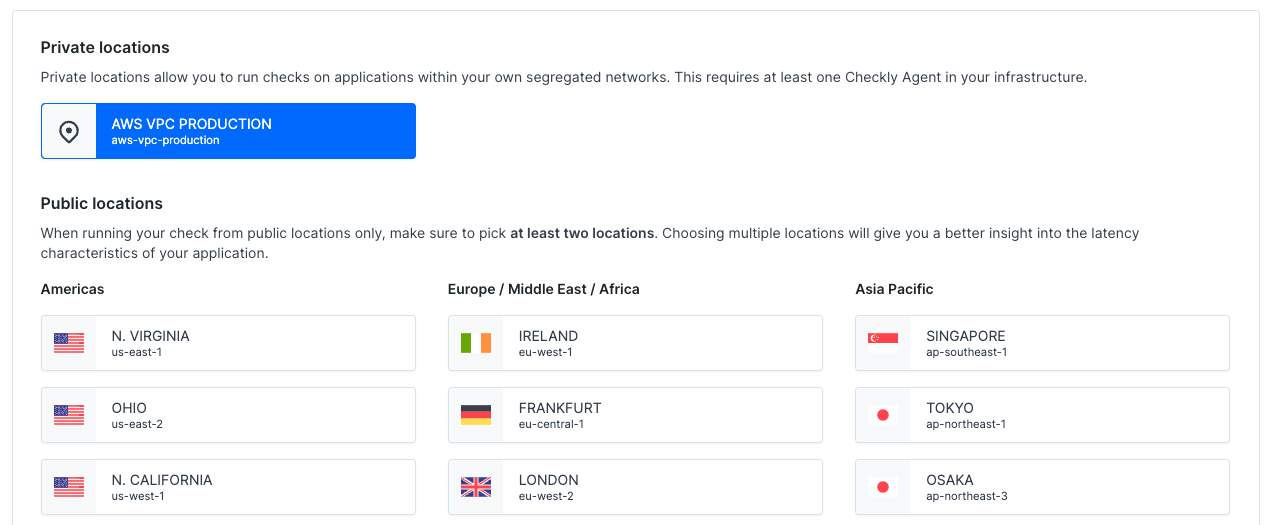
- Test from anywhere: Test the performance and reliability of applications and APIs from different parts of the world. Install your Checkly Agent(s) for location-based performance insights, that we don’t cover with our Global Locations
Requirements
Here are the requirements before you get started:- A container runtime (we test using Docker, but other runtimes should work)
- Outbound internet access for the Agent to https://agent.checklyhq.com (proxy configuration is supported)
- Access to your API or browser-based applications and services from the Private Location network
- Owner or Admin permissions (required to create, edit, and delete Private Locations)
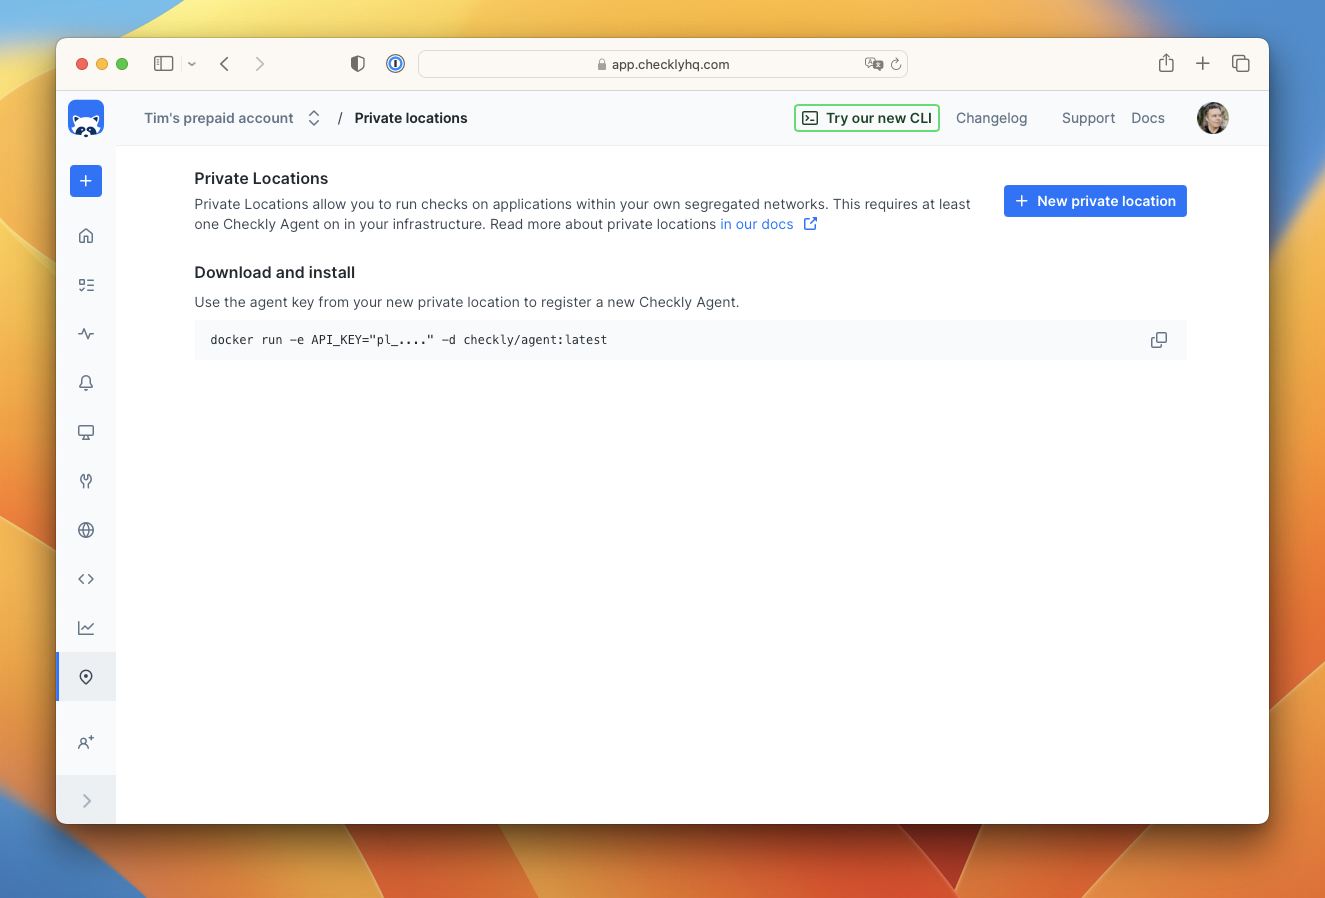
Configuring a Private Location
-
Navigate to the Private Locations page and click “New private location”
-
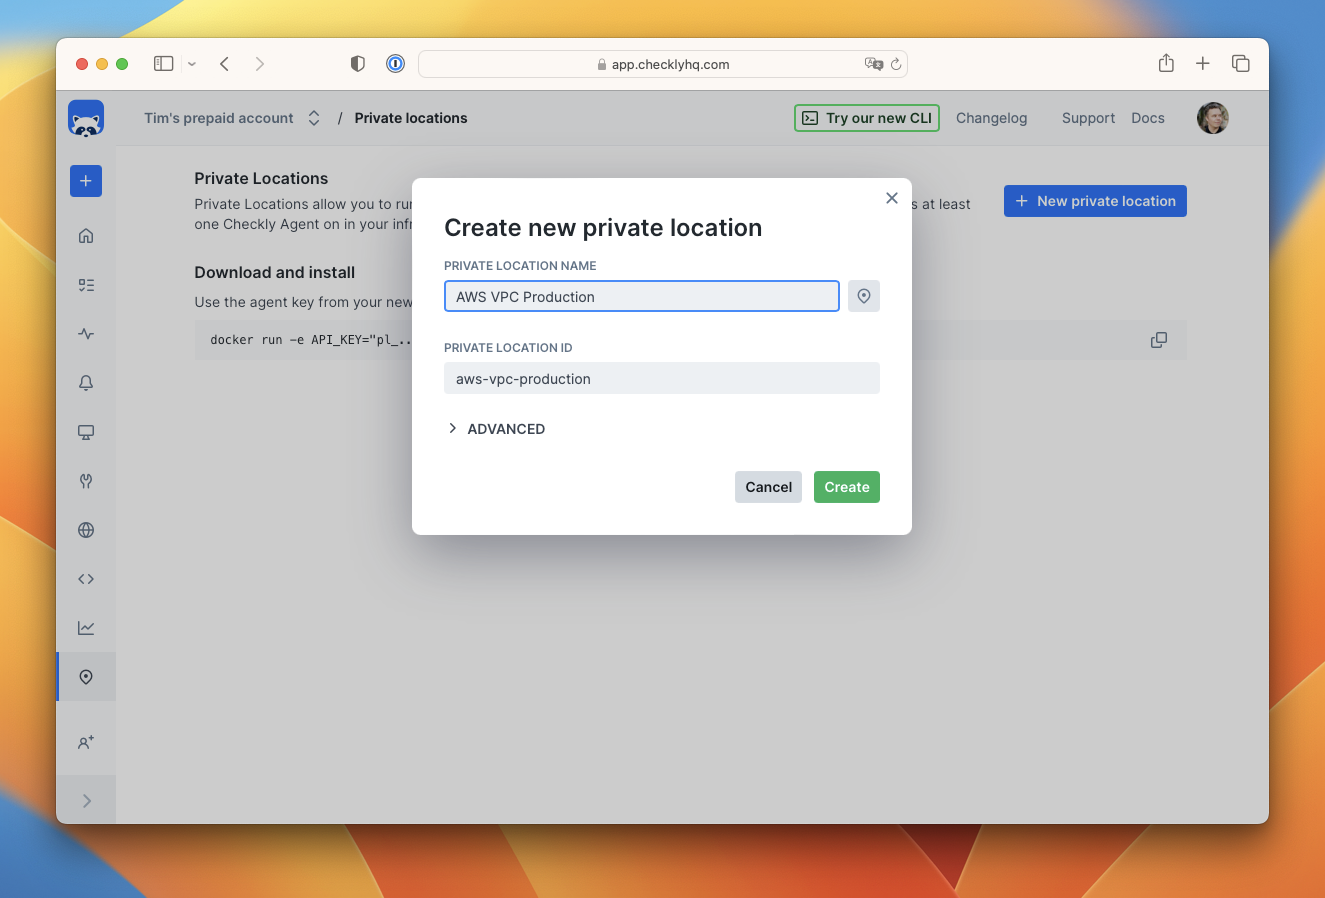
Provide a name and icon for the new private location. The ID is automatically generated ID for API access. Click create.
-
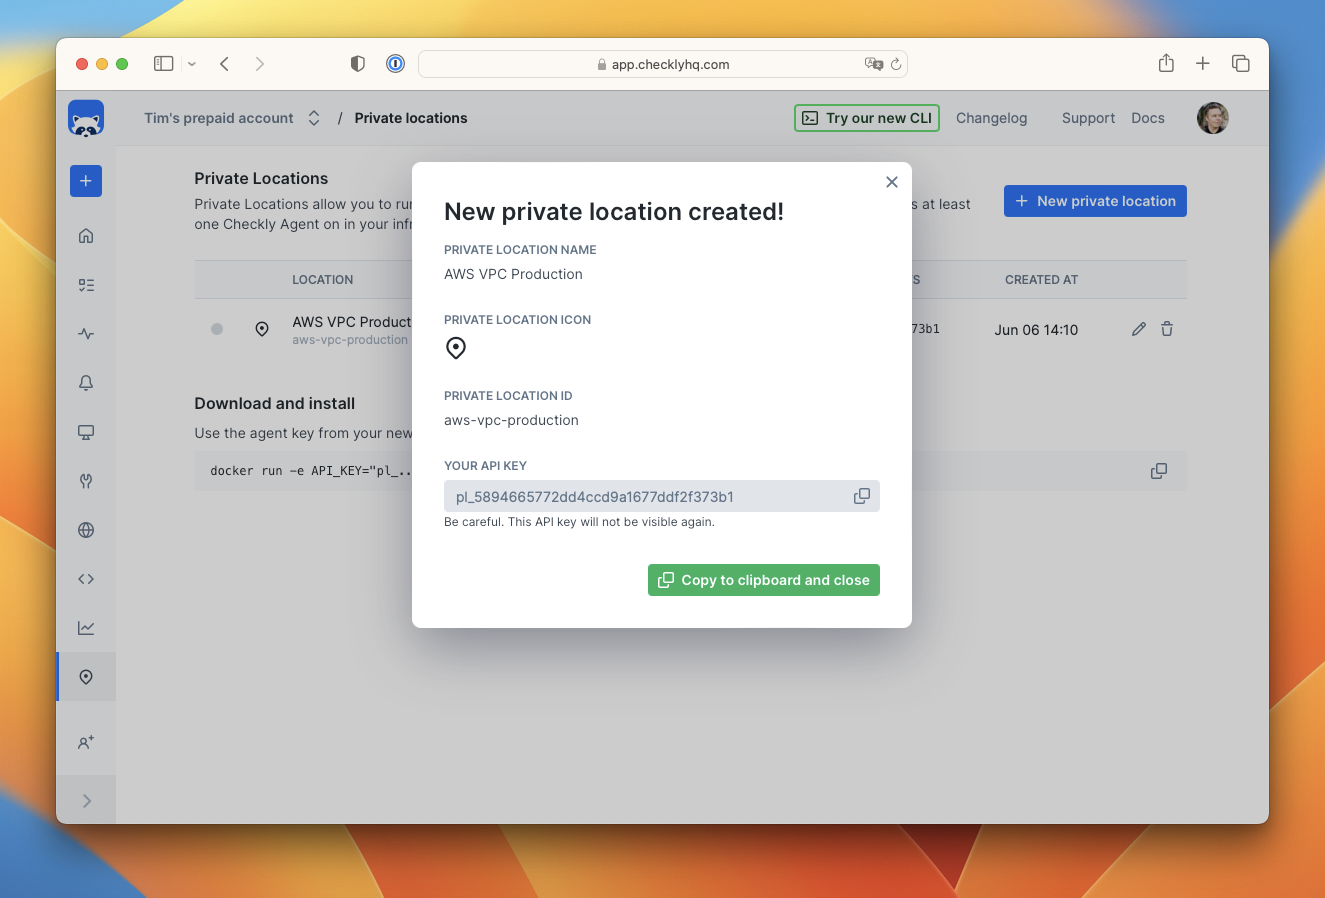
You will receive an API key for the new location. Copy this key and keep it safe as you will need it to add agents to the location, and you won’t be able to see it again.
-
Start the Checkly agent by running the following command in a terminal, making sure to replace the
API_KEYwith the key you just received. See more configuration options.
-
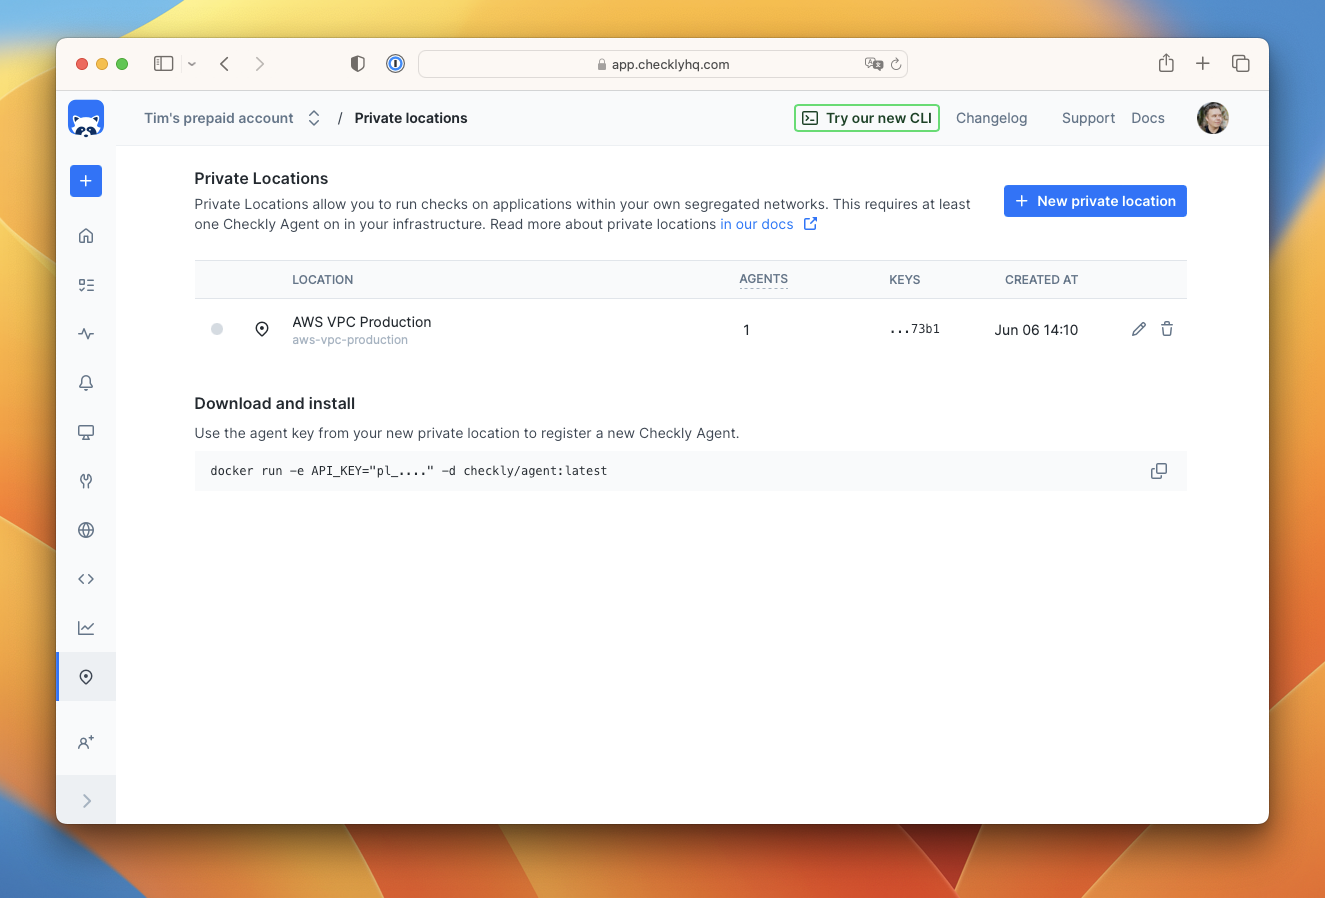
Refresh the Private Locations page in the Checkly app and you will see a count of the number of running agents.
-
Create a new check as you normally would in Checkly. You will now see your new private location in the list of available locations. Select it and deselect any other locations.
Using Private Locations with the CLI
With the Checkly CLI, you can configure any check to run on a Private Location by adding the slug name to theprivateLocations array. For example, with an ApiCheck construct:
Unavailable Private Locations
If a private location has had no Checkly agents connected for more than 10 minutes, it will be flagged as unavailable. Checkly will email account owners and admins that the location has become unavailable. While a location is unavailable, no checks will be scheduled to run on it. When a location becomes available, check scheduling and execution will resume automatically.Using Playwright Check Suites in Private Locations
We recommend to update the Checkly agent regularly.- Playwright Check Suites are available in private locations since Checkly Agent
6.0.3.
Next Steps
Once your first agent is running, explore these topics to start using Private Locations in production:Agent Configuration
Detailed agent configuration options, updating your agent, runtime support, and more.
Kubernetes Deployment
Run production-grade agent deployments on a container orchestrator like Kubernetes.
Scaling and Redundancy
How to calculate the number of agents and amount of resources needed.
Dev Image
Use the dev agent for npm packages that require compilation.