Documentation Index
Fetch the complete documentation index at: https://checklyhq.com/docs/llms.txt
Use this file to discover all available pages before exploring further.


What are Multistep Checks?
Multistep checks are API-focused tests that perform multiple sequential HTTP requests within a single check. They’re designed to test complete user workflows that span multiple API endpoints, ensuring that complex business processes work correctly from start to finish. Multistep checks are perfect for:- User authentication and authorization flows
- E-commerce checkout and payment processes
- Data processing and workflow pipelines
- Multi-step form submissions
- Complex business transaction testing
- API dependency chain validation
How Multistep Checks Work
Multistep checks execute a series of API requests in sequence, with the ability to pass data between steps:- Step Execution - Runs each API request in defined order
- Data Flow - Passes response data from one step to the next
- State Validation - Verifies system state at each step
- Error Handling - Manages failures and rollback scenarios
- Performance Tracking - Measures timing across the entire workflow
- Result Aggregation - Combines results from all steps
Key Capabilities
Sequential API Request Execution
Sequential API Request Execution
Execute multiple API calls in a predefined order, ensuring each step completes successfully before proceeding to the next.
Data Passing Between Requests
Data Passing Between Requests
Extract data from API responses and use it in subsequent requests, enabling realistic workflow testing with dynamic values.
Complex Authentication Flows
Complex Authentication Flows
Handle multi-step authentication processes like OAuth flows, token refresh sequences, and session-based authentication chains.
Workflow State Validation
Workflow State Validation
Verify that each step in your business process maintains proper state and data consistency throughout the entire workflow.
Performance Measurement Across Steps
Performance Measurement Across Steps
Monitor response times and performance metrics for individual steps and the complete workflow to identify bottlenecks.
Timeouts
As with Browser checks, Checkly runs Multistep checks for a maximum of 240s. Scripts exceeding this will timeout. For more information on how to work with the timeout limits for Multistep and Browser checks, see Timeouts.Built-in Runtime Variables
The Multistep Check runtime exposes a set of environment variables (e.g.process.env.CHECK_NAME) that indicate what check, check type etc. you are running.
| Variable | Description | Availability |
|---|---|---|
ACCOUNT_ID | The ID of the account the check belongs to. | |
CHECK_ID | The UUID of the check being executed. | Only available after saving the check. |
CHECK_NAME | The name of the check being executed. | |
CHECK_RESULT_ID | The UUID where the result will be saved. | Only available on scheduled runs. |
CHECK_RUN_ID | The UUID of the check run execution. | Only available on scheduled runs. |
CHECK_TYPE | The type of the check, e.g. BROWSER. | |
PUBLIC_IP_V4 | The IPv4 of the check run execution. | |
PUBLIC_IP_V6 | The IPv6 of the check run execution. | |
REGION | The current region, e.g. us-west-1. | |
RUNTIME_VERSION | The version of the runtime, e.g, 2023.09. | Only in Browser, Multistep, and API setup/teardown scripts. |
Multistep Check Results
Multistep check results are navigated using the tree on the left side of the screen. If you are running checks in parallel, first select the location you are interested in.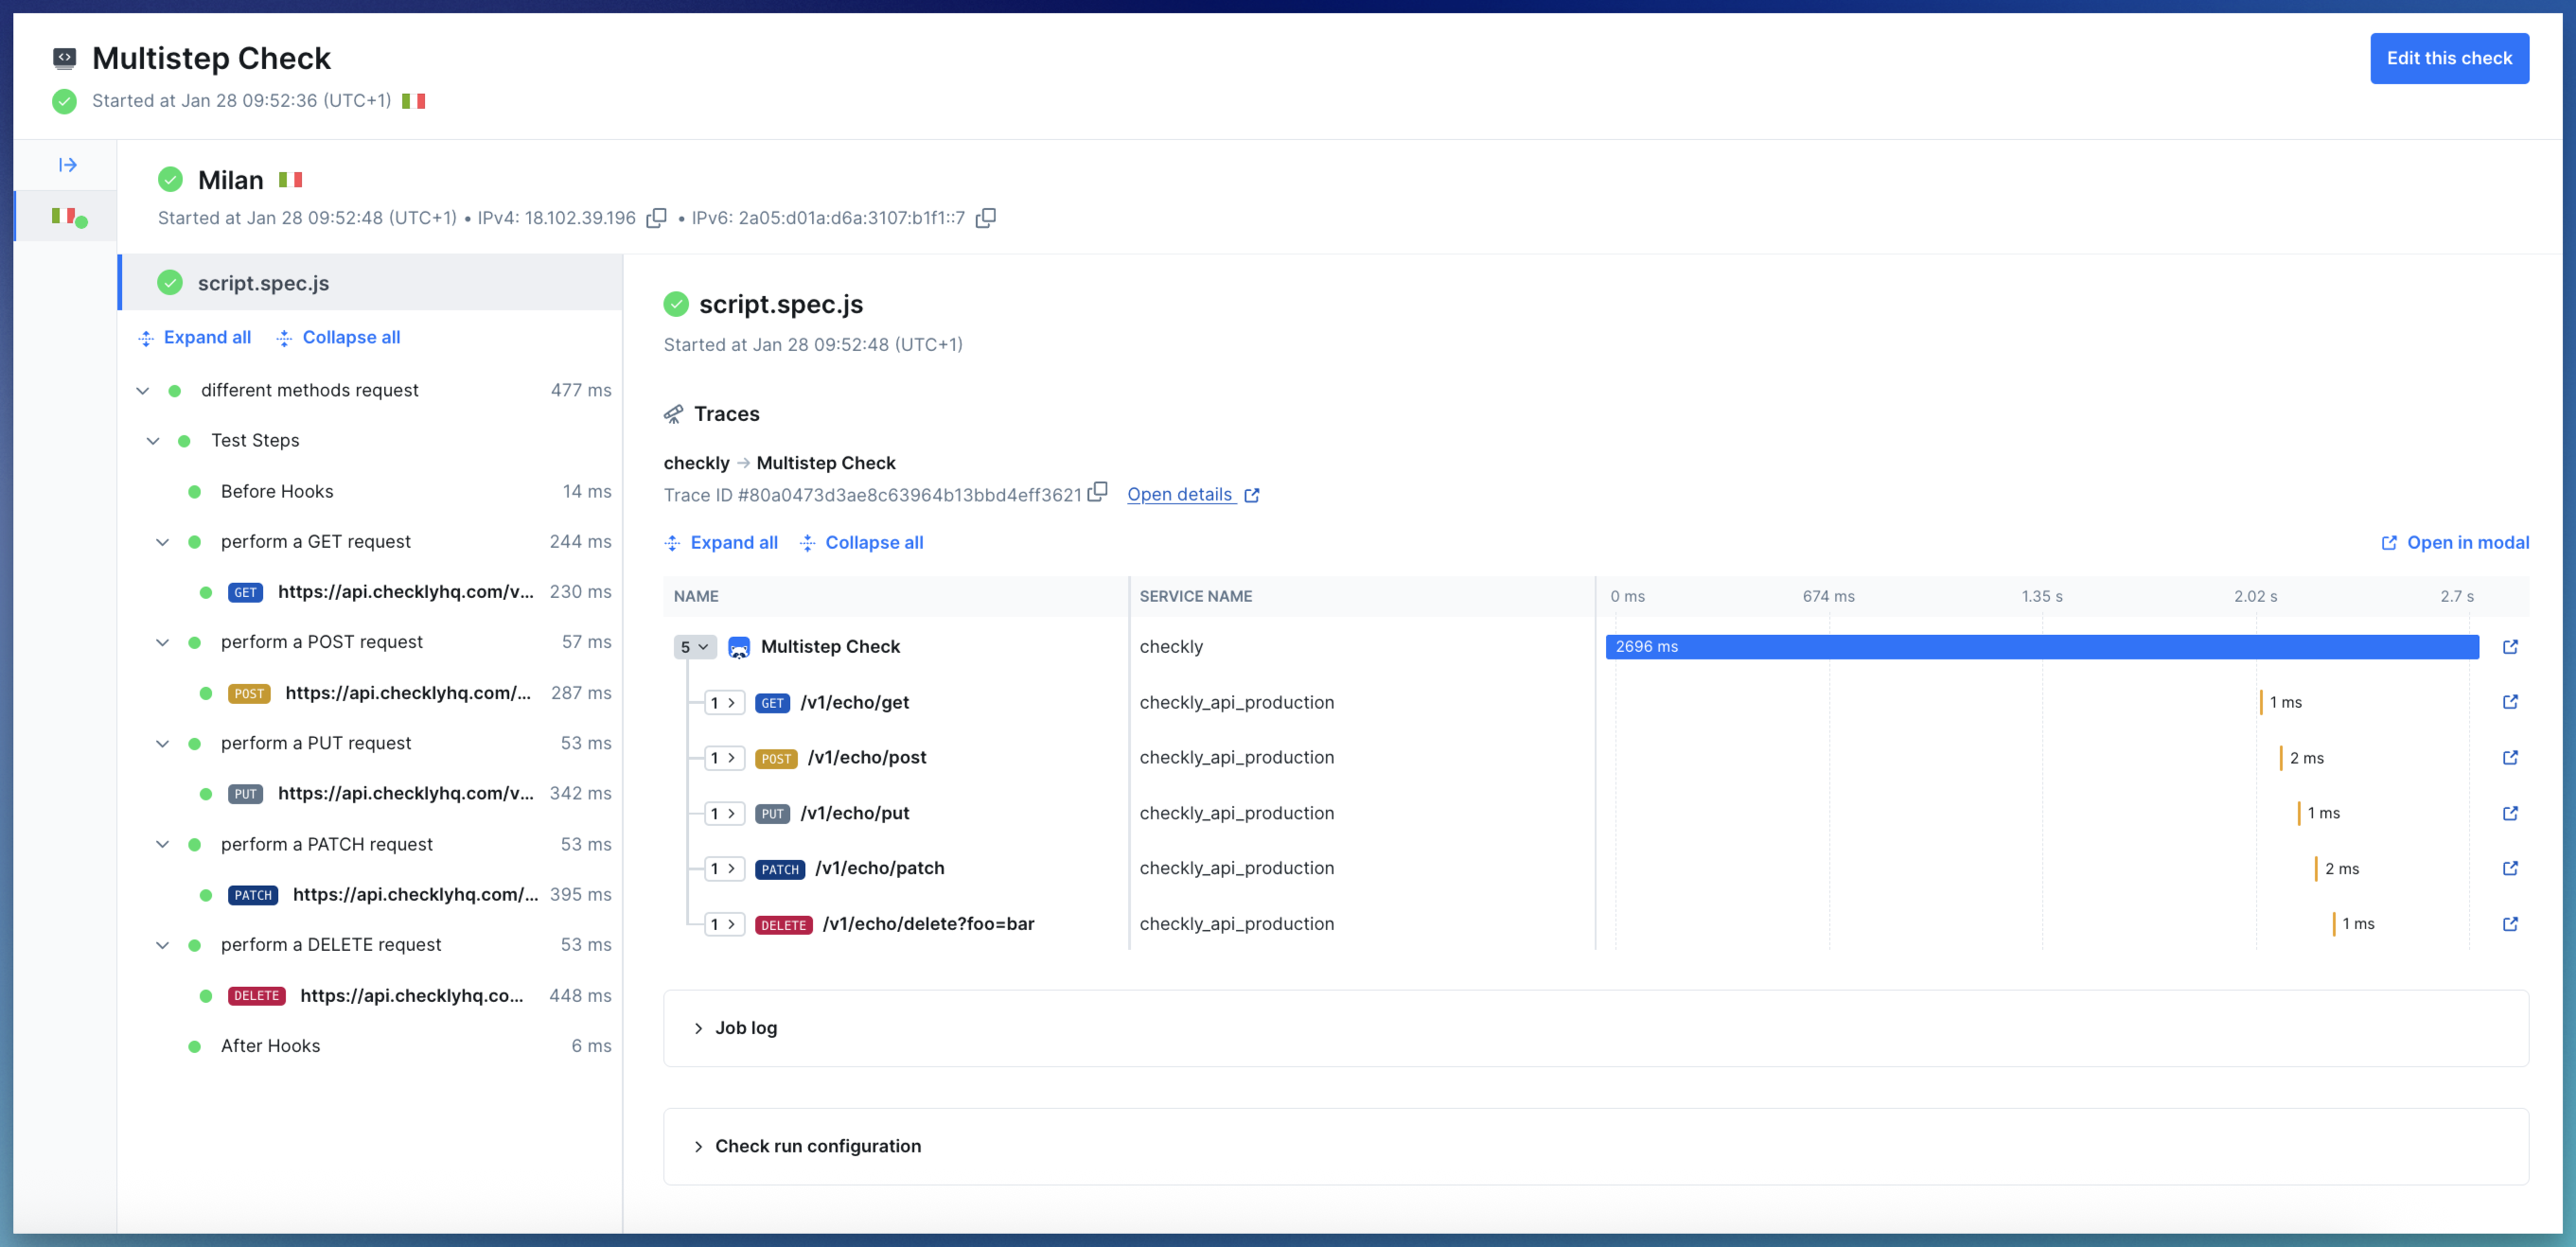
- The request and response body
- Headers and any request parameters
- A breakdown of the request timings
- If you’ve made assertions in the same test step as this request, then those assertions will be shown here
Checkly/1.0 (https://www.checklyhq.com). If you would like to use a different user-agent, you can add test.use({userAgent: 'customUserAgent'}) to your script.
Currently, only requests done using the Playwright request are shown as nodes in the tree, requests done via e.g Axios or HTTPS are not.
Learn more in our documentation on Results.