- Your own Telegram bot and its associated HTTP API Token
- Your own Telegram user’s Chat ID
Telegram Bot
-
Create a Telegram Bot using the @BotFather. Detailed instructions can be found here, however you can simply message the Telegram user
@BotFatherand send them the command message/newbot. Then follow the instructions the bot replies with.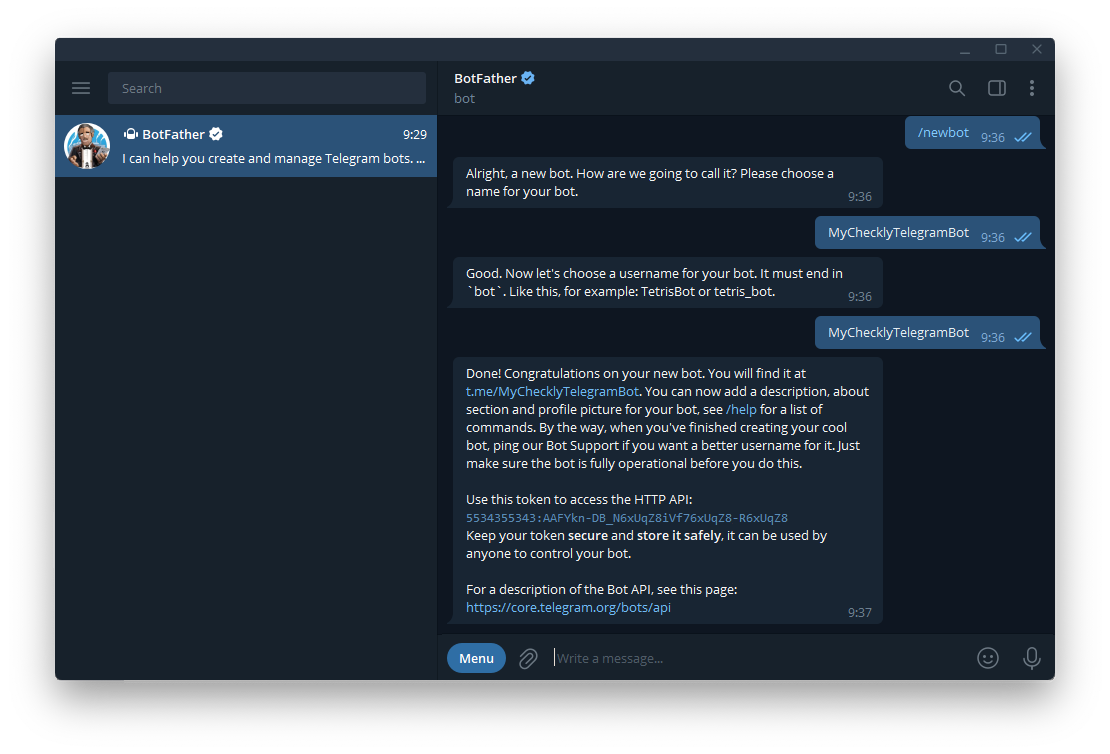
-
As the last step of creating your new bot, the BotFather should reply with a message congratulating you that everything is complete and include a new HTTP API Token for you to use. Alternatively, if you want to reuse an existing Telegram bot you can message the BotFather with the command message
/tokenand they will generate a new token. Make sure to copy this token value out as we’ll be using it in the Checkly setup later. -
Start your new Telegram bot by opening a chat with it. You can use the START button in the UI or type the
/startcommand message.
Chat ID
There are multiple methods for getting your own users Chat ID in Telegram and we’ll cover two of them. First, we can leverage another Telegram bot and they will reply to us with our own ID. Second, we can use the newly created HTTP API Token to query the Telegram API.ID Bot
You can retrieve your own Telegram Chat ID by starting a chat with another bot. This Telegram bot user can be found at@get_id_bot.
- Send this
@get_id_botbot the command message/my_idand they will reply with a 9 digit number which identifies you in Telegram. This is the second and last piece of information we need for the Checkly Telegram integration.
API Query
Alternatively, we can use the API token we generated with the bot earlier and query the Telegram API for our own Chat ID.-
In a browser enter the following URL,
https://api.telegram.org/bot<API_TOKEN>/getUpdates, of course replacing the<API_TOKEN>part with the actual token we obtained previously. Your browser should now display some JSON formatted data which looks like the following: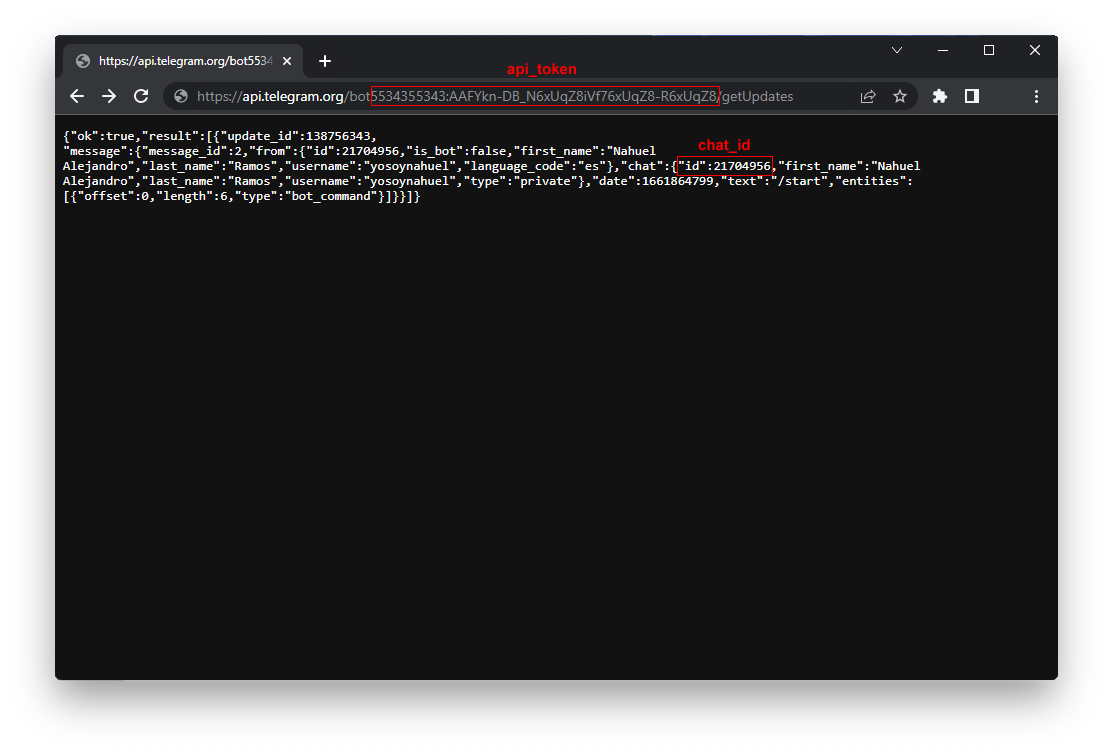
resultarray, you will see the message you sent to your Bot previously to start it, including theidof the user who sent it - your own. This should be a 9-digit number. This is the second and last piece of information we need for the Checkly Telegram integration.
Checkly Integration
With the (1) HTTP API Token and (2) Chat ID in hand, we can go back to Checkly and create a new Telegram alert channel.-
Log in to Checkly and navigate to Alert Settings.
Click the “Add more channels” button, find Telegram on the list, and click “Add channel”.

-
Give the alert channel a name and paste the API Token and Chat ID in the dedicated input fields. Here you can also tweak
which alerts you want to be notified of and which checks or check groups should trigger this channel.
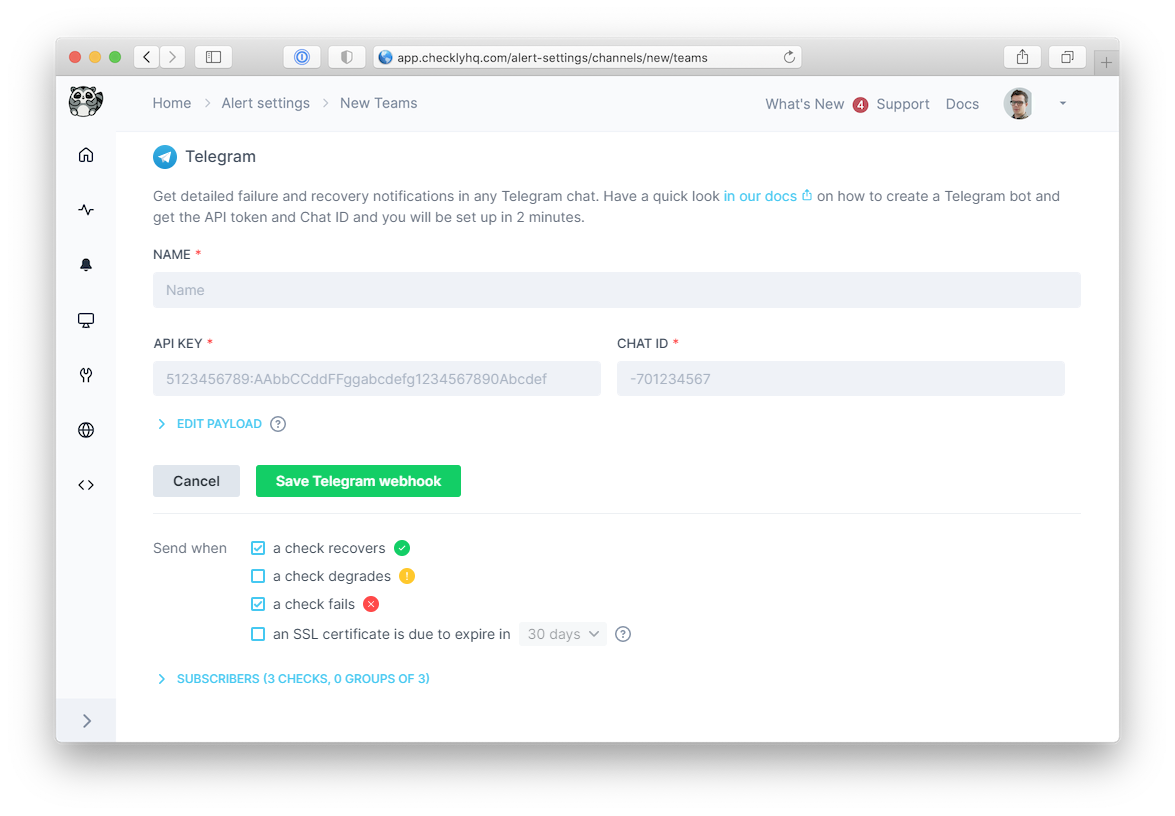 Note that we provide a preconfigured message payload, but you may want to edit the payload to modify the Telegram alert message contents. Such as by adding more variables or changing existing variables. Click the “Edit payload” button and reference the “Help & variables” tab.
Alternatives
Telegram also accepts messages via an HTTPGET request. Therefore, you can use the API Token and Chat ID to create a custom Telegram alert channel by leveraging our webhook alert channel. The webhook should use the GET method and target this URL, https://api.telegram.org/bot<API_TOKEN>/sendMessage?chat_id=<CHAT_ID>&text=Your%20Alert%20Title. More information about sending messages via Telegram bots and the API can be found here.
Telegram Best Practices
Group vs Direct Messages
- Direct Messages: Use your personal chat ID for personal notifications
- Group Chats: Add the bot to group chats and use the group’s Chat ID for team notifications
- Channels: Bots can post to channels if added as administrators
Message Formatting
Telegram supports basic formatting in messages:Security Considerations
- Bot Token Security: Keep your bot tokens secure and never share them publicly
- Chat ID Privacy: Chat IDs can be sensitive information, especially for private groups
- Bot Permissions: Only give your bot the minimum necessary permissions in group chats